
5. Project management with Git, GitHub, and RStudio Cloud
Source:vignettes/recipe_5.Rmd
recipe_5.RmdOverview
In this Recipe, we will be turning out attention to getting familiar with the software resources that are used to share and collaborate on research projects. We will be using Git and GitHub to manage, store, and publish our projects.1
Getting setup with Git and Github
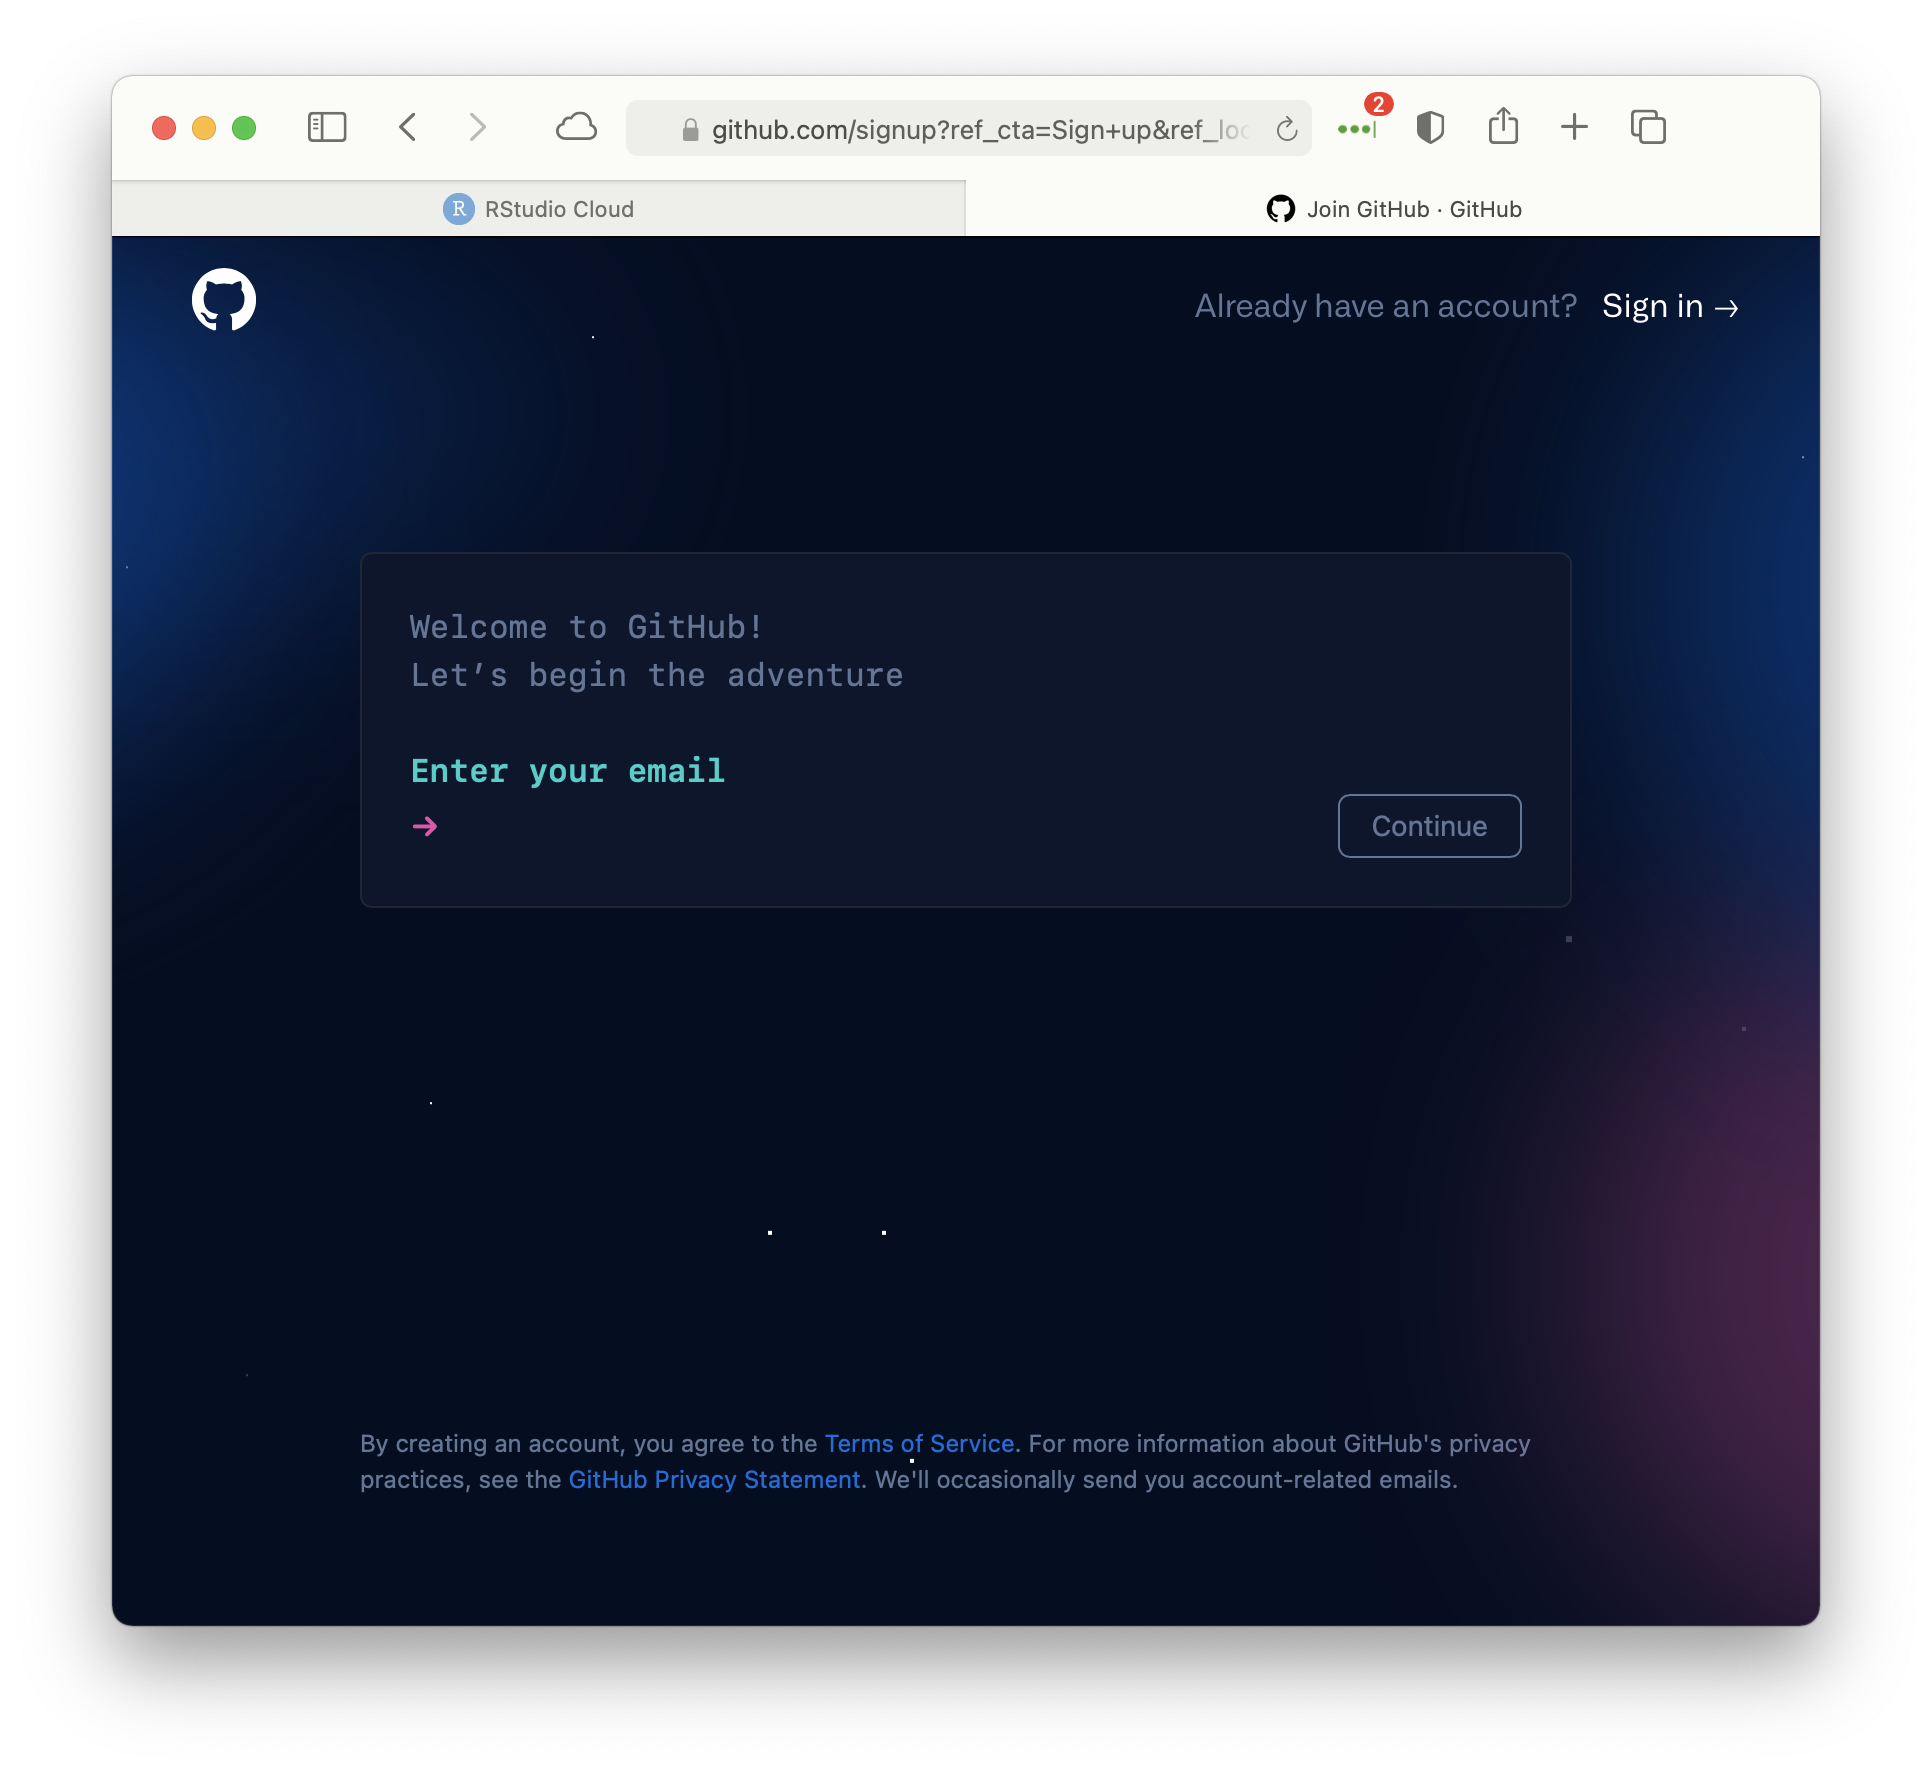
Creating a GitHub account
GitHub signup. Note that there are some consideration you may want to take into account when setting up your GitHub account. Note, that you will want to use your university email if you would like to later take advantage of the Student Education Benefits.
Once you have created an account, you will be presented the following page.
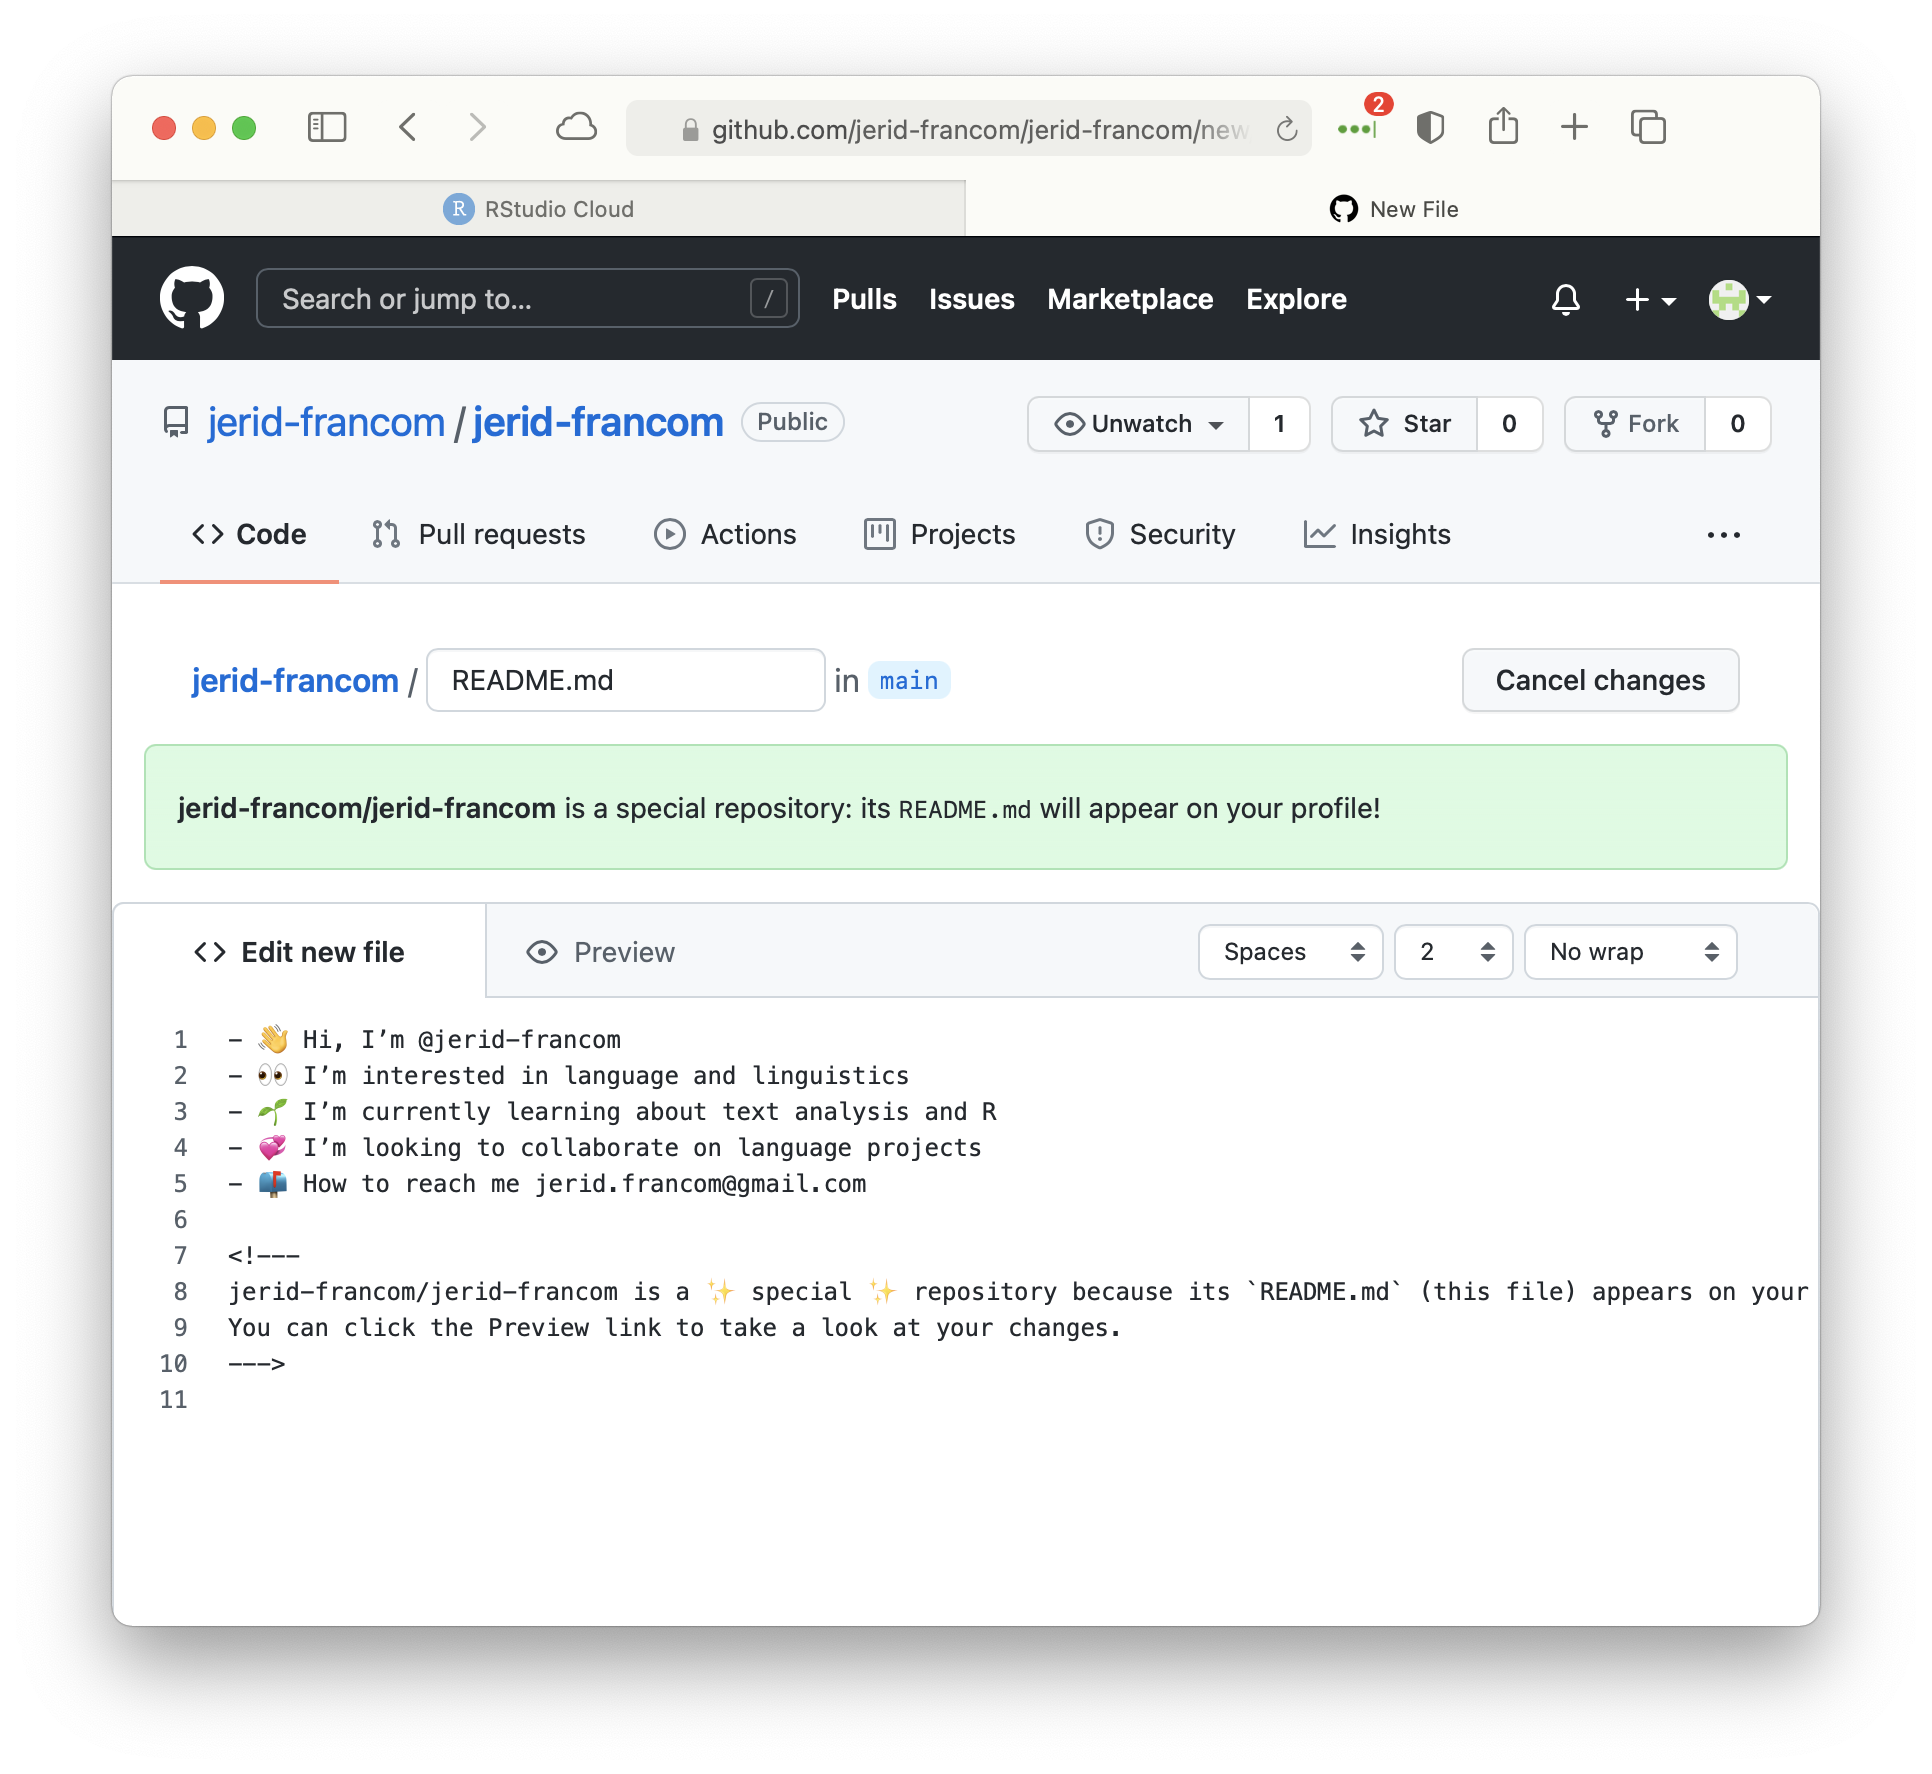
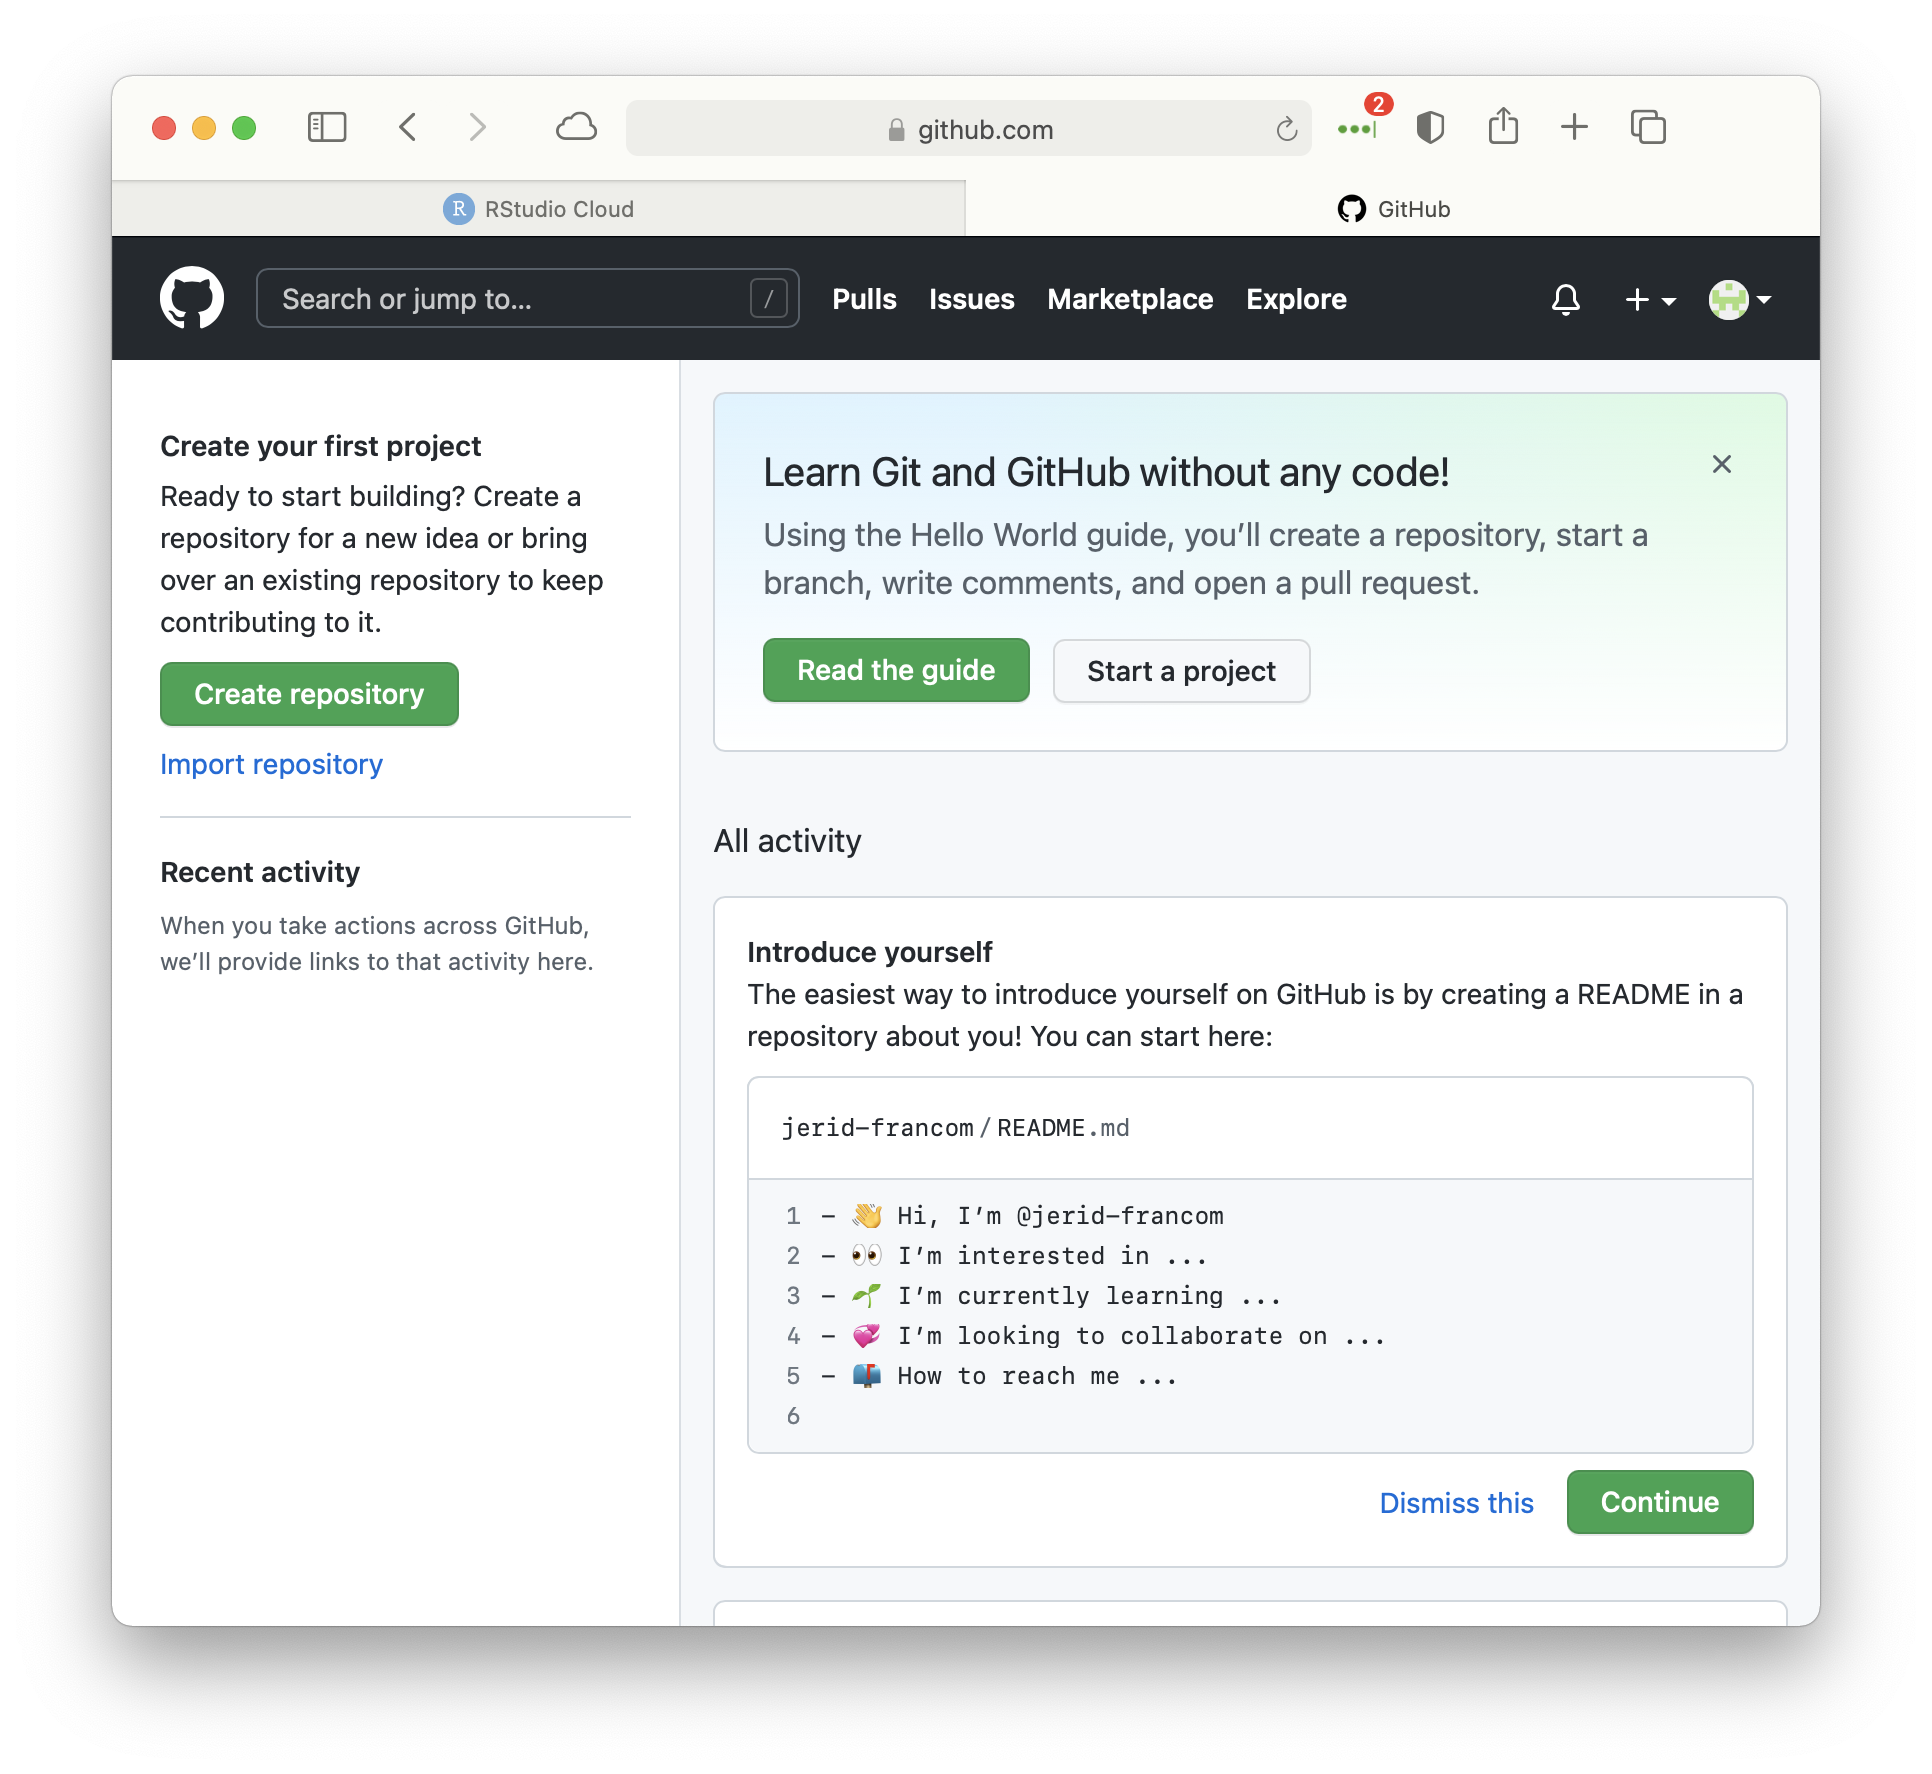 Click the ‘Continue’ button to modify your repositories main
 README.md file.
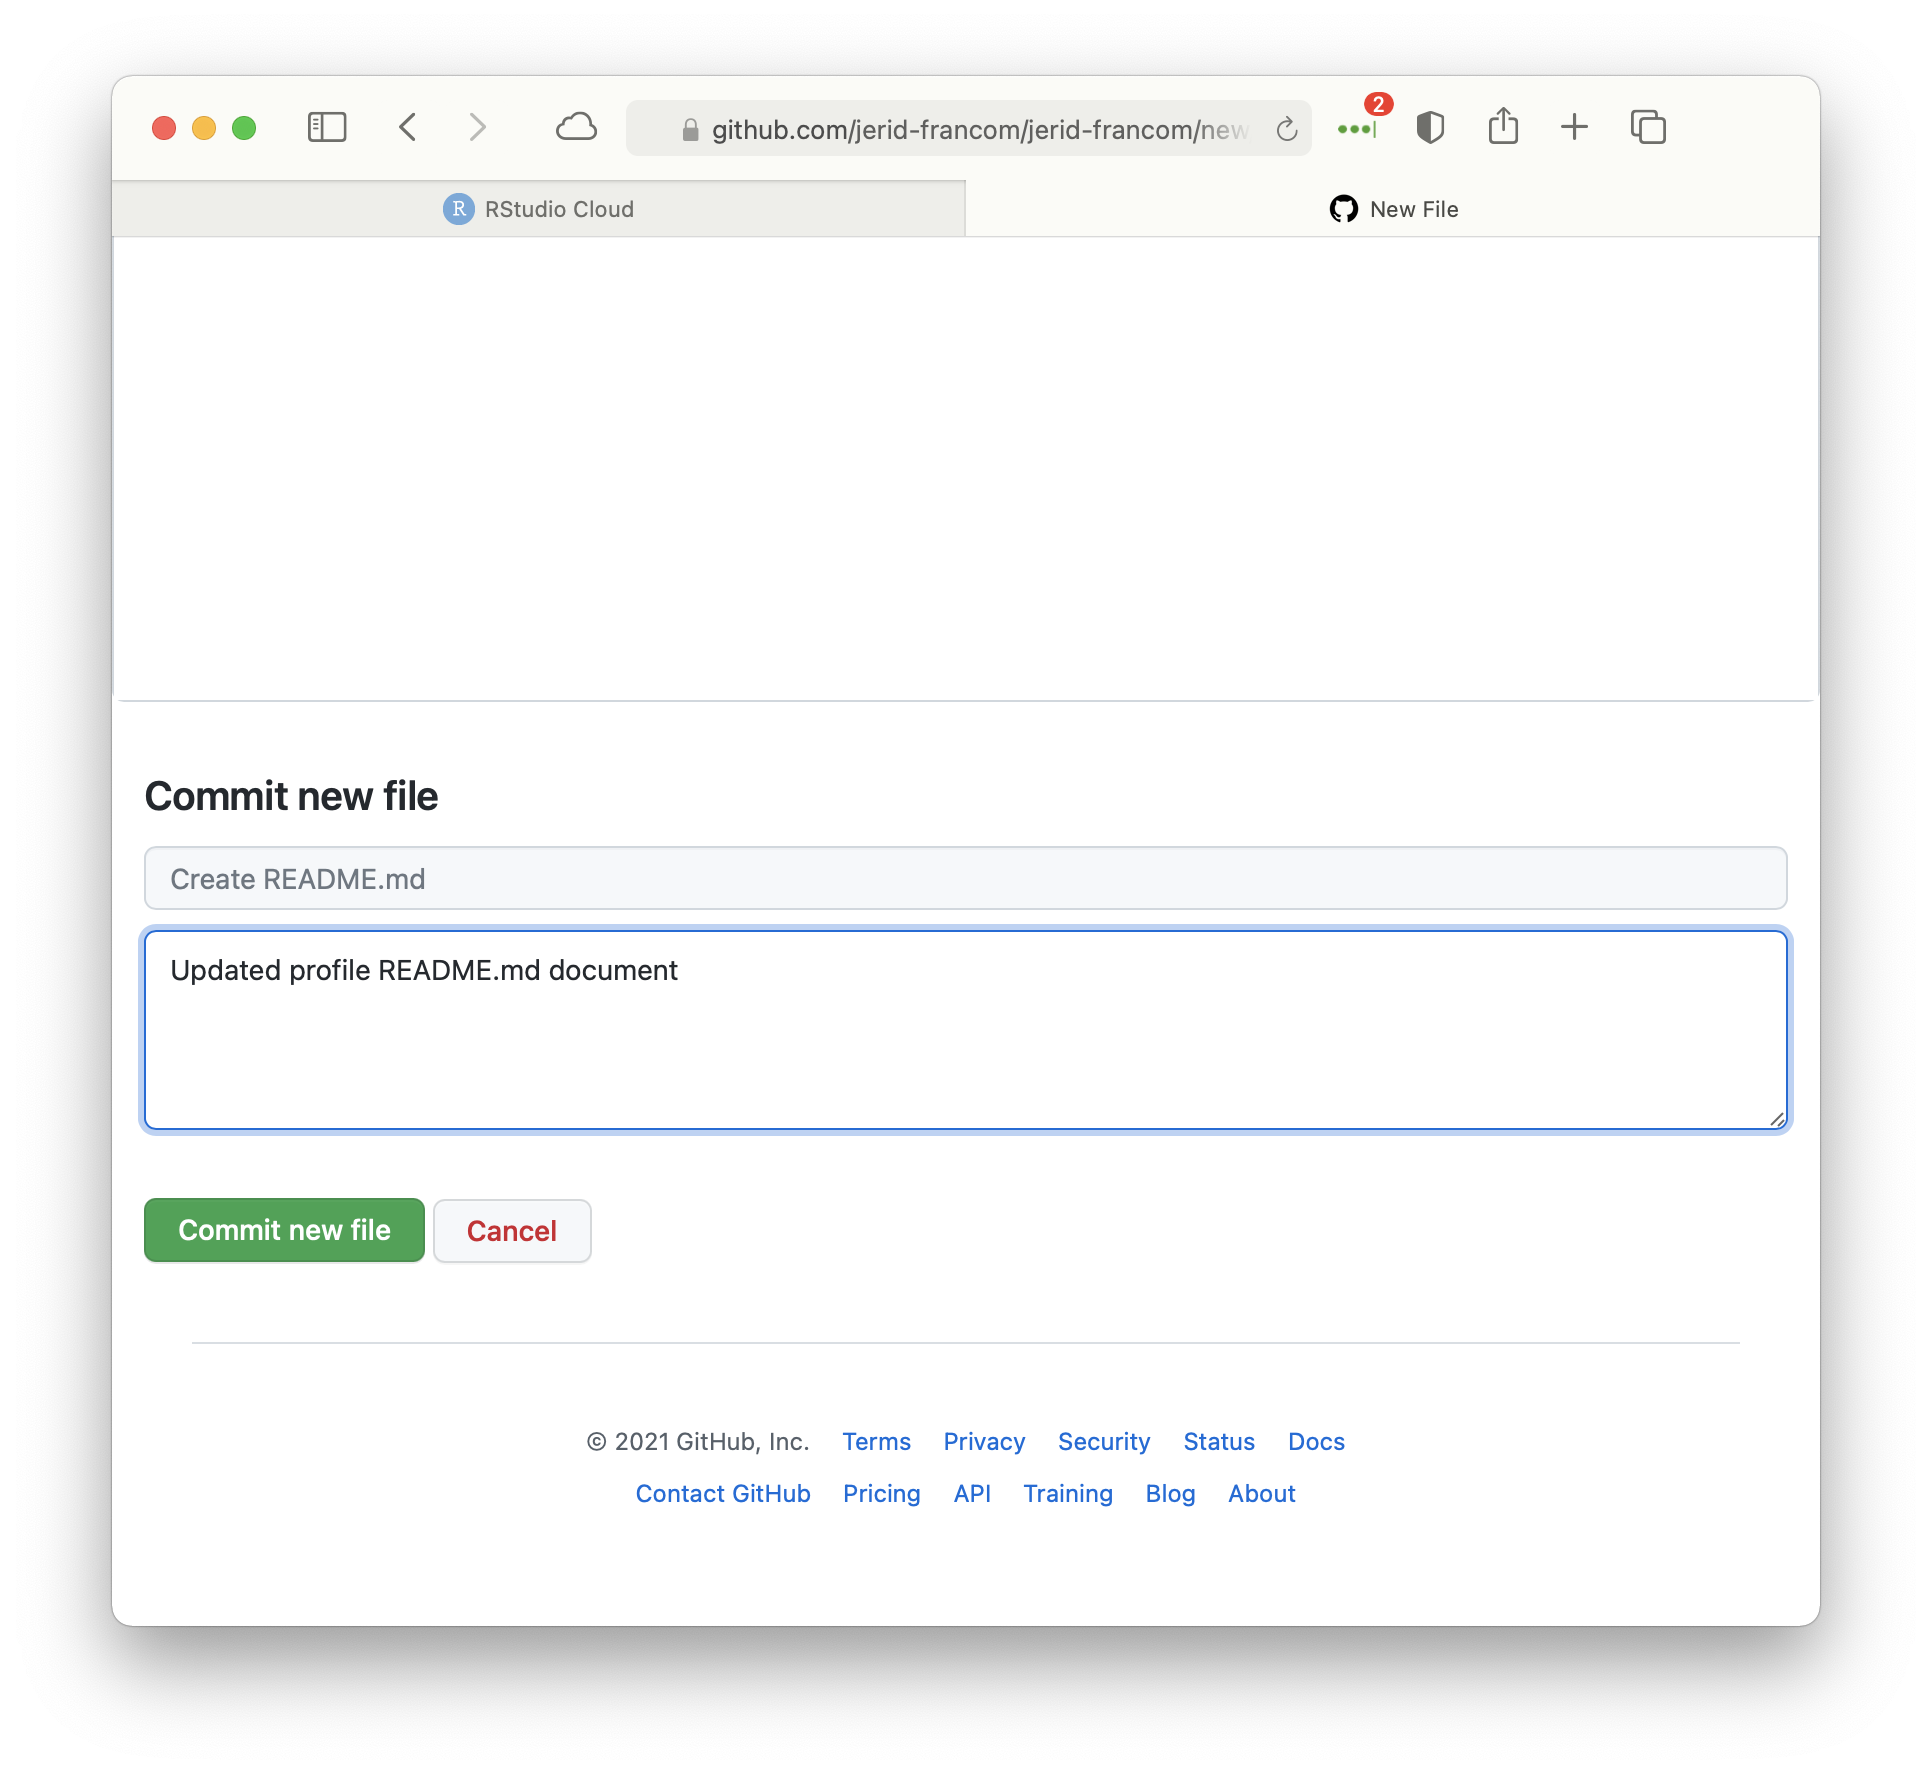
After editing the README.md file, skip to the bottom of the page where you can add a comment and then click ‘Commit new file’.
Create a new repository
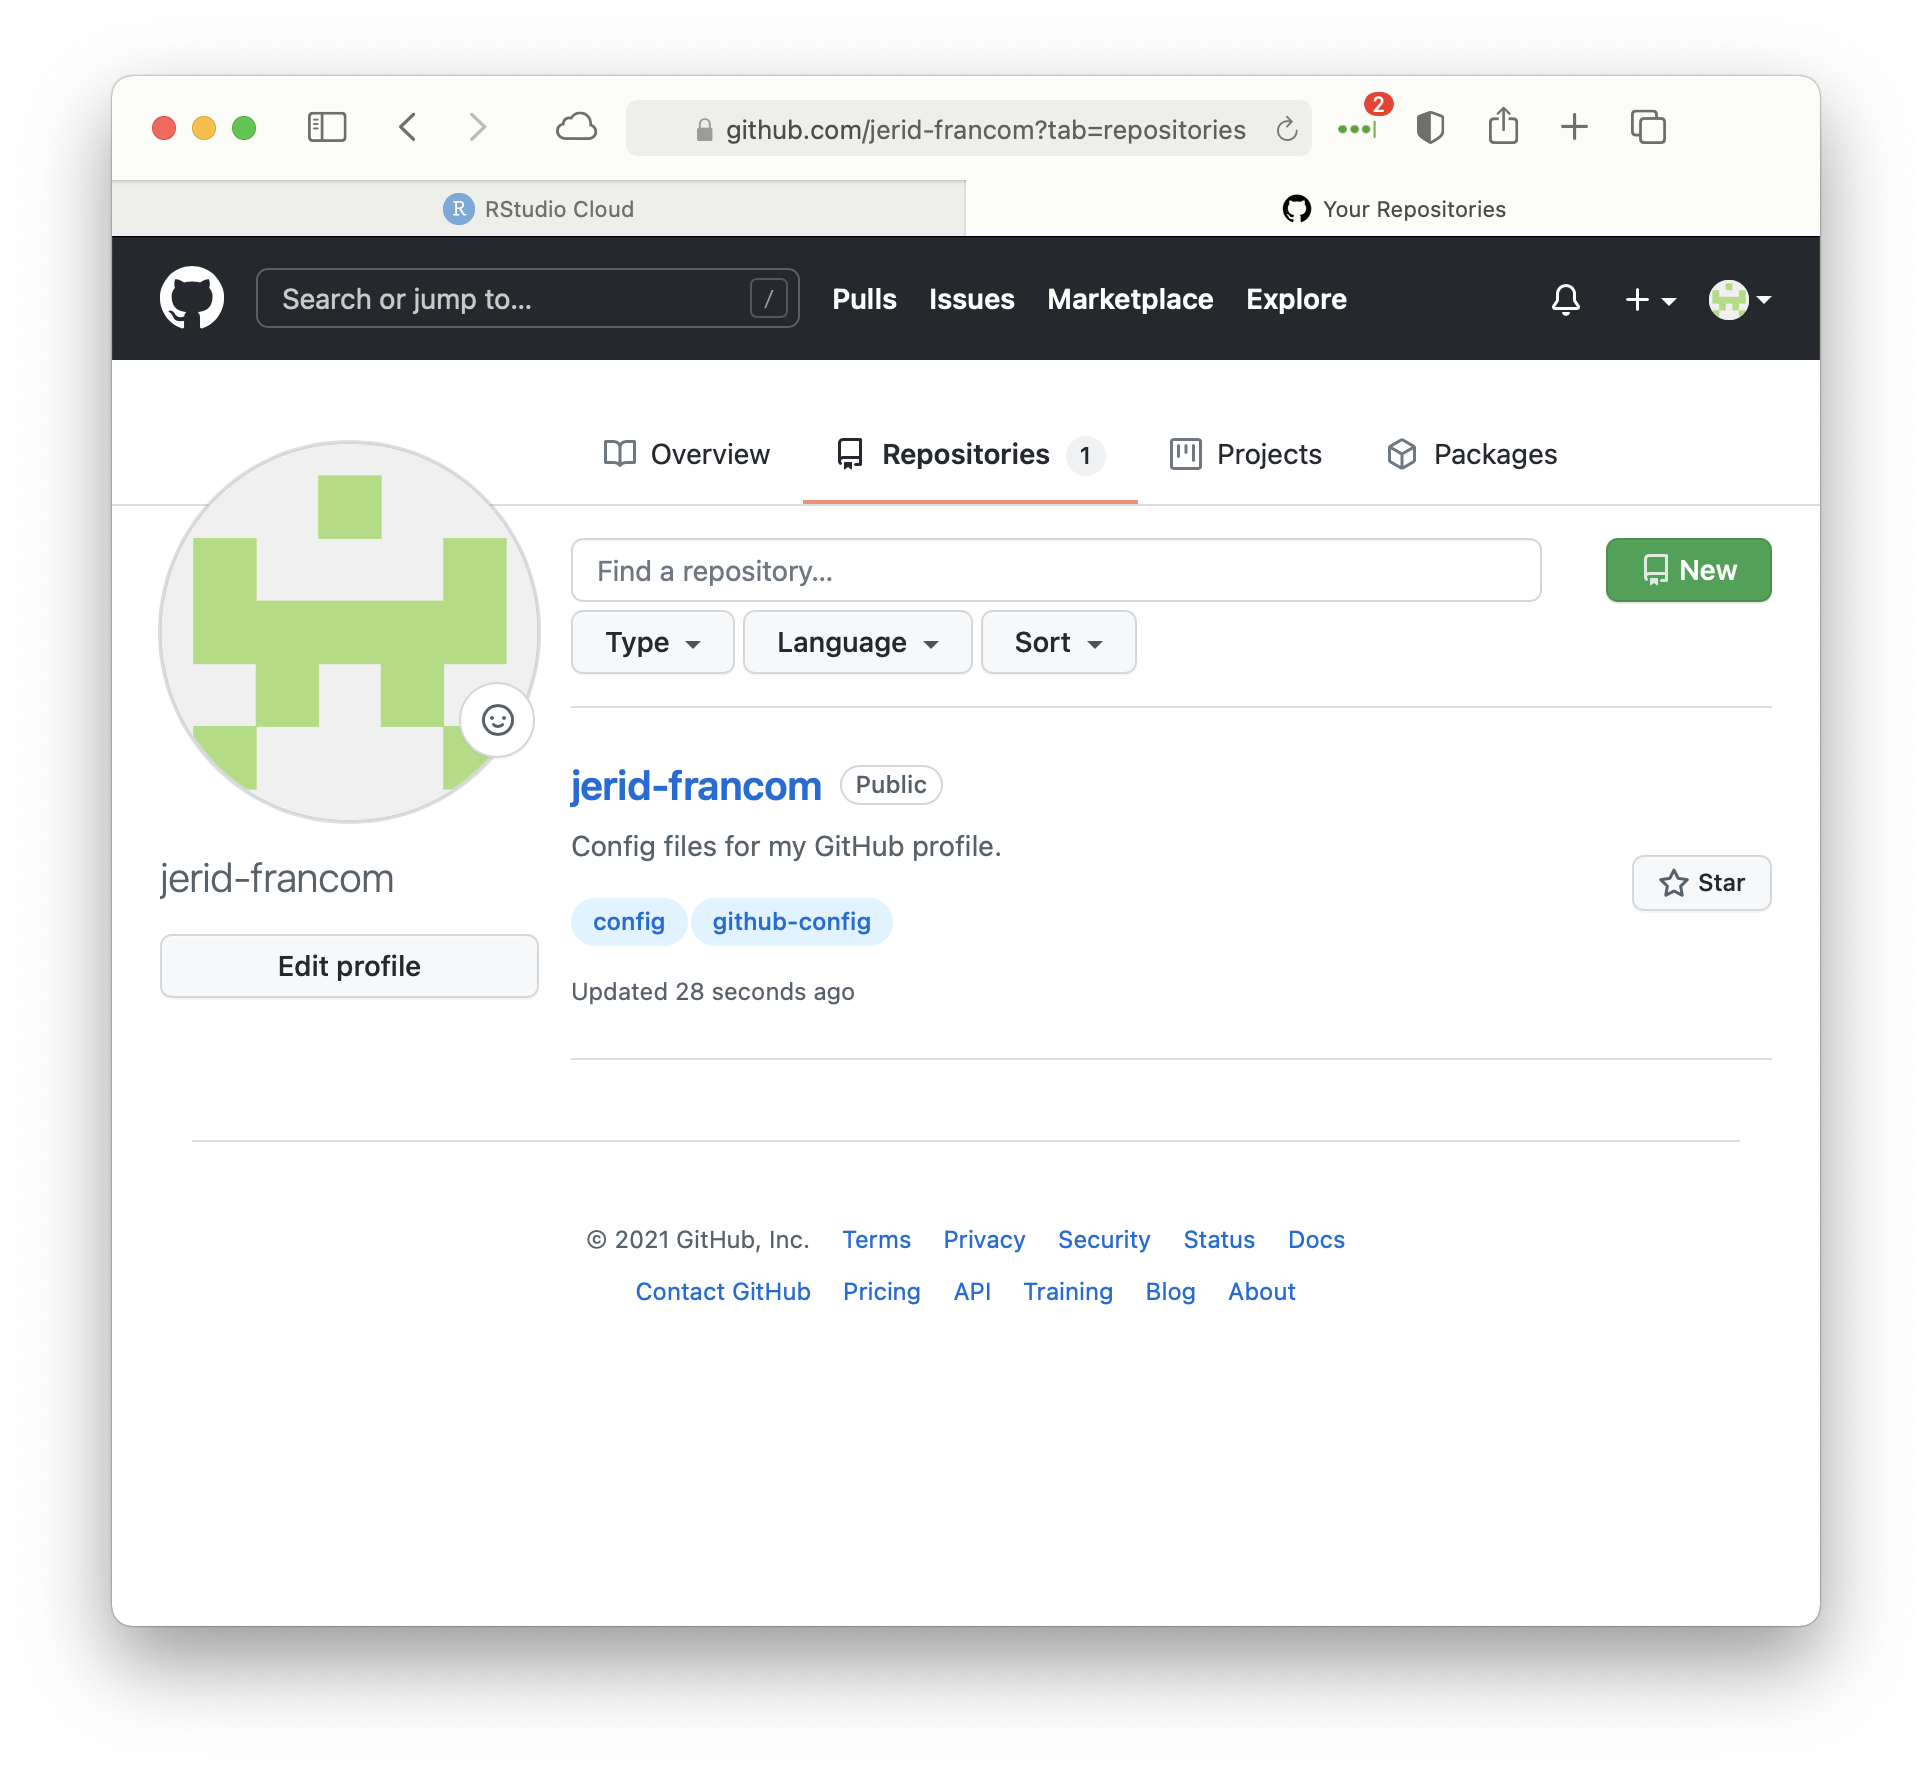
Then navigate to your repository listings. Click ‘New’ to start the process of creating a new repository.
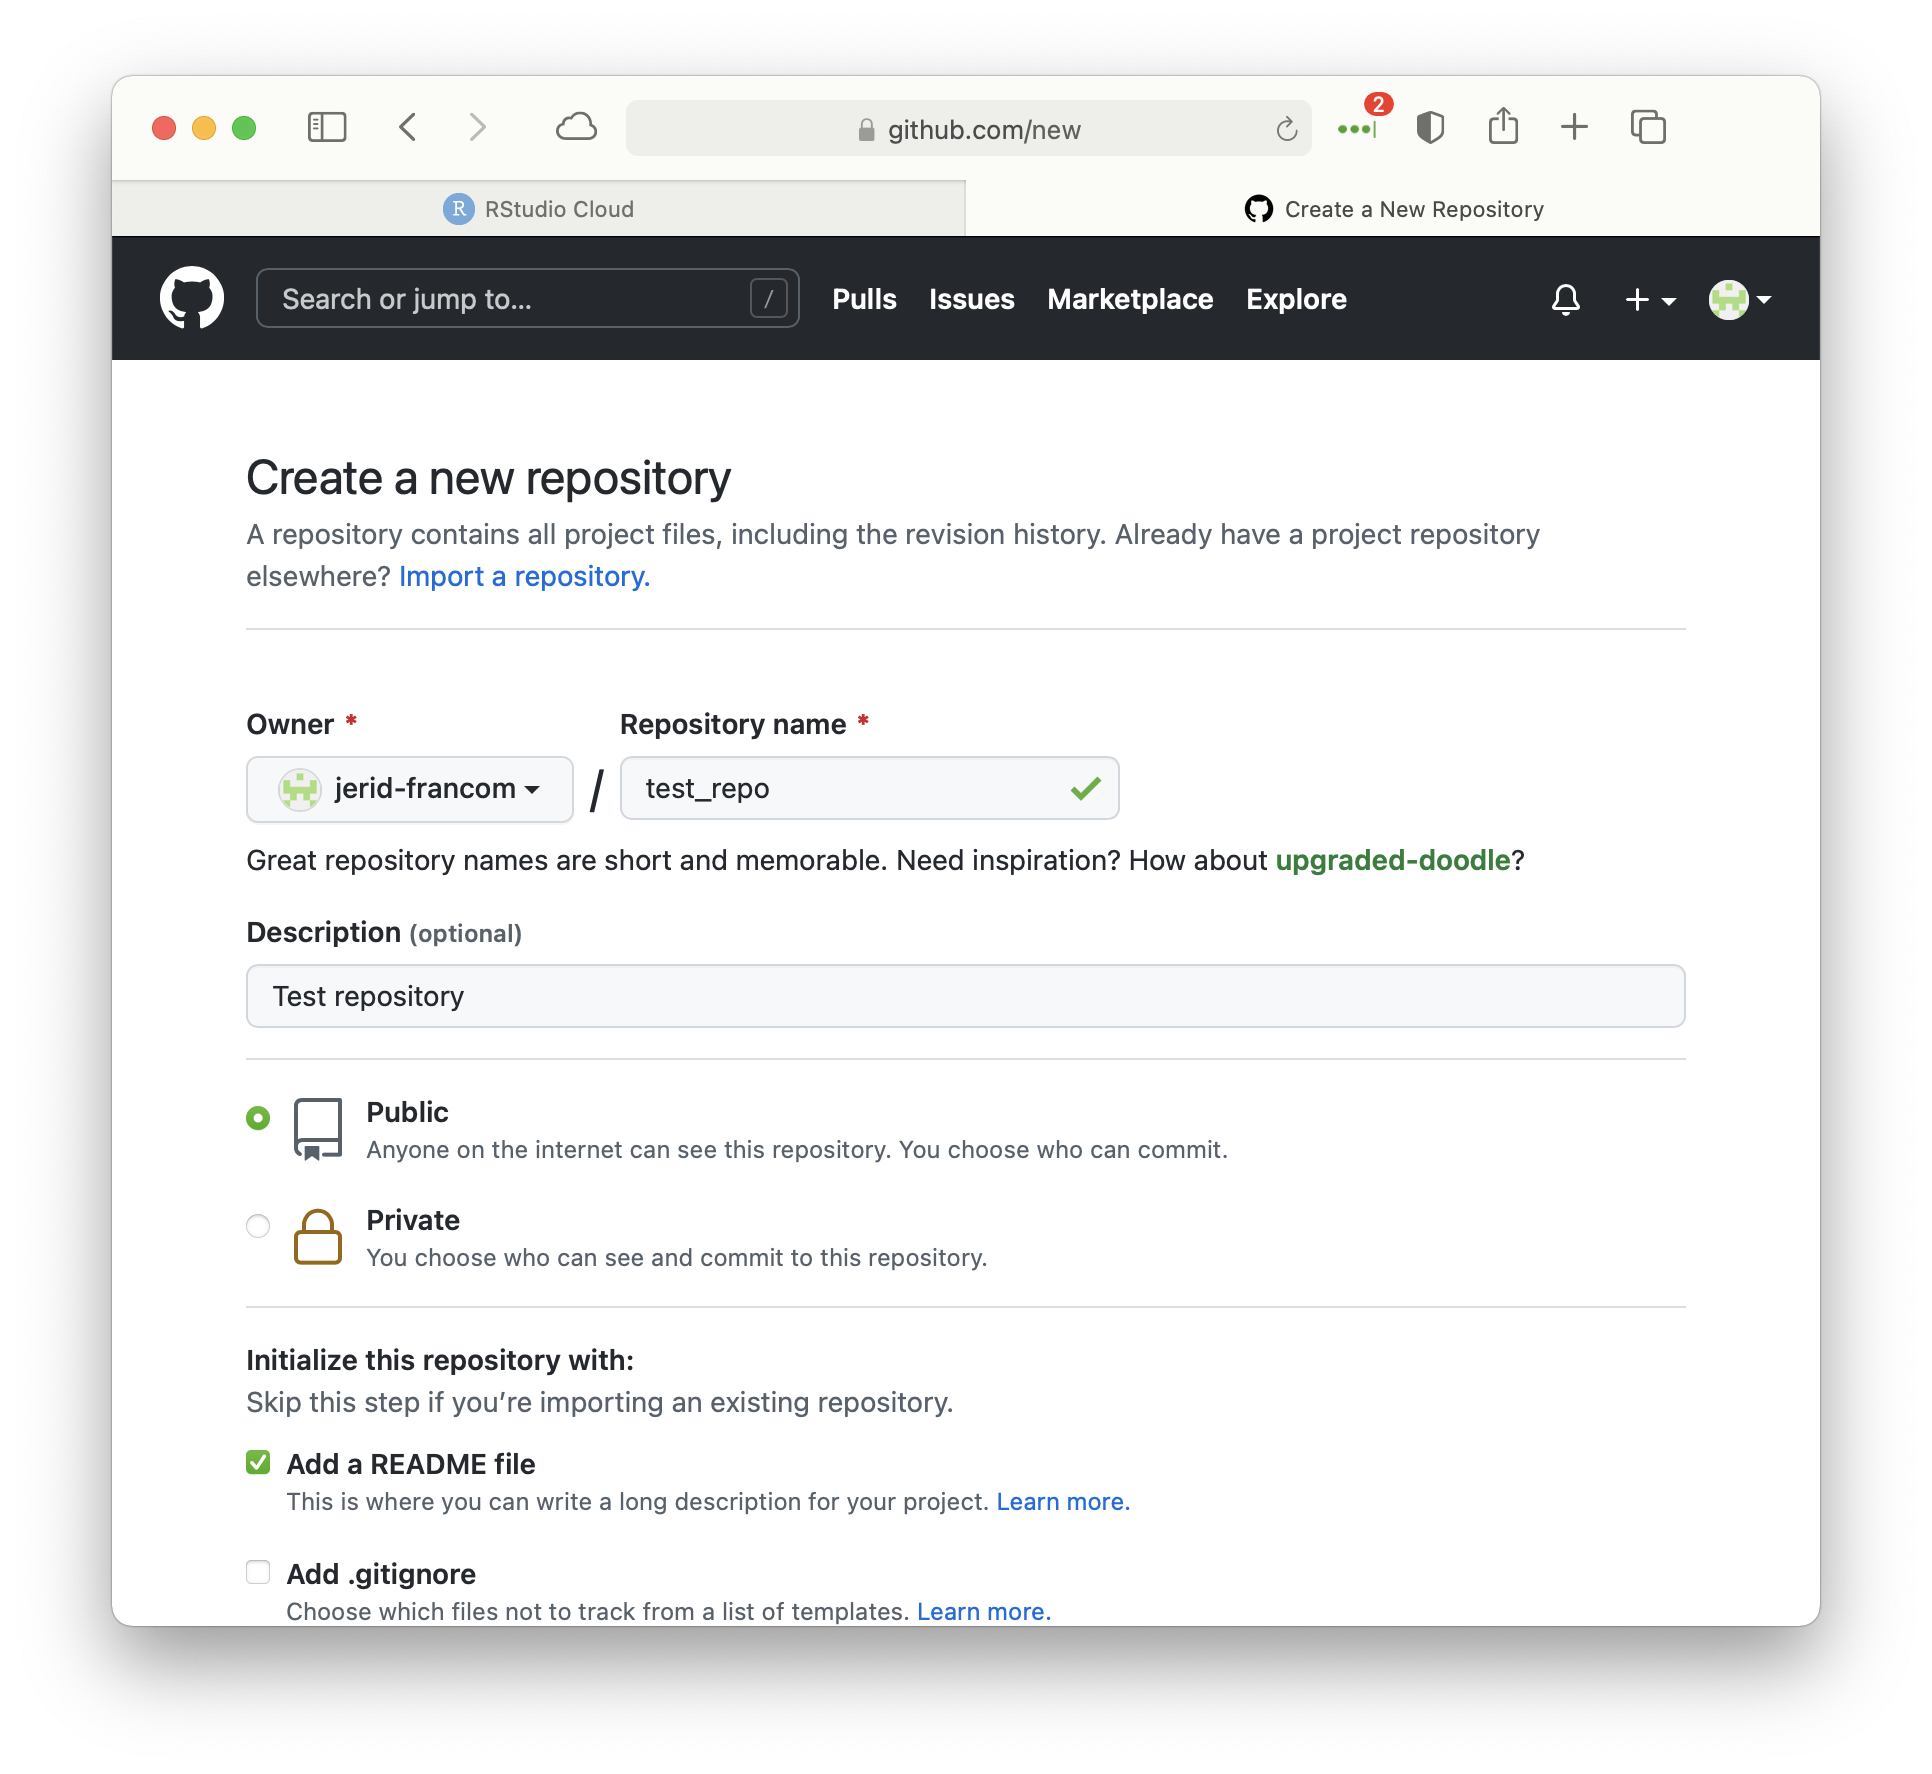
Give the new repository the name test_repo, provide a short description, make sure the repository is ‘Public’, and check ‘Add a README file’.
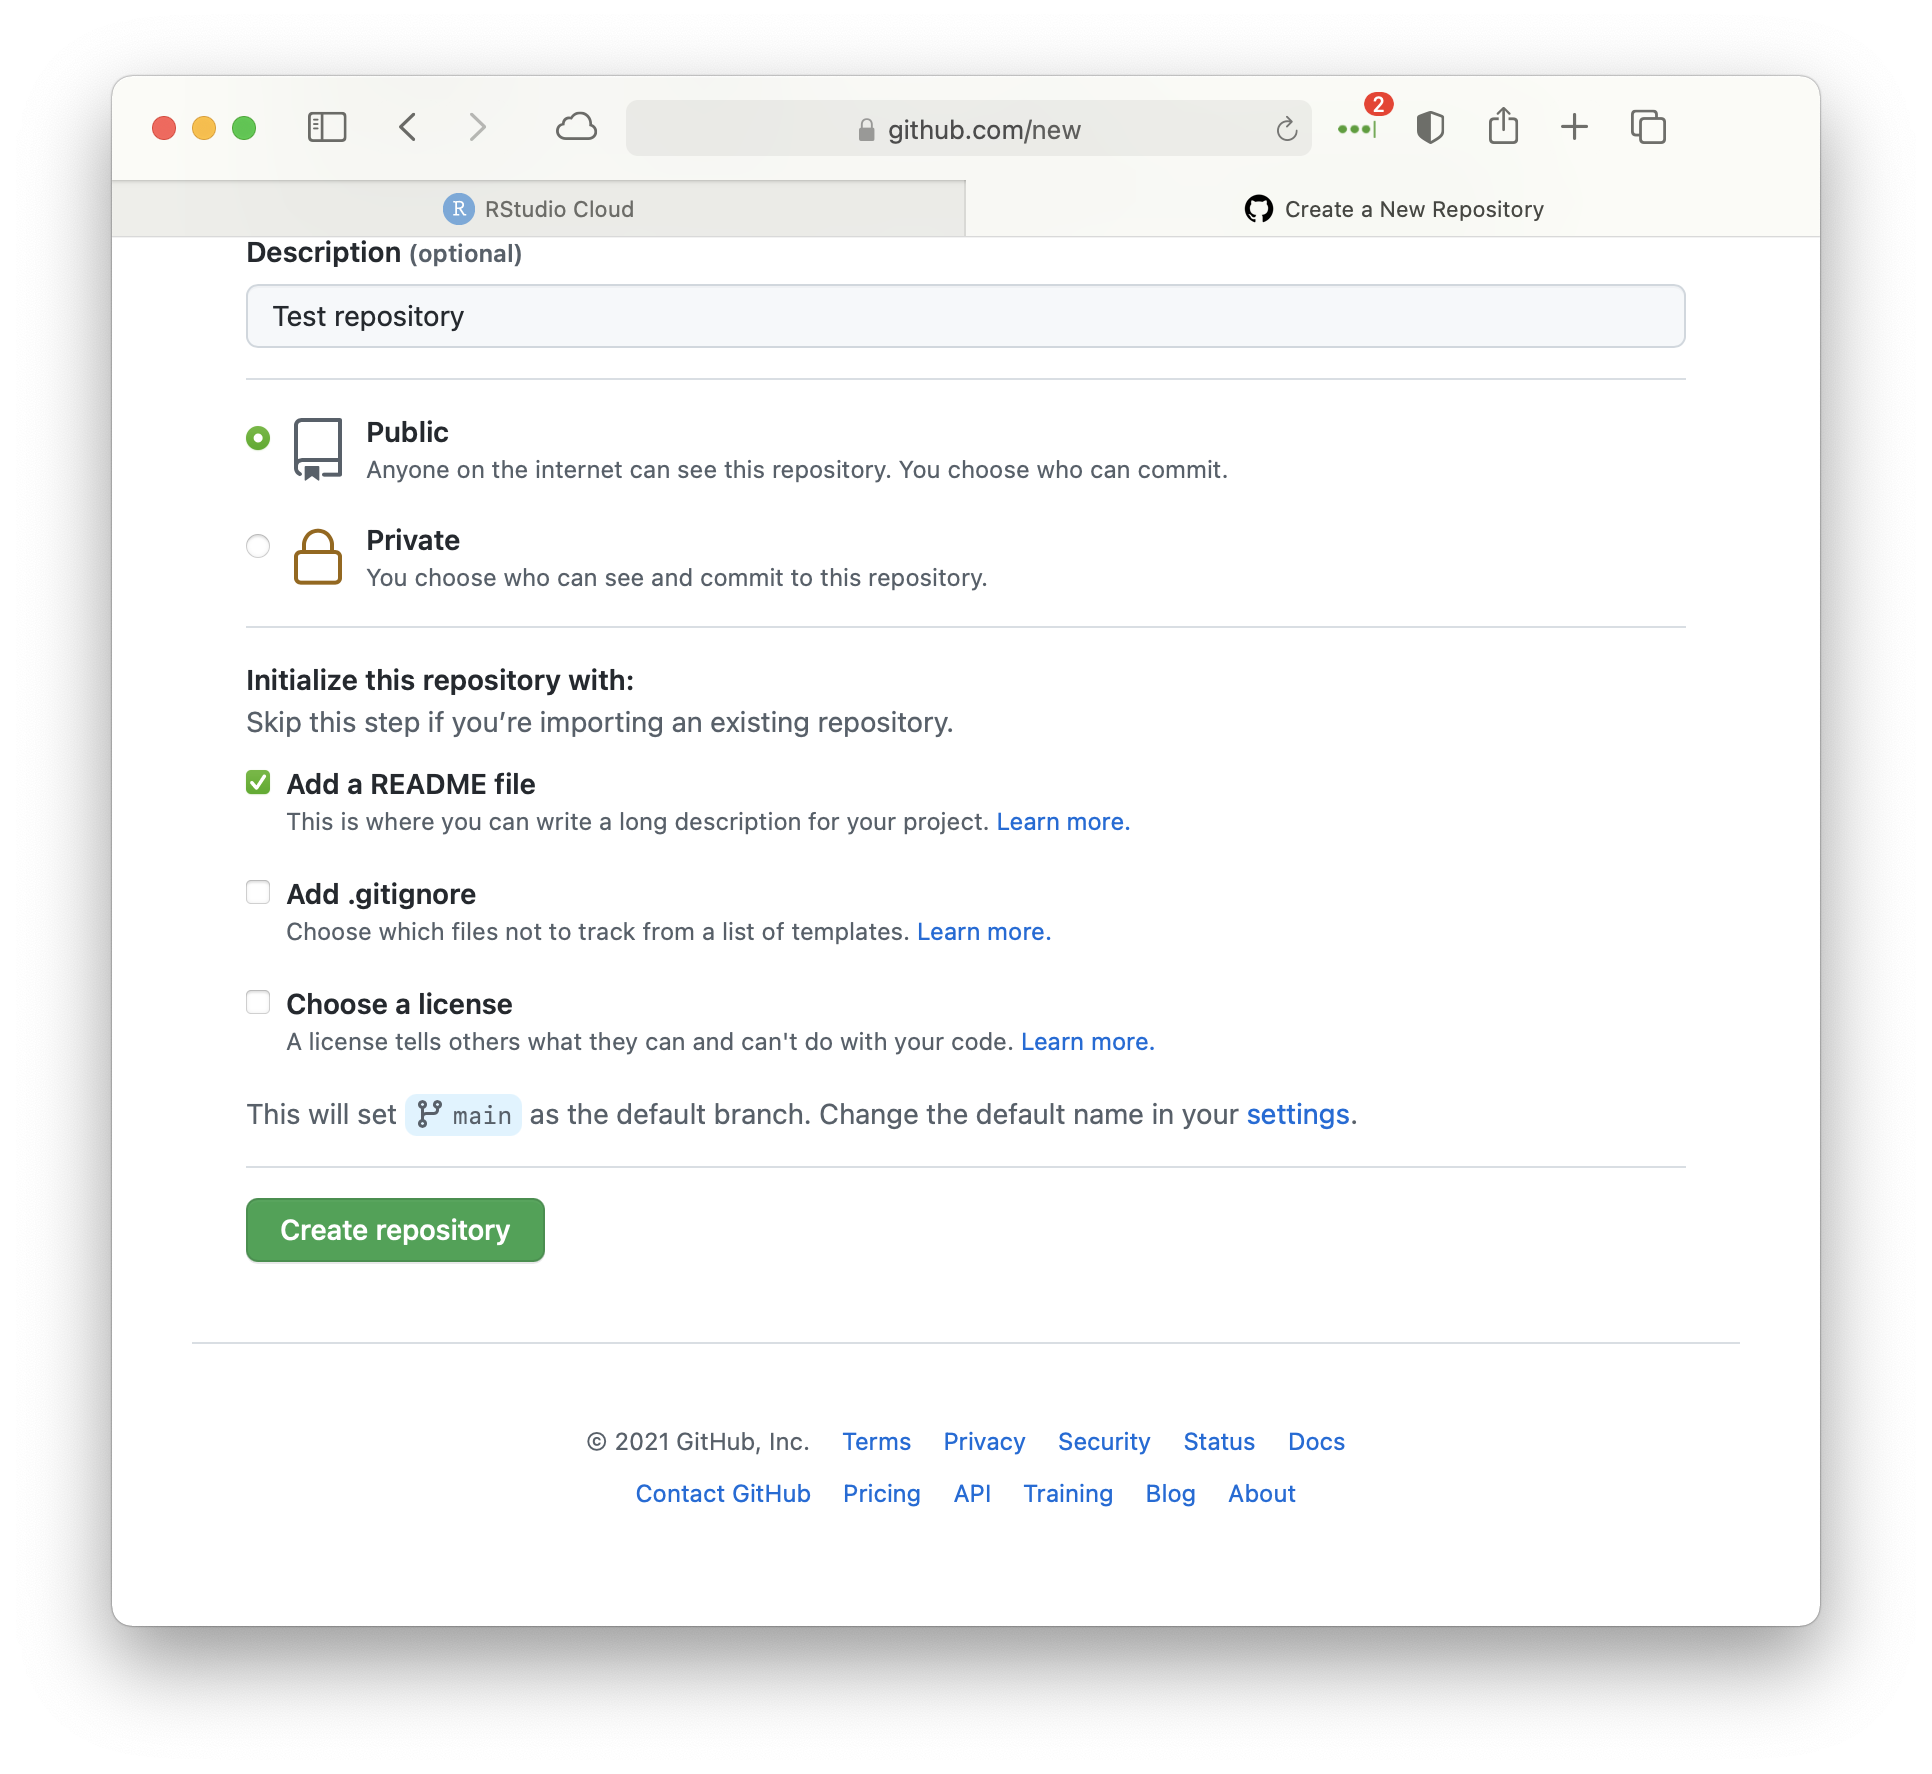
 Then skip to the bottom of this page and click ‘Create repository’.
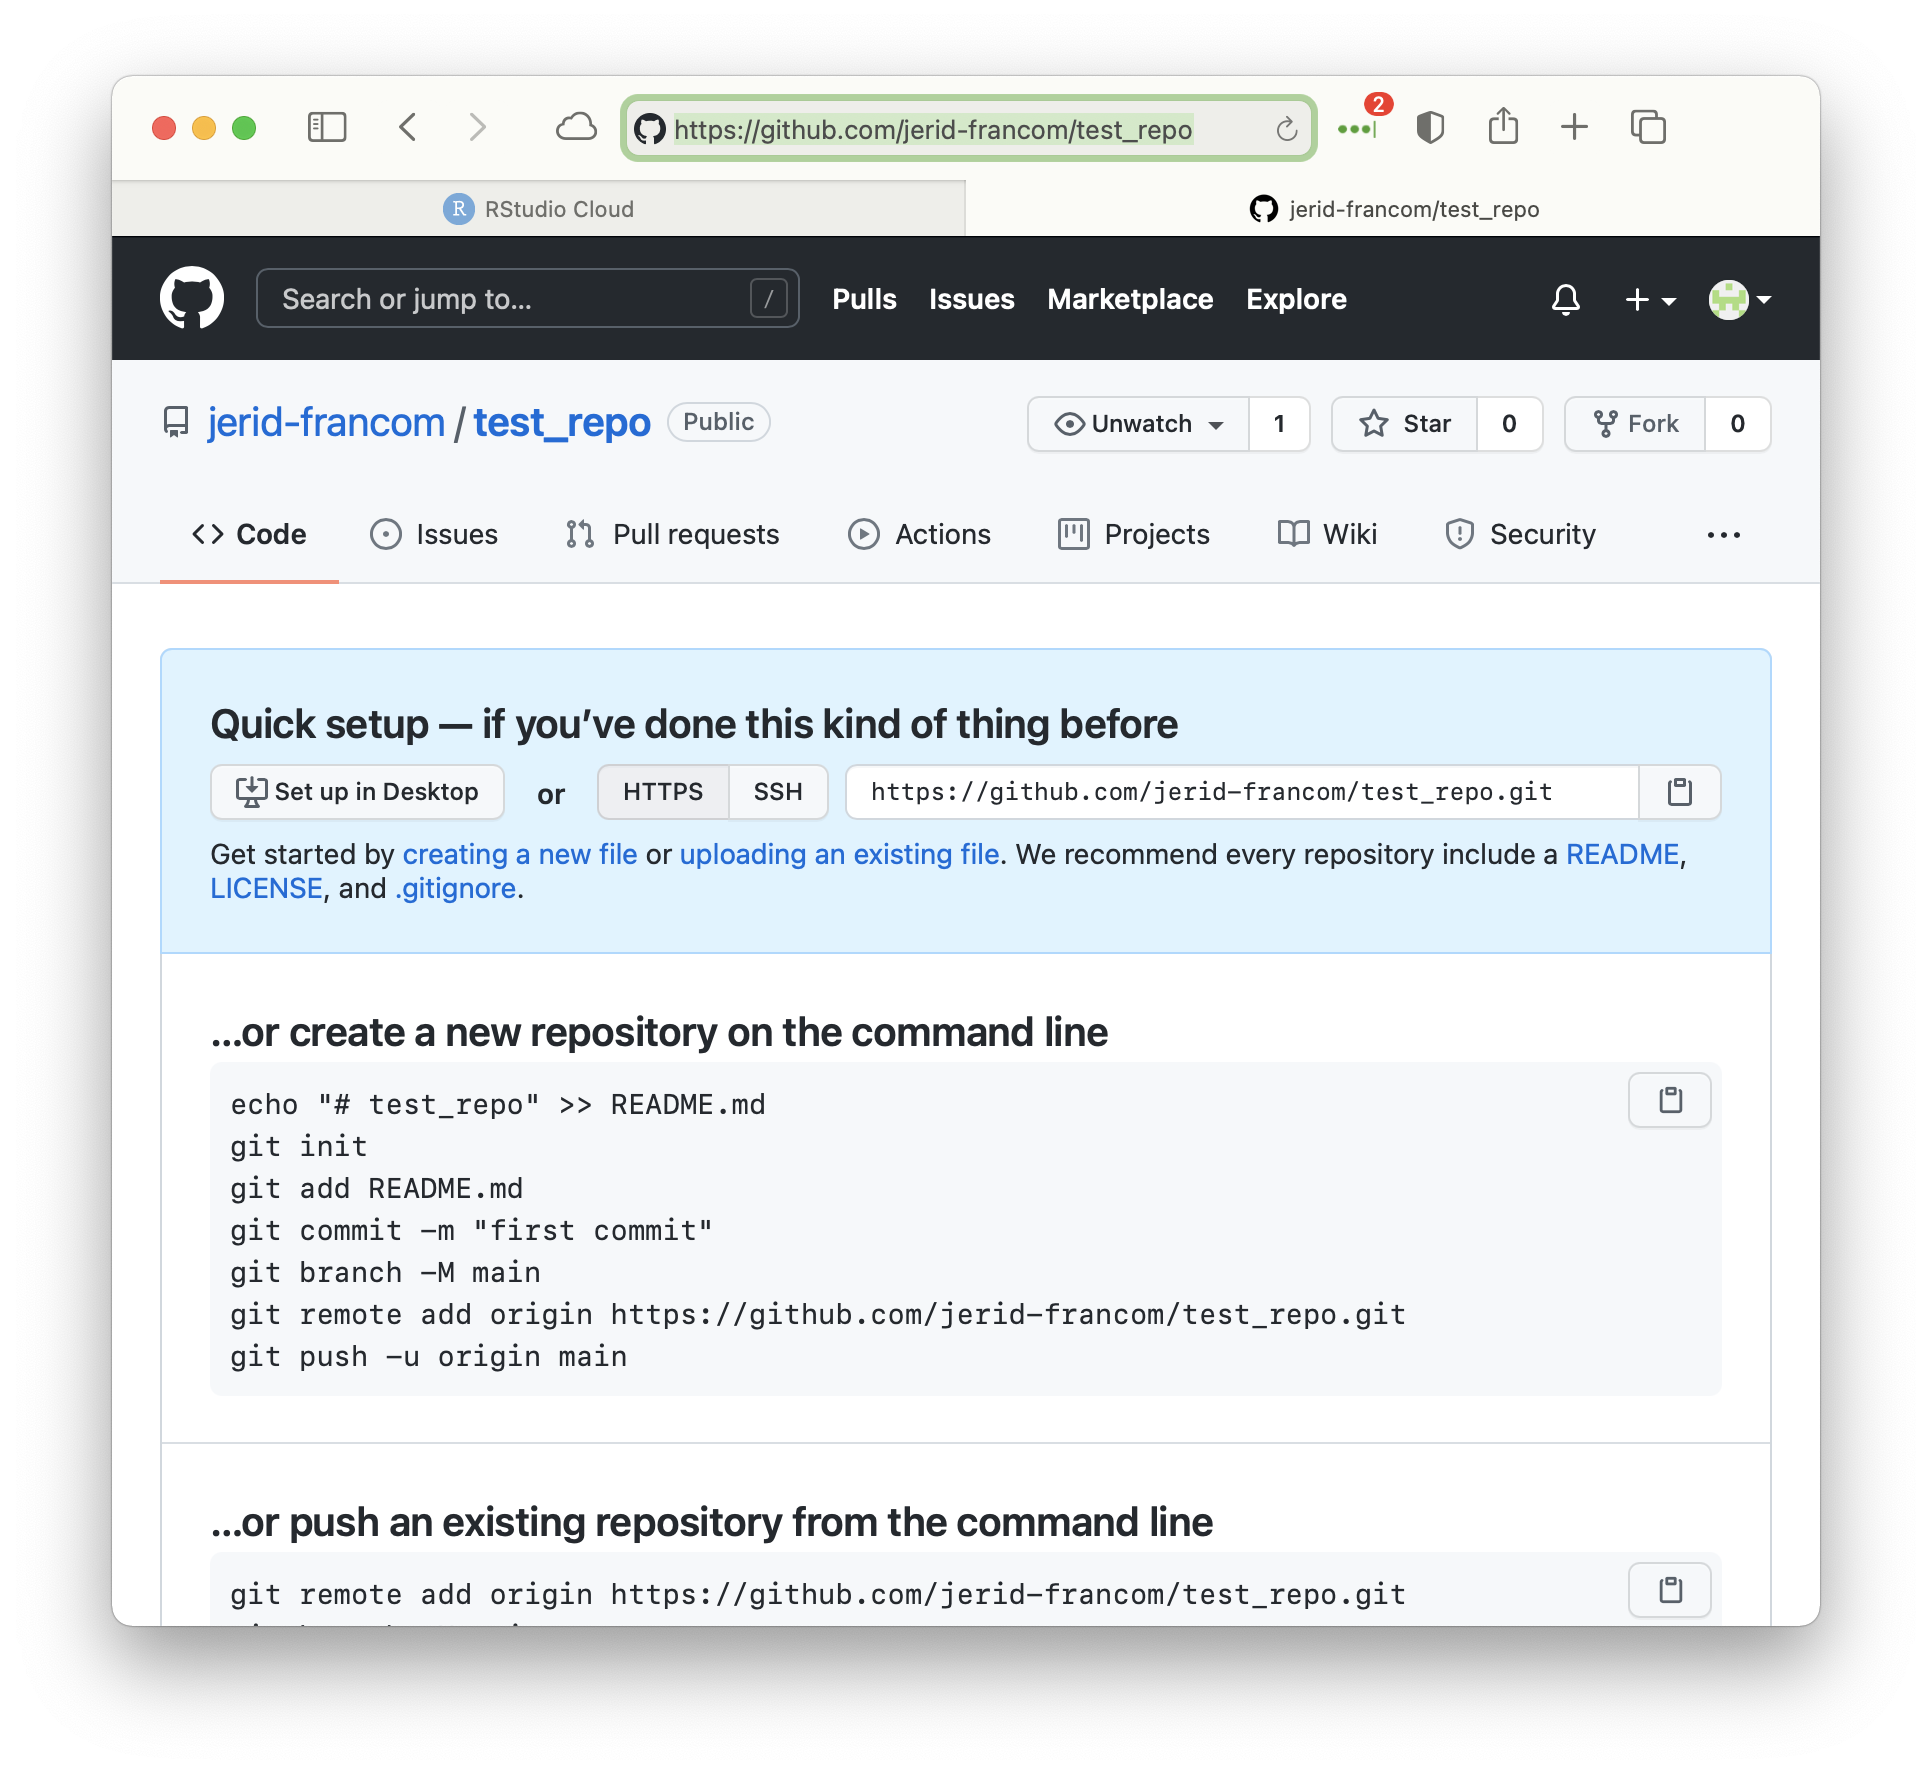
You will be presented with a page where the repository will be accessible by URL. We will not follow the steps on this page. Rather we will copy the URL of this page and navigate to RStudio Cloud.
 ### Create an RStudio Cloud Project from the repository
In ‘Your Workspace’ on RStudio Cloud, click ‘New Project’ and select ‘New Project from Git Repository’.
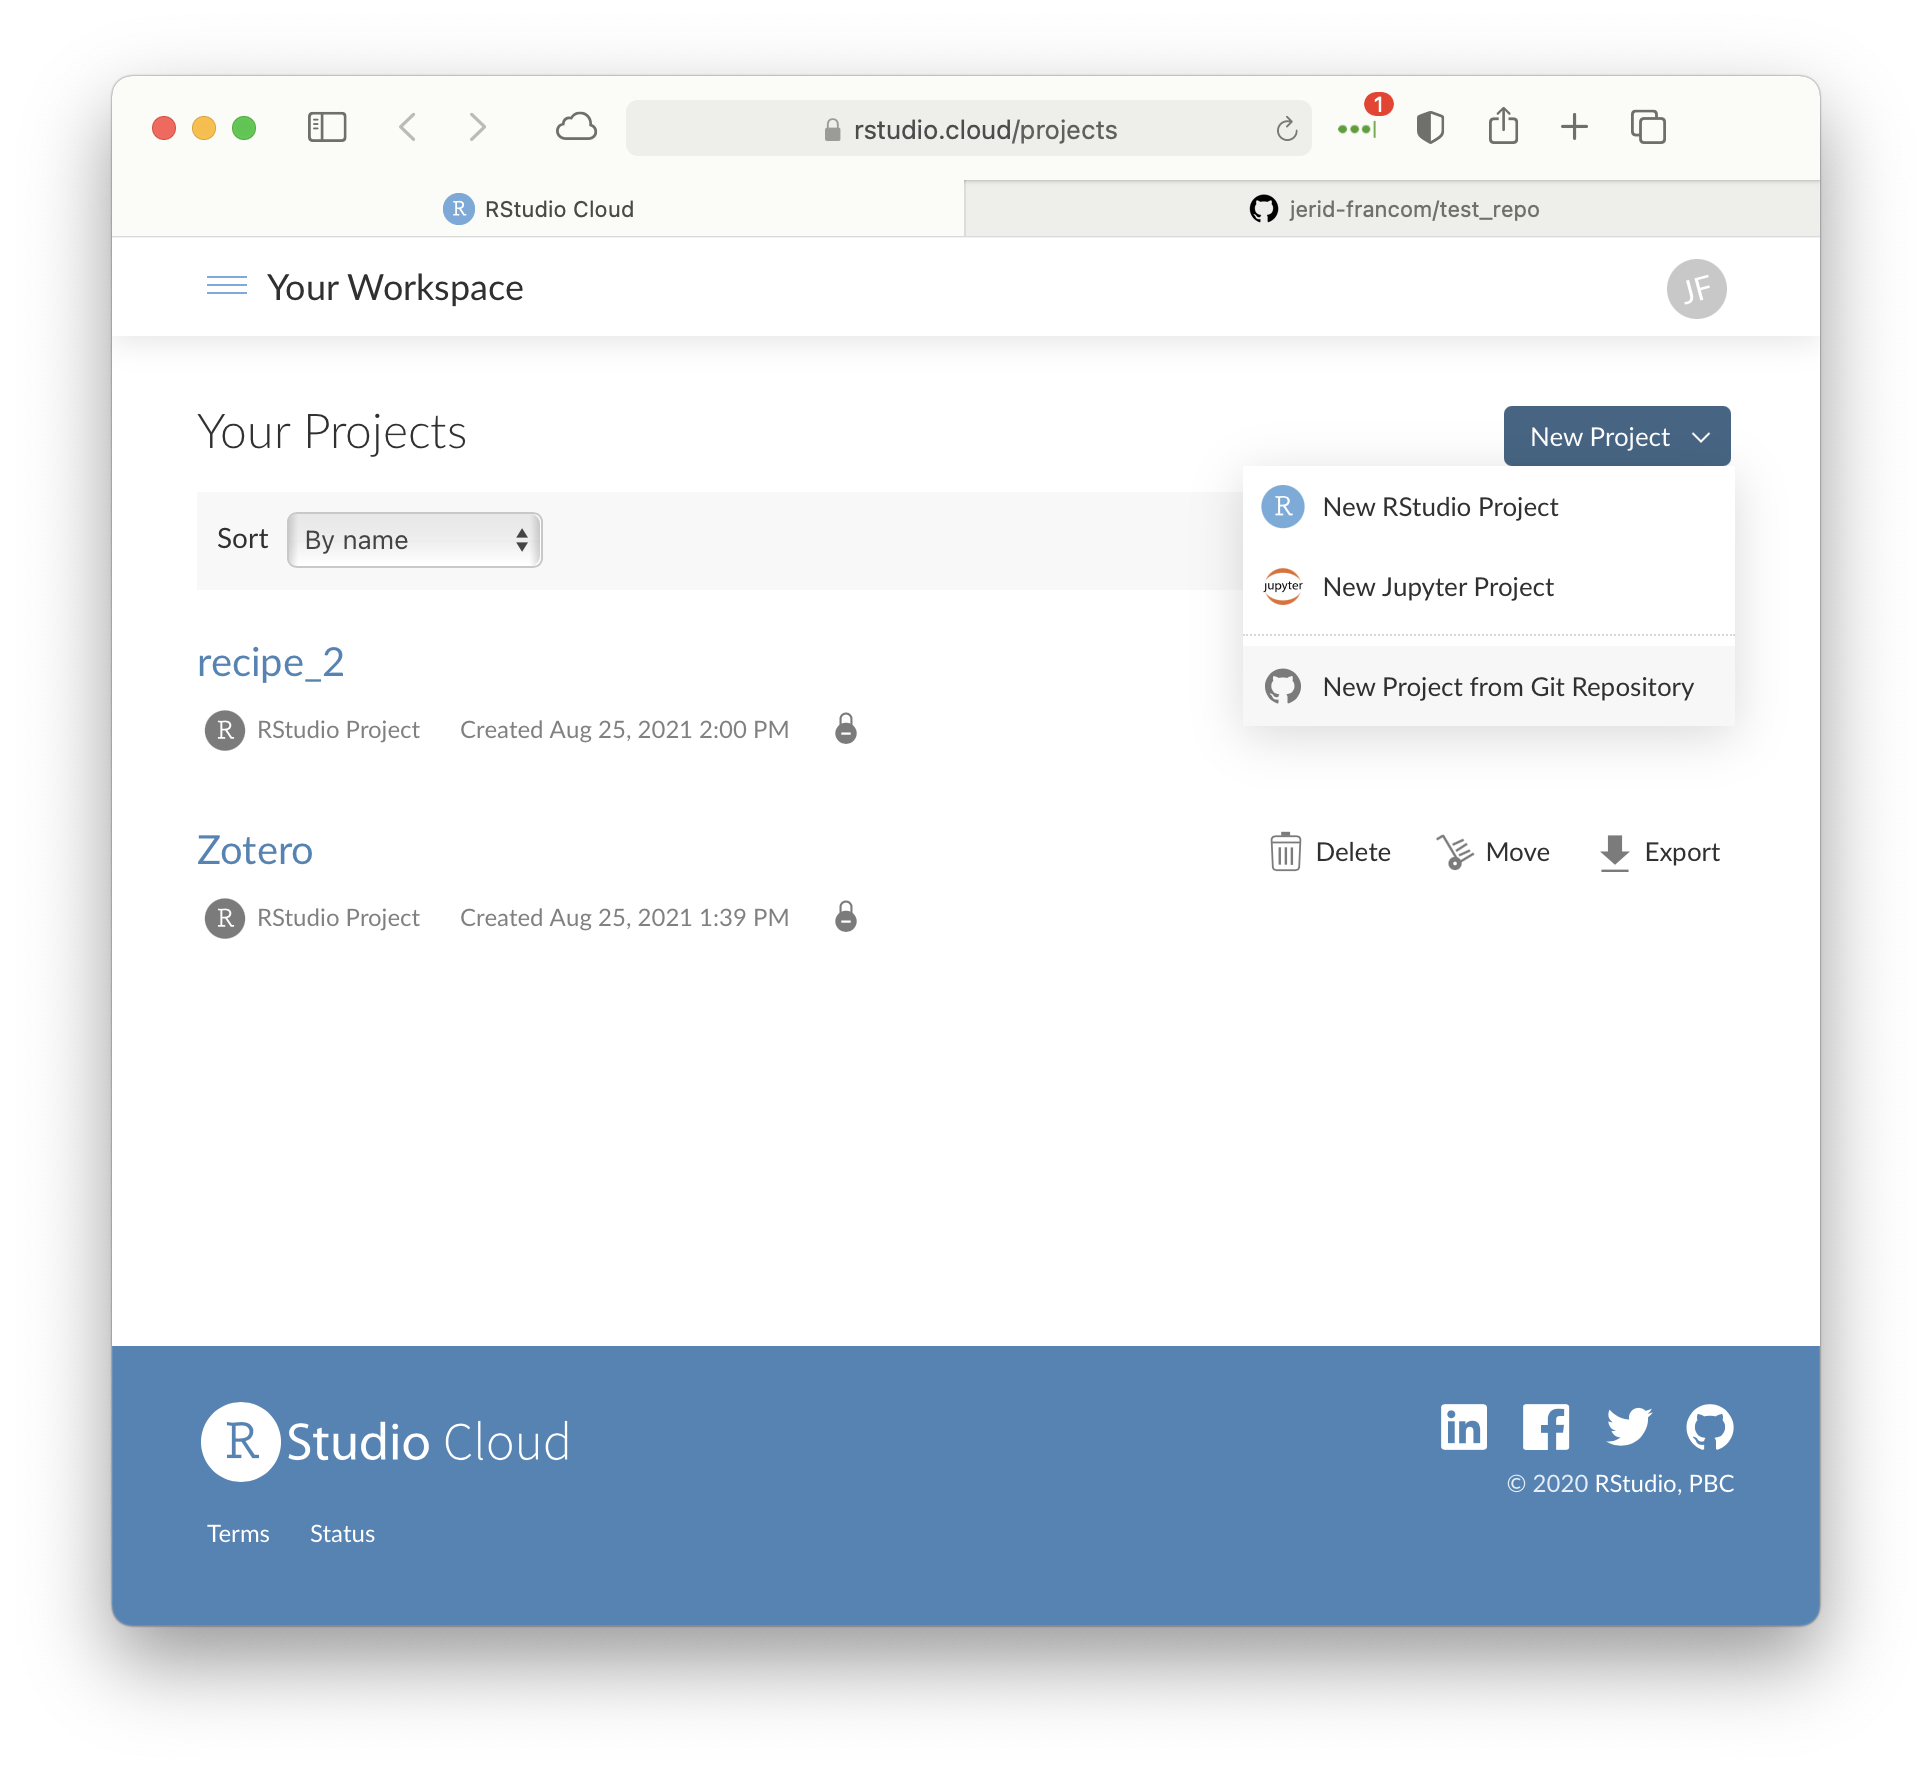 This will copy your GitHub repository
 test_repo to RStudio Cloud as a new R Project.
Setting up Git on RStudio Cloud
To be able to make changes to this project on RStudio Cloud and then send the changes back to GitHub we will first need to set up Git on RStudio Cloud. Git is the engine behind GitHub and it is already installed by default on all RStudio Cloud projects. To make the process of configuring Git to talk to GitHub it needs to know a few pieces of information: (1) our GitHub username (user.name), (2) our GitHub email address (user.email), and (3) our password for GitHub.
To make the setup easier for steps 1 and 2, we will install the usethis package (Wickham, Bryan, and Barrett 2021). Select the ‘Packages’ pane and click ‘Install’. Then in the ‘Packages’ field of the interactive dialogue box, enter usethis and click ‘Install’.
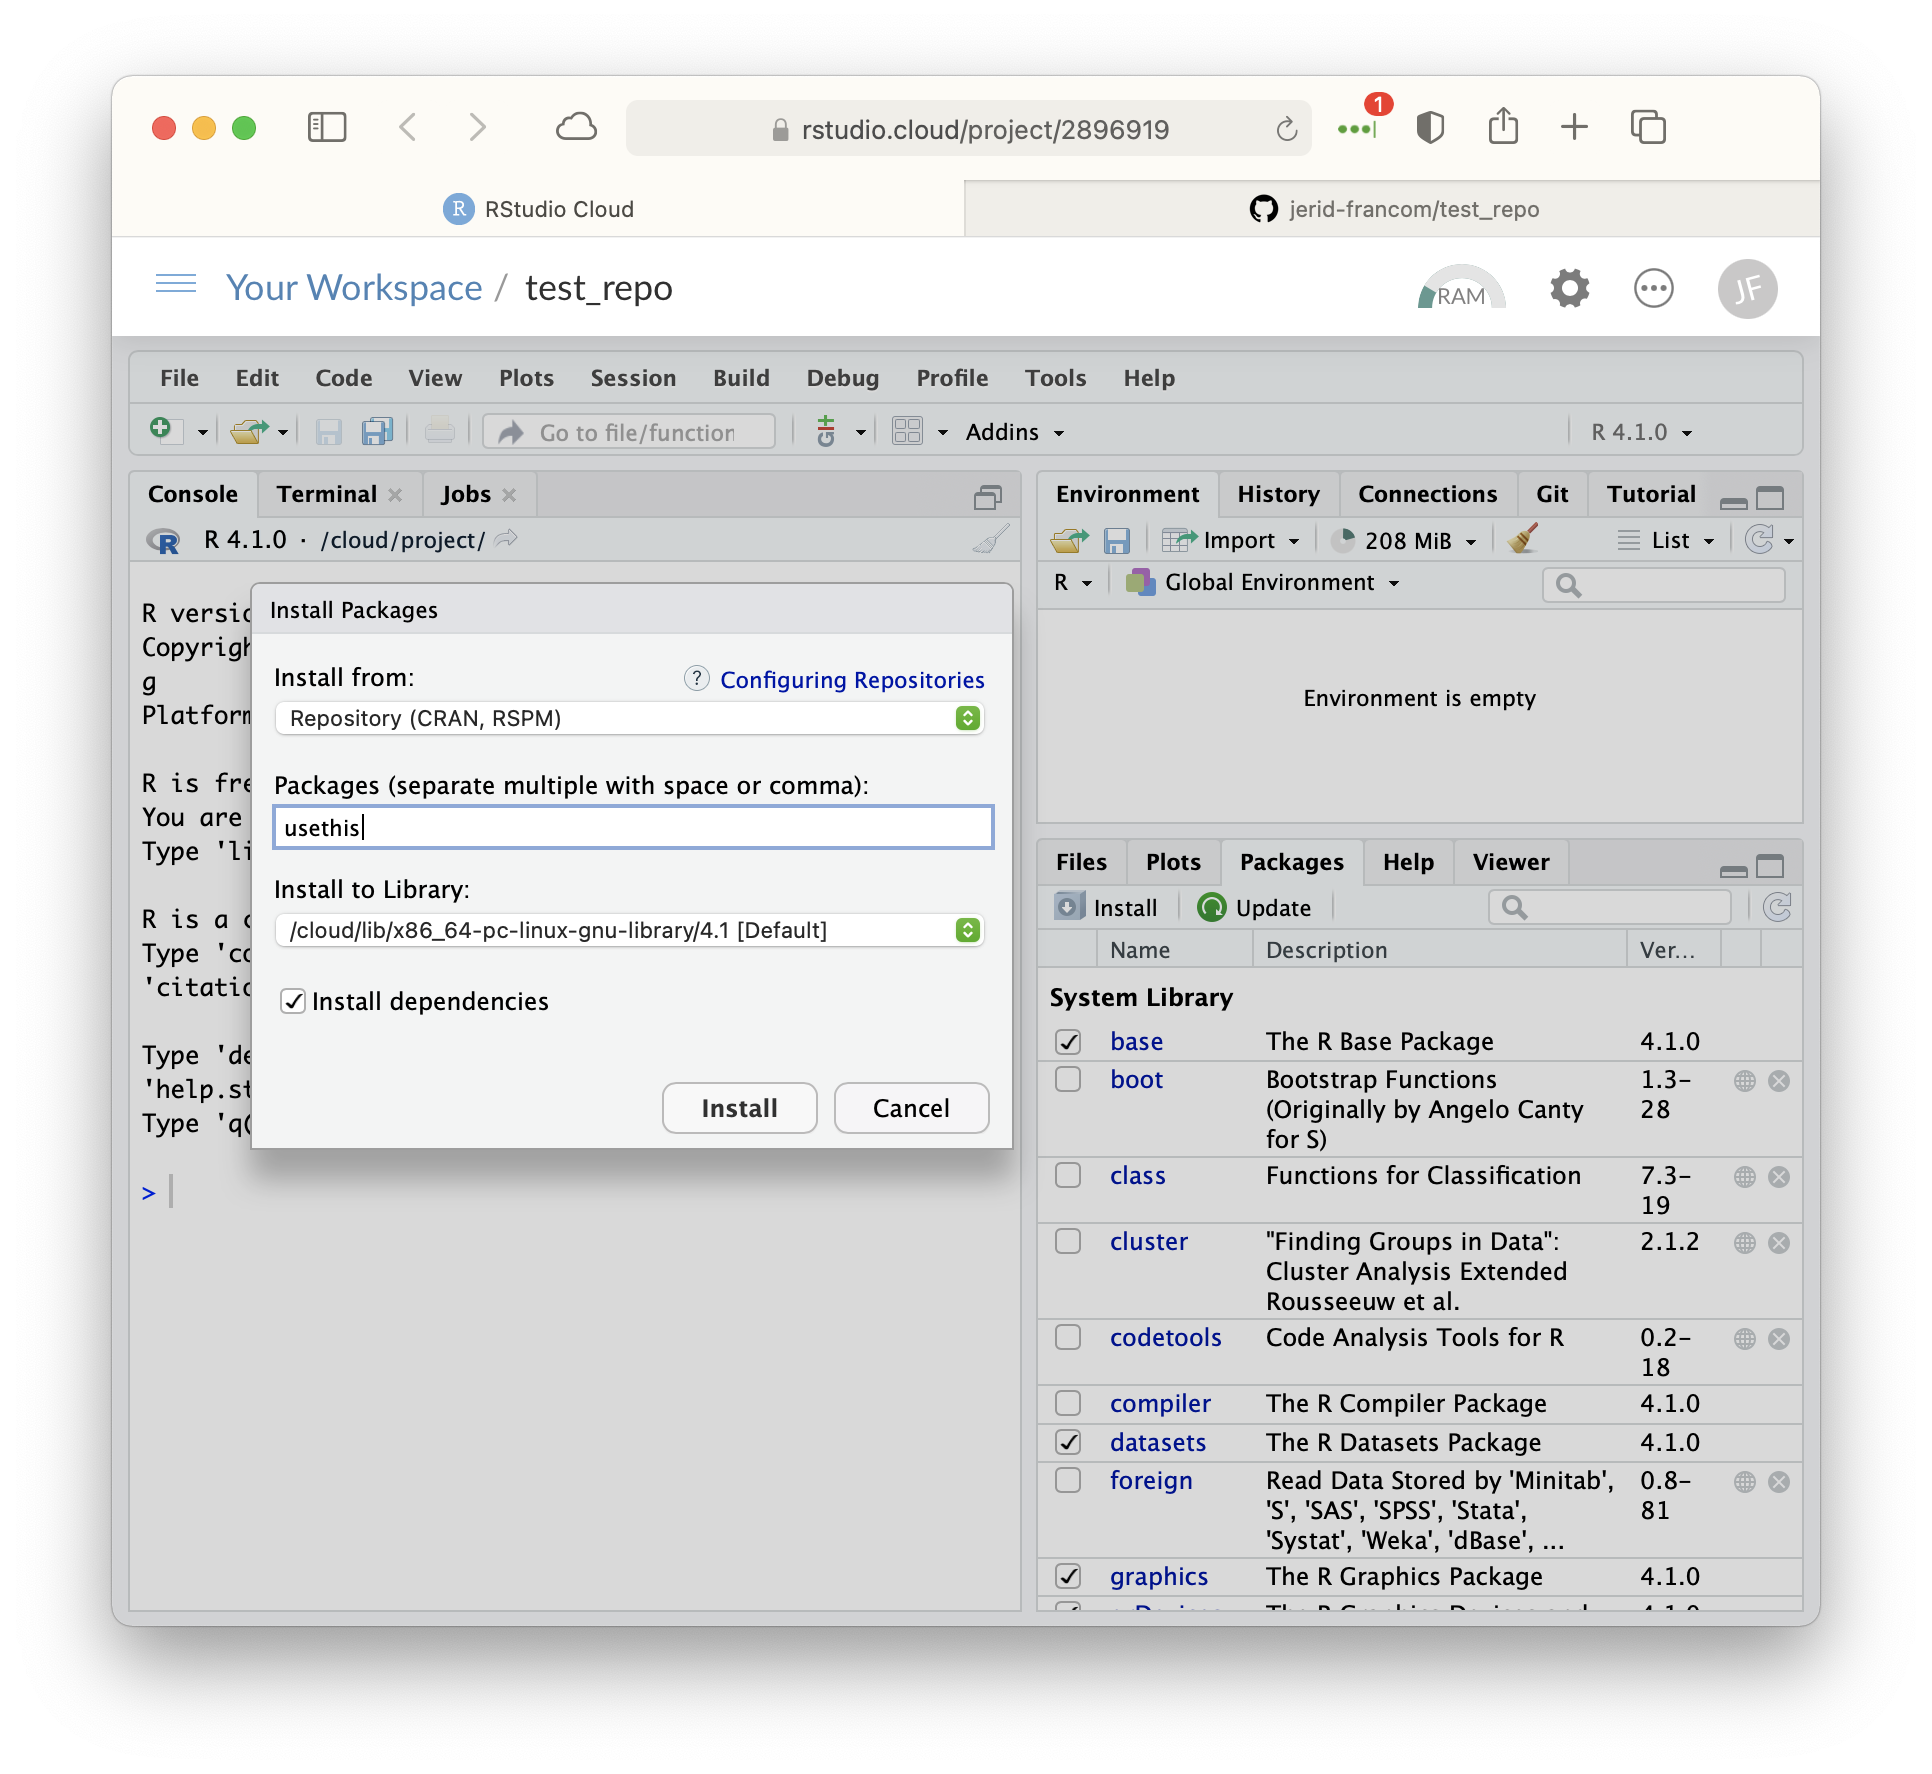 Once the usethis package is installed and the
 > prompt is available in the R Console, load the package and then enter your GitHub configuration details (user.name and user.email) with the use_git_config() function.
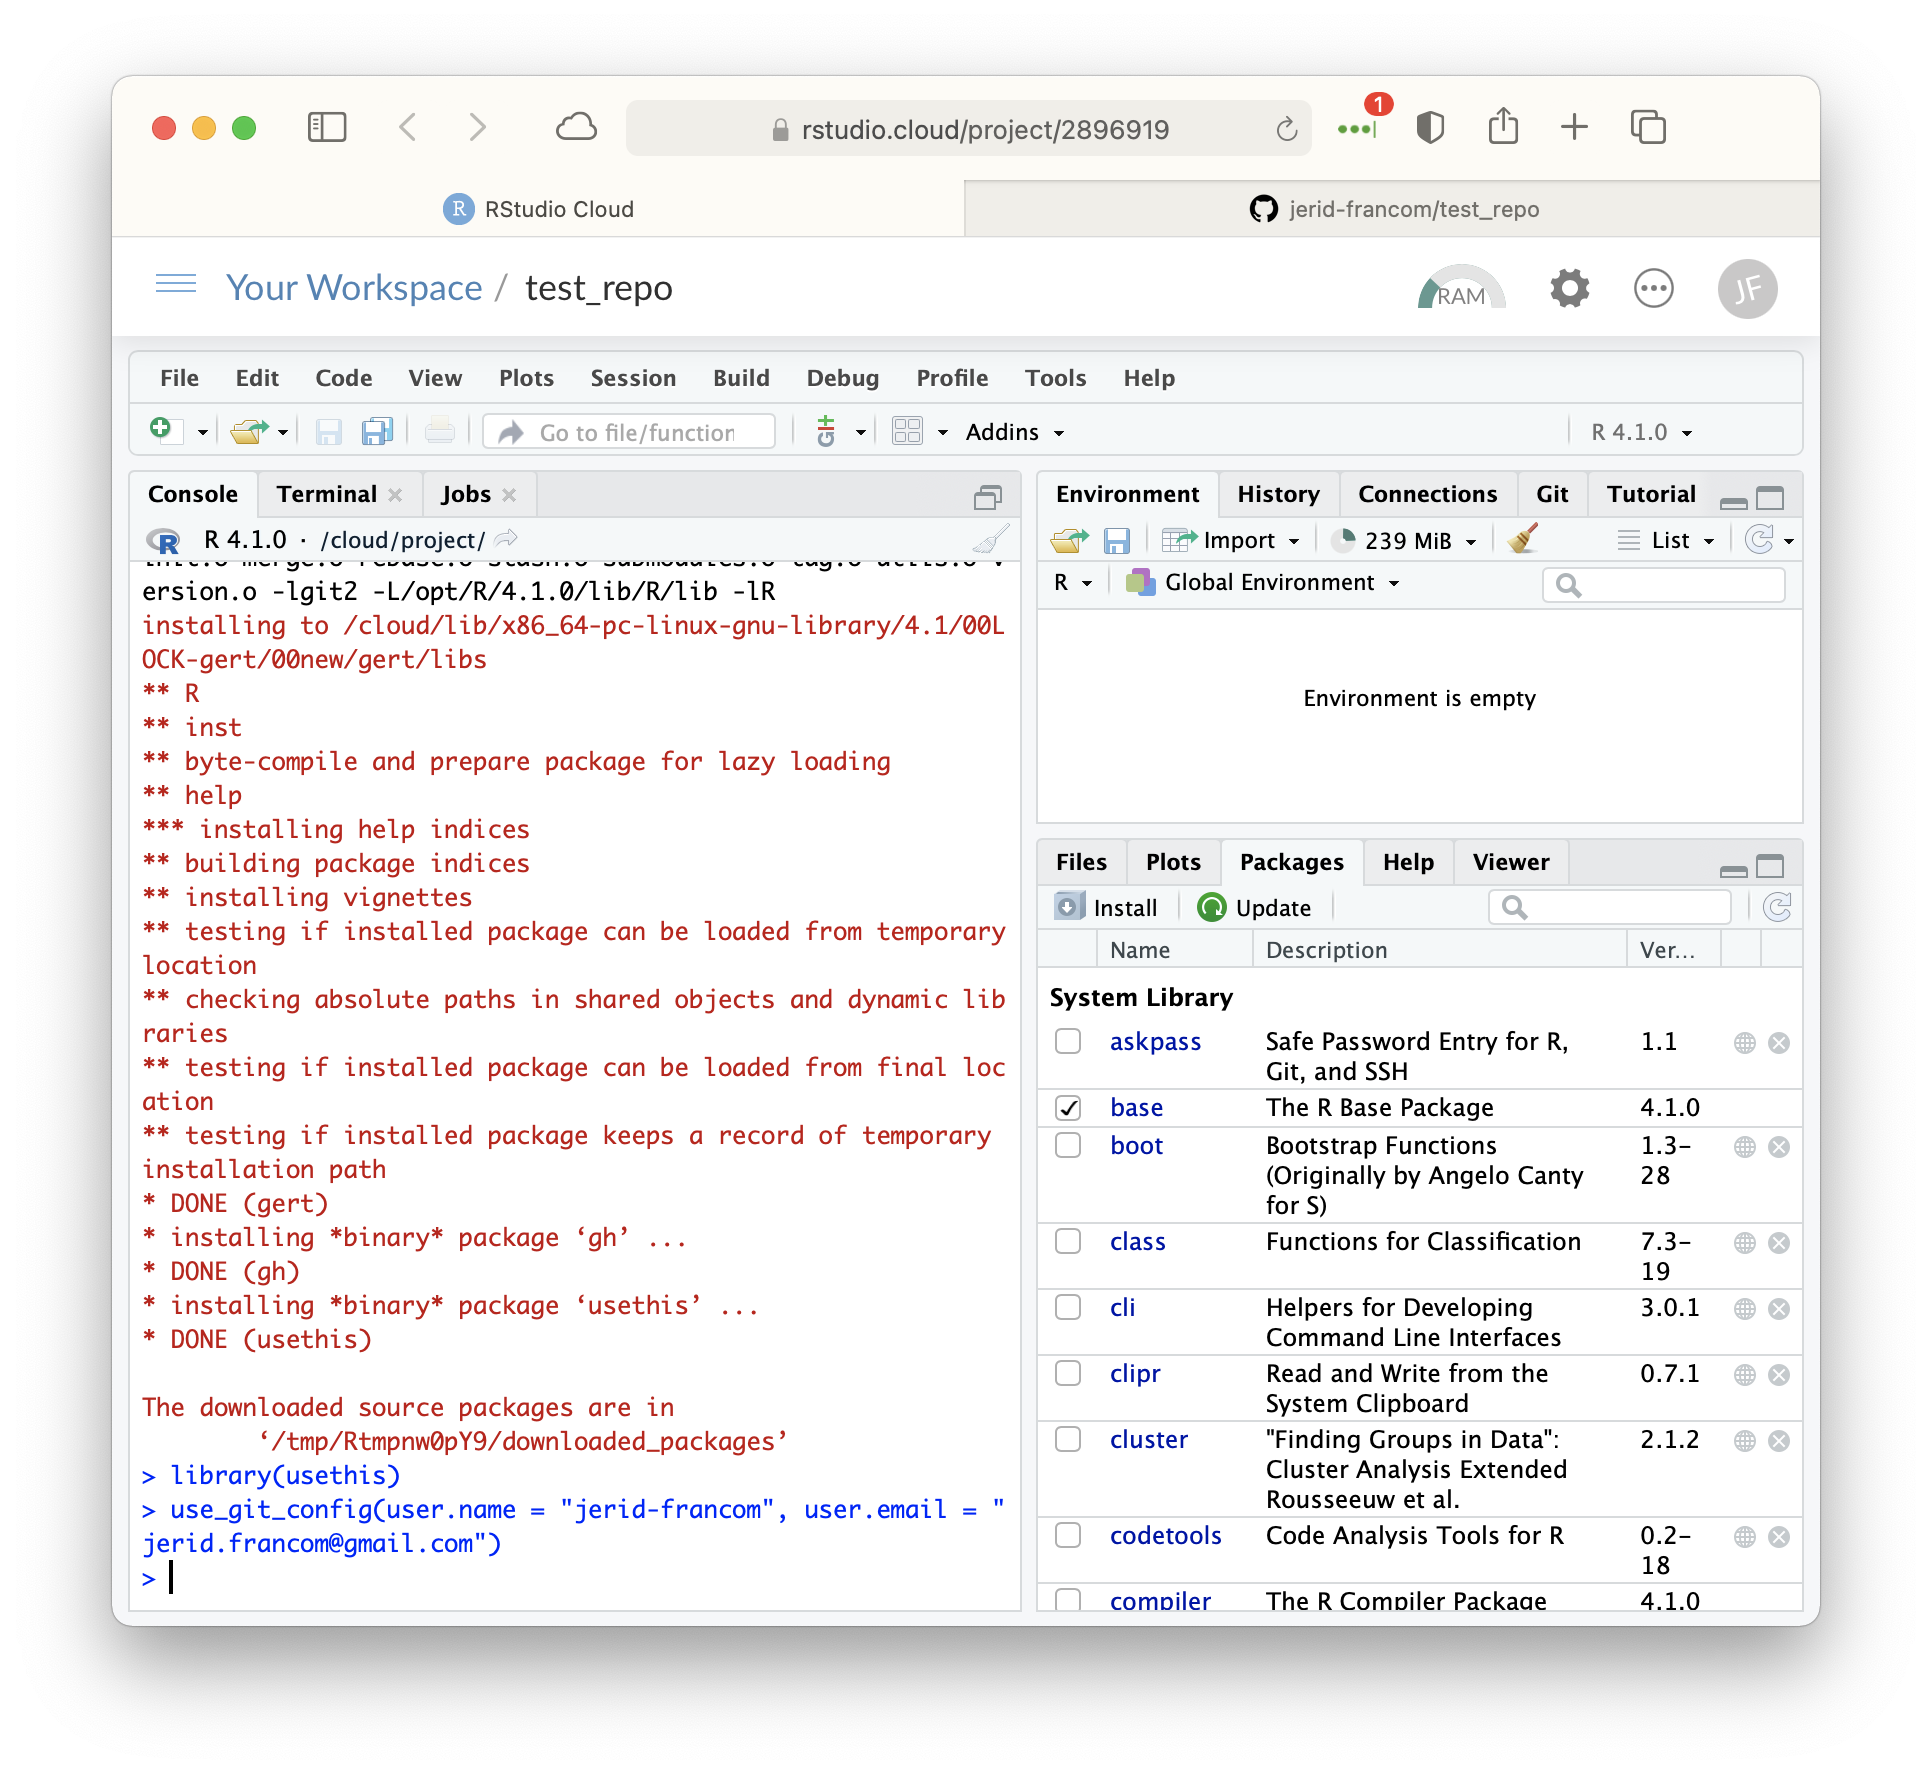
To confirm that the configuration details we entered with the use_git_config() function are registered with Git, we move to the ‘Terminal’ pane (just right of the Console pane) and enter the command git config --global --list (note the double hyphens!). You should see the ‘user.name’ and ‘user.email’ set to your credentials.
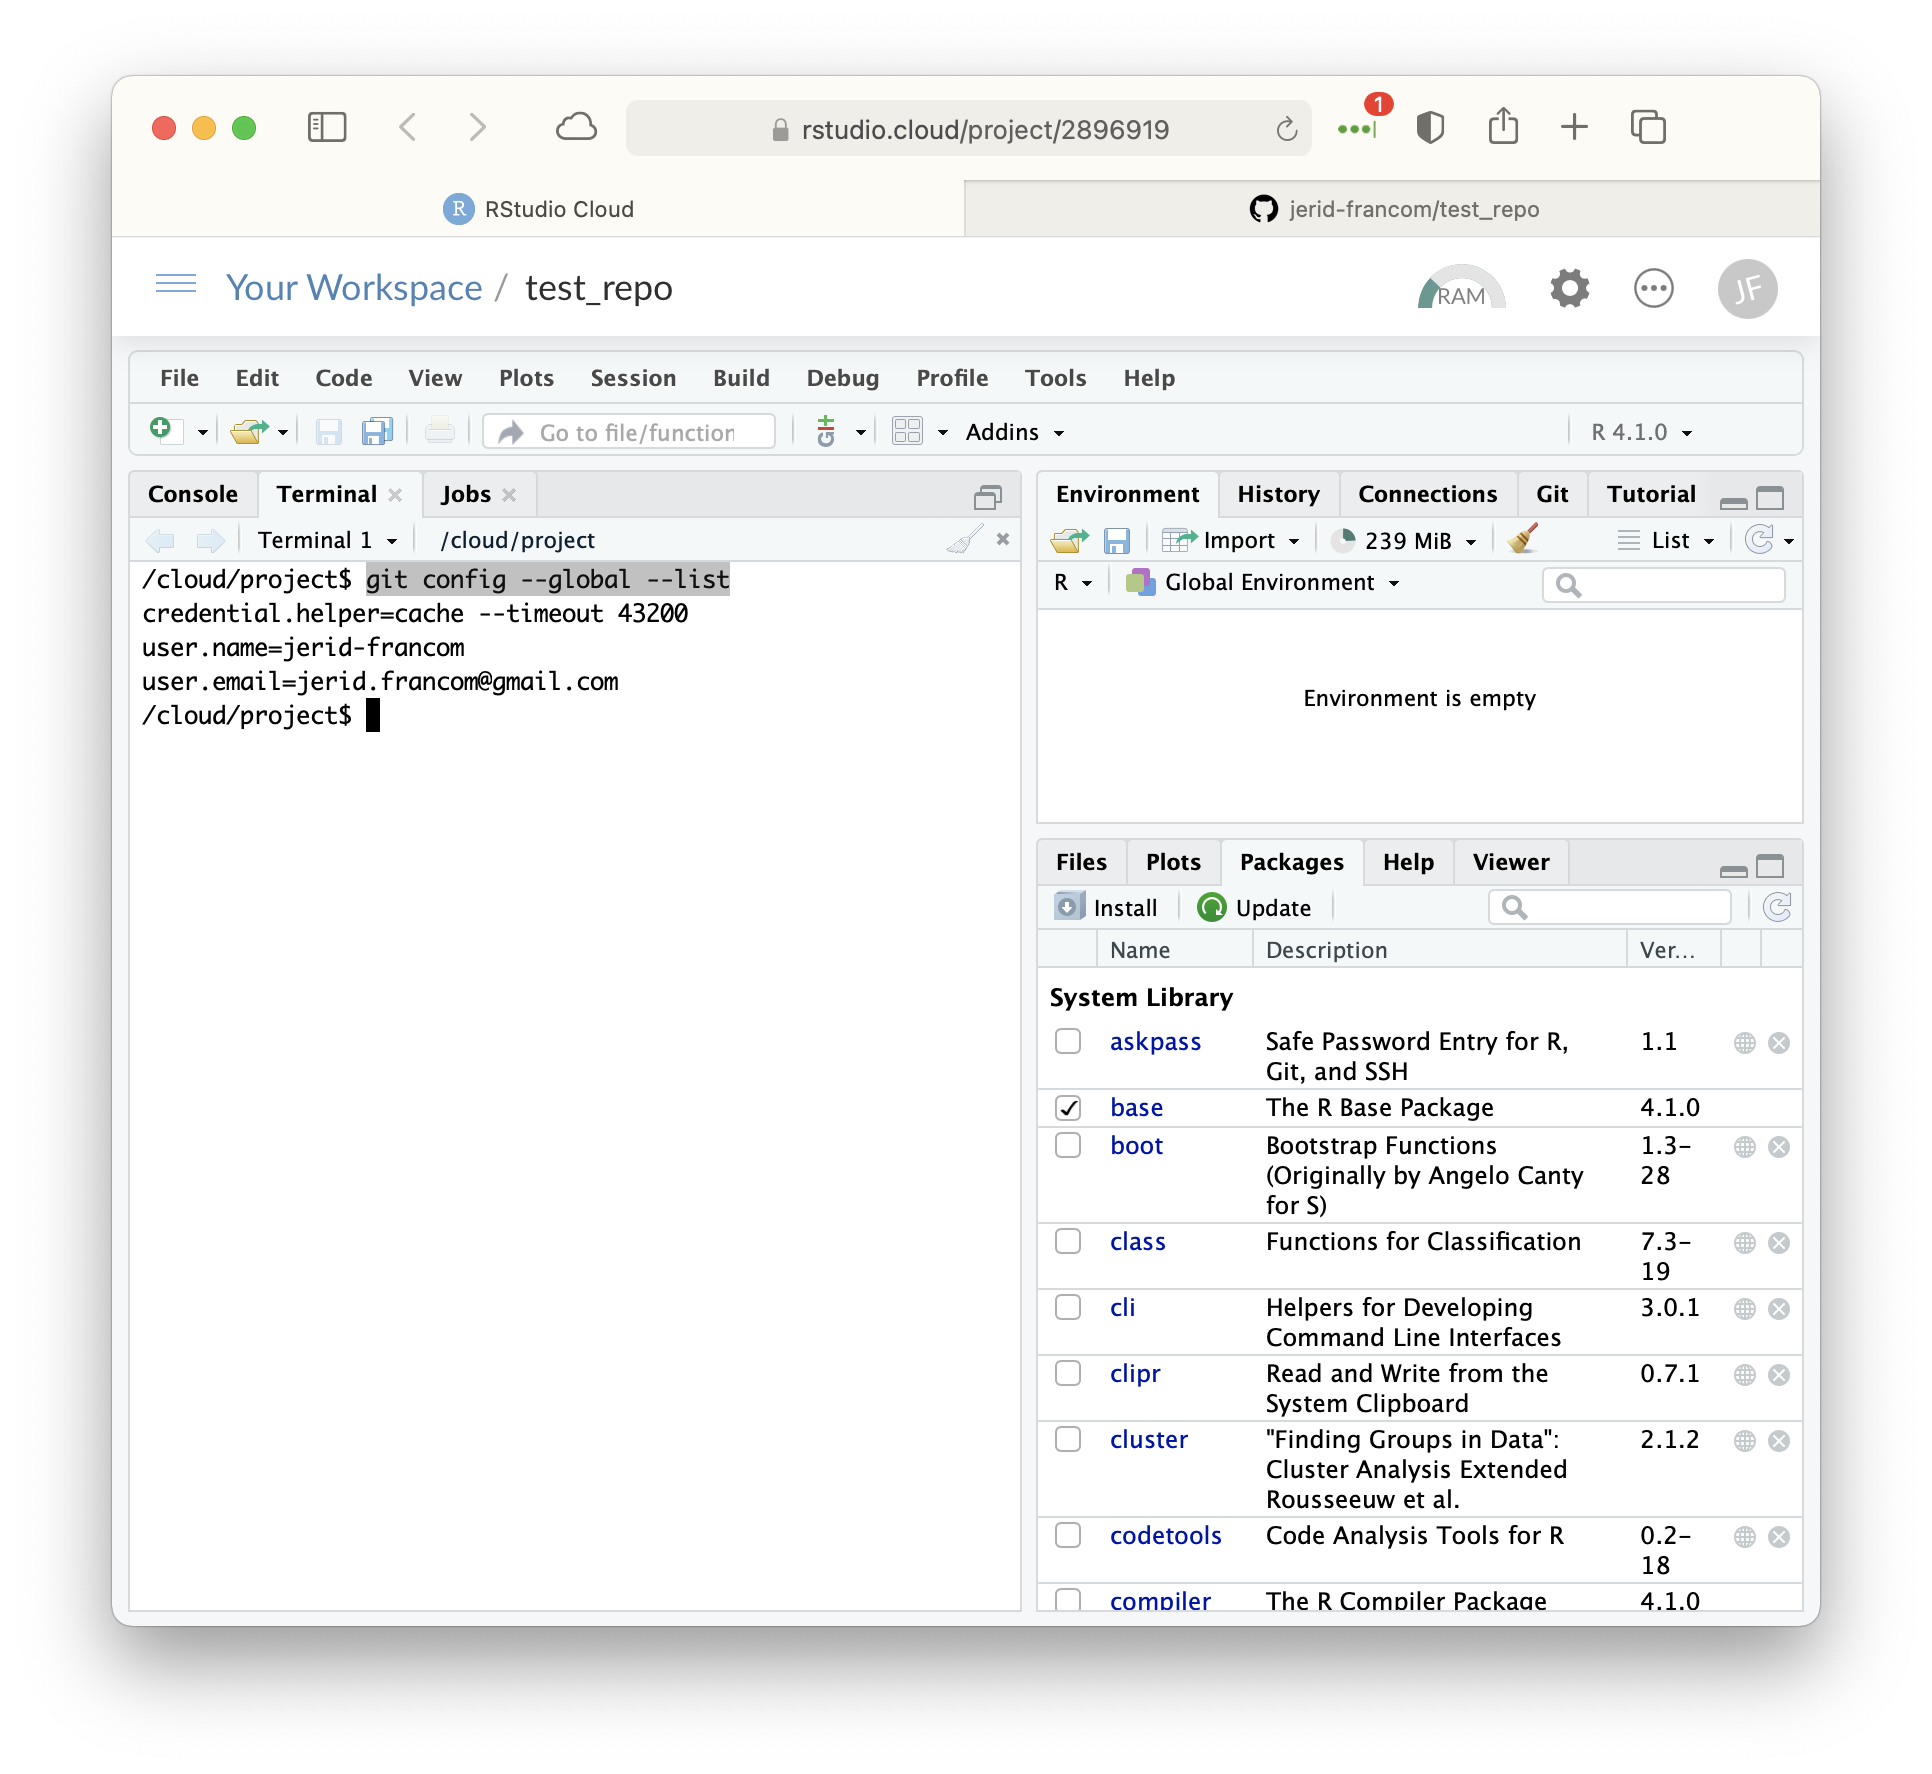
The final step to configure Git to talk with GitHub is to create a GitHub token and store it in your Git configuration on RStudio Cloud. The token in effect is your password. The usethis package’s create_github_token() function will open an interactive session with GitHub where we can create this token, known as a personal access token, or PAT. In the Console run the create_github_token() (with no arguments).
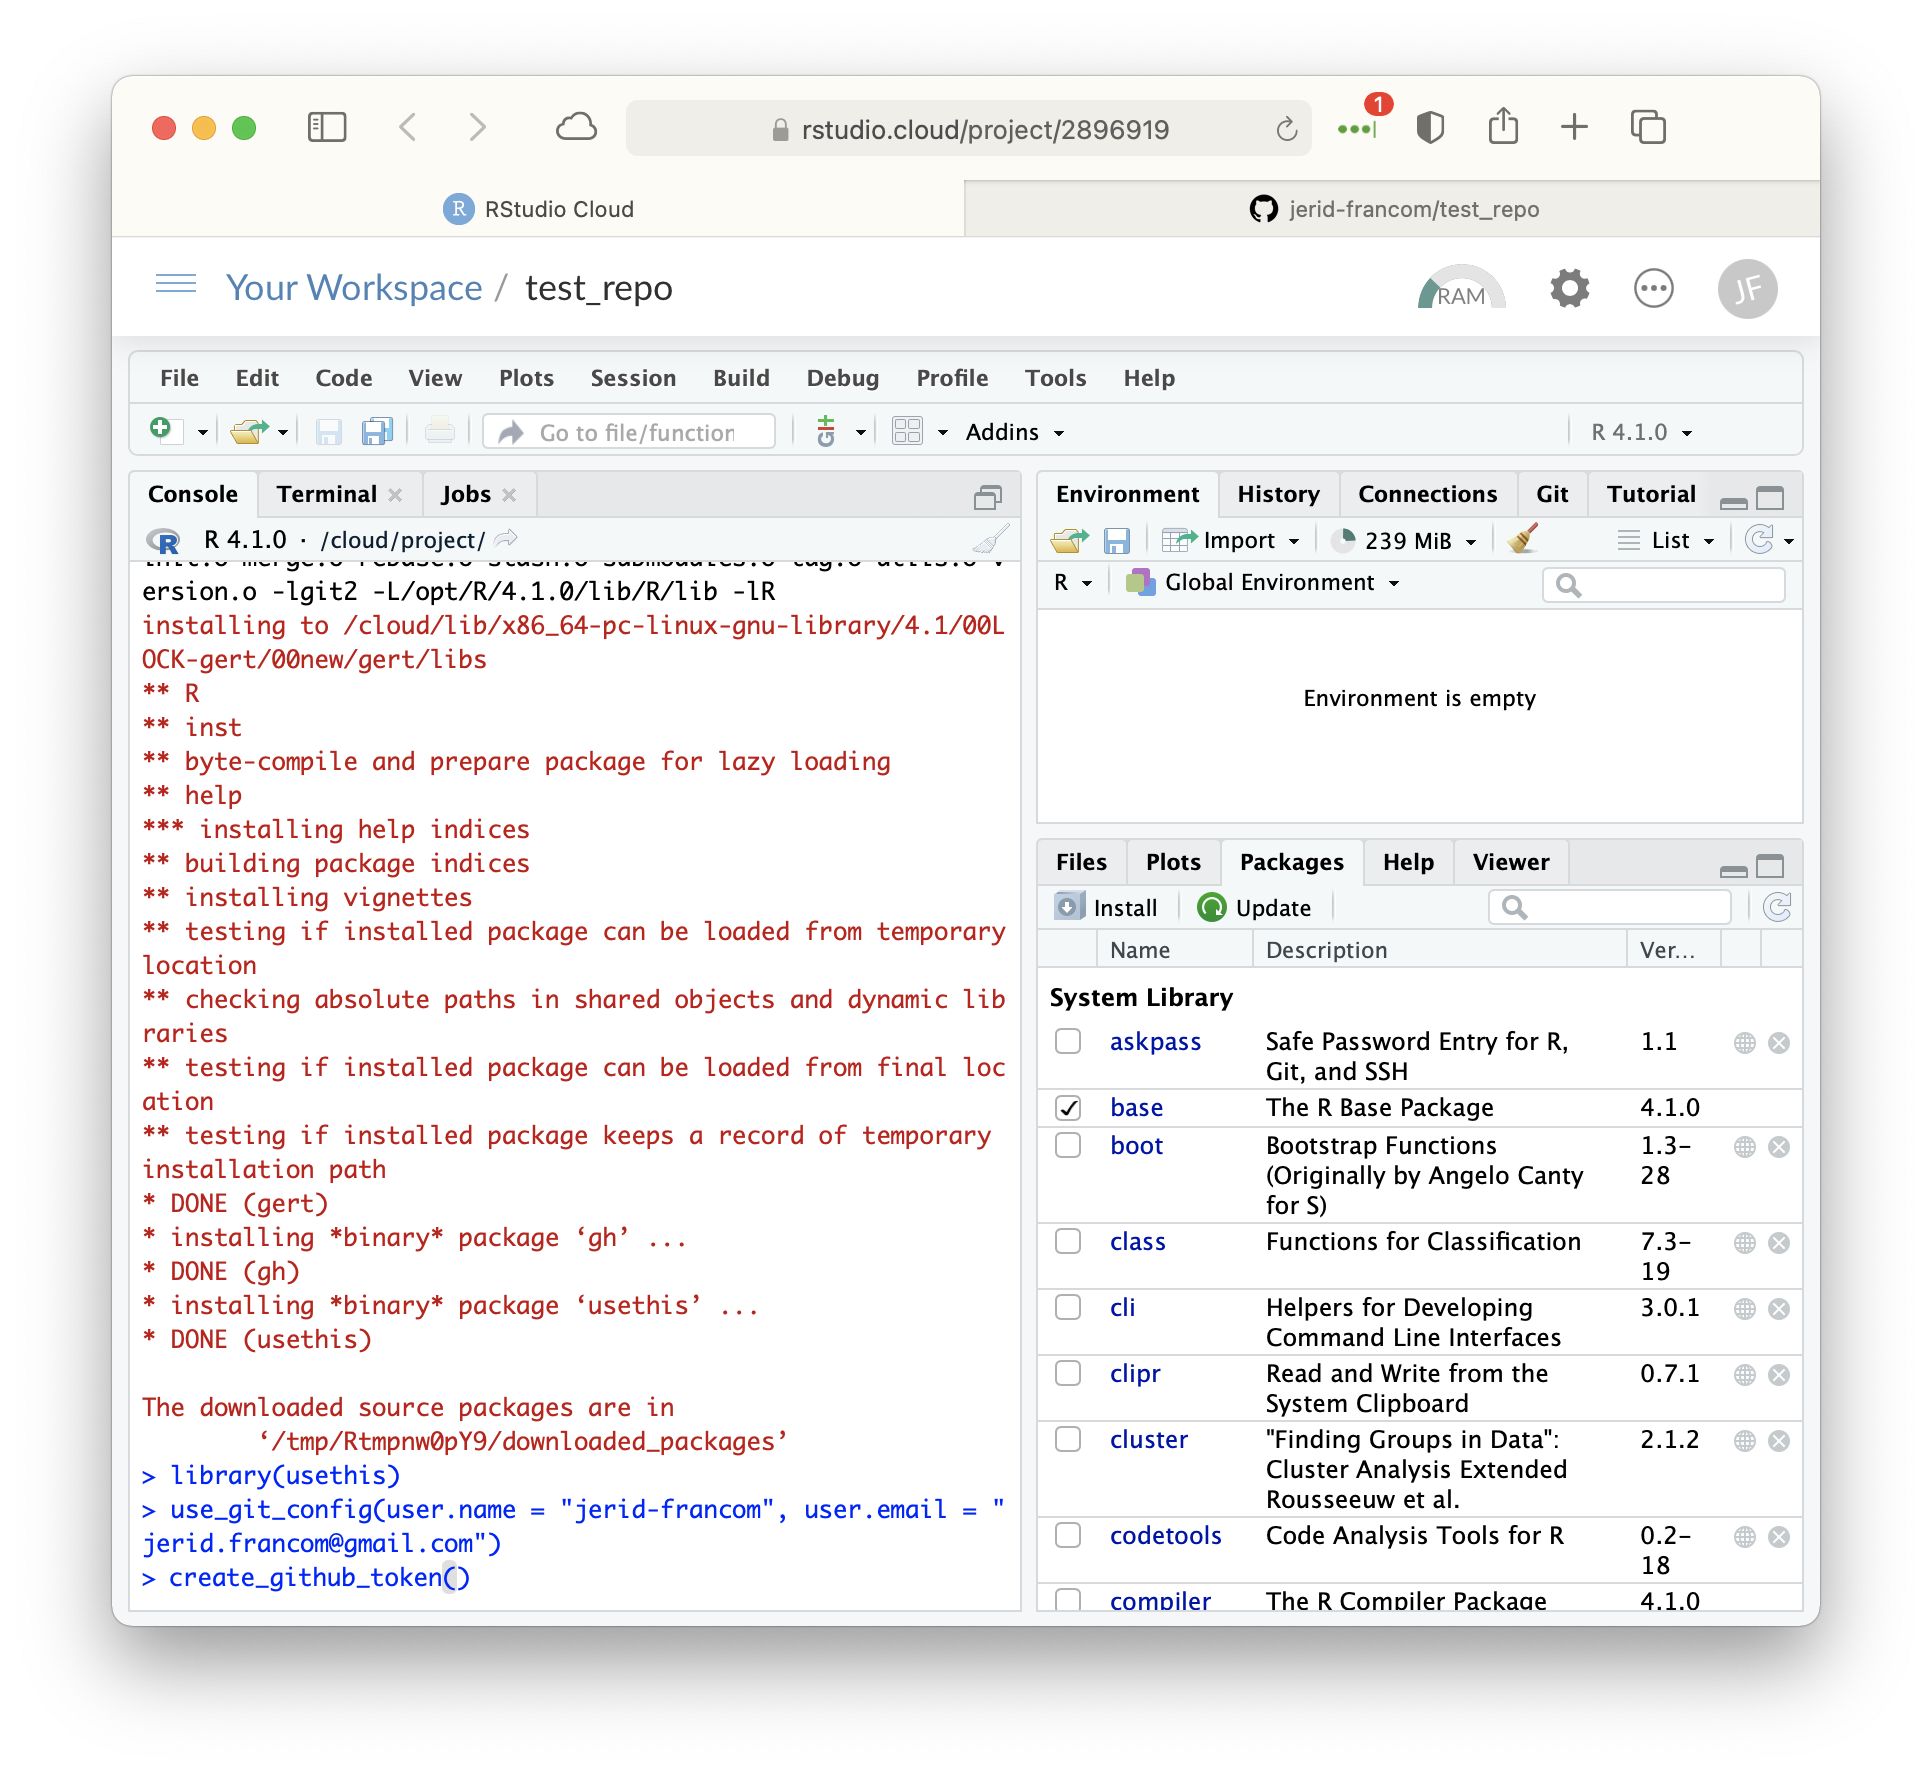 A browser tab will open to the ‘New personal access token’ page. The only required field is the ‘Expiration’ field. Set this to ‘90 days’.
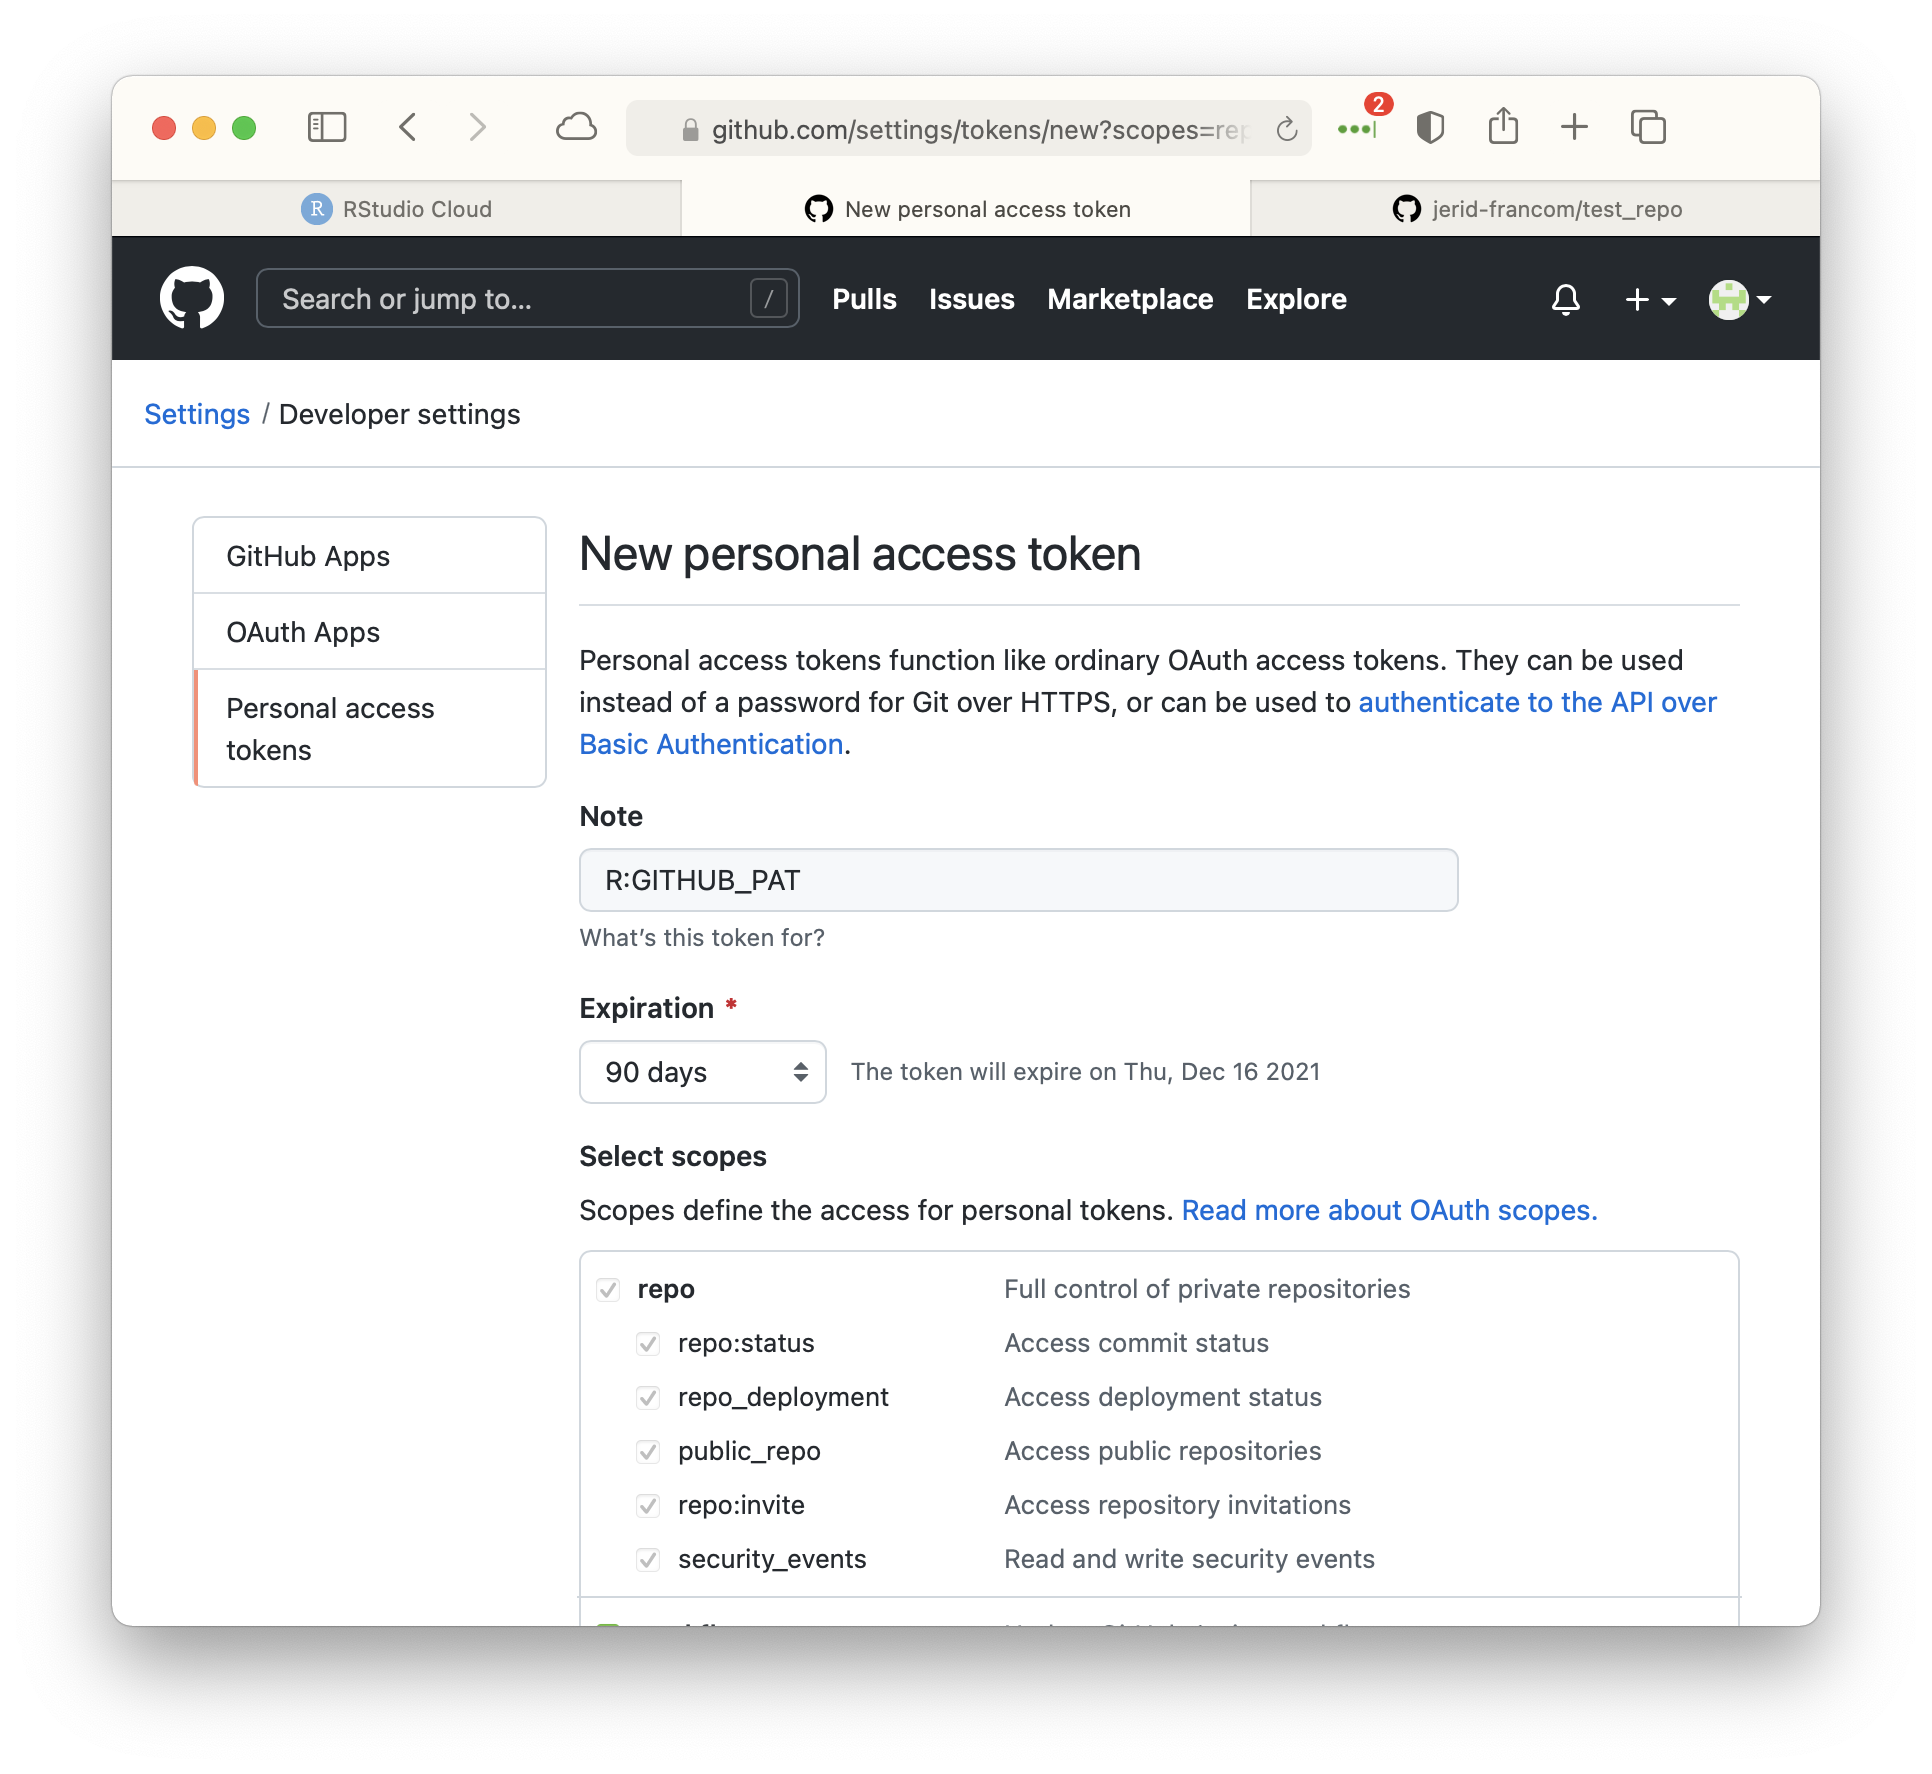 Then skip to the bottom of this page and create the token. Copy and store the token (PAT) which is shown on the screen to a safe place as we will need it in just a bit (and every time we want to set up Git/ GitHub on a new RStudio Cloud project).
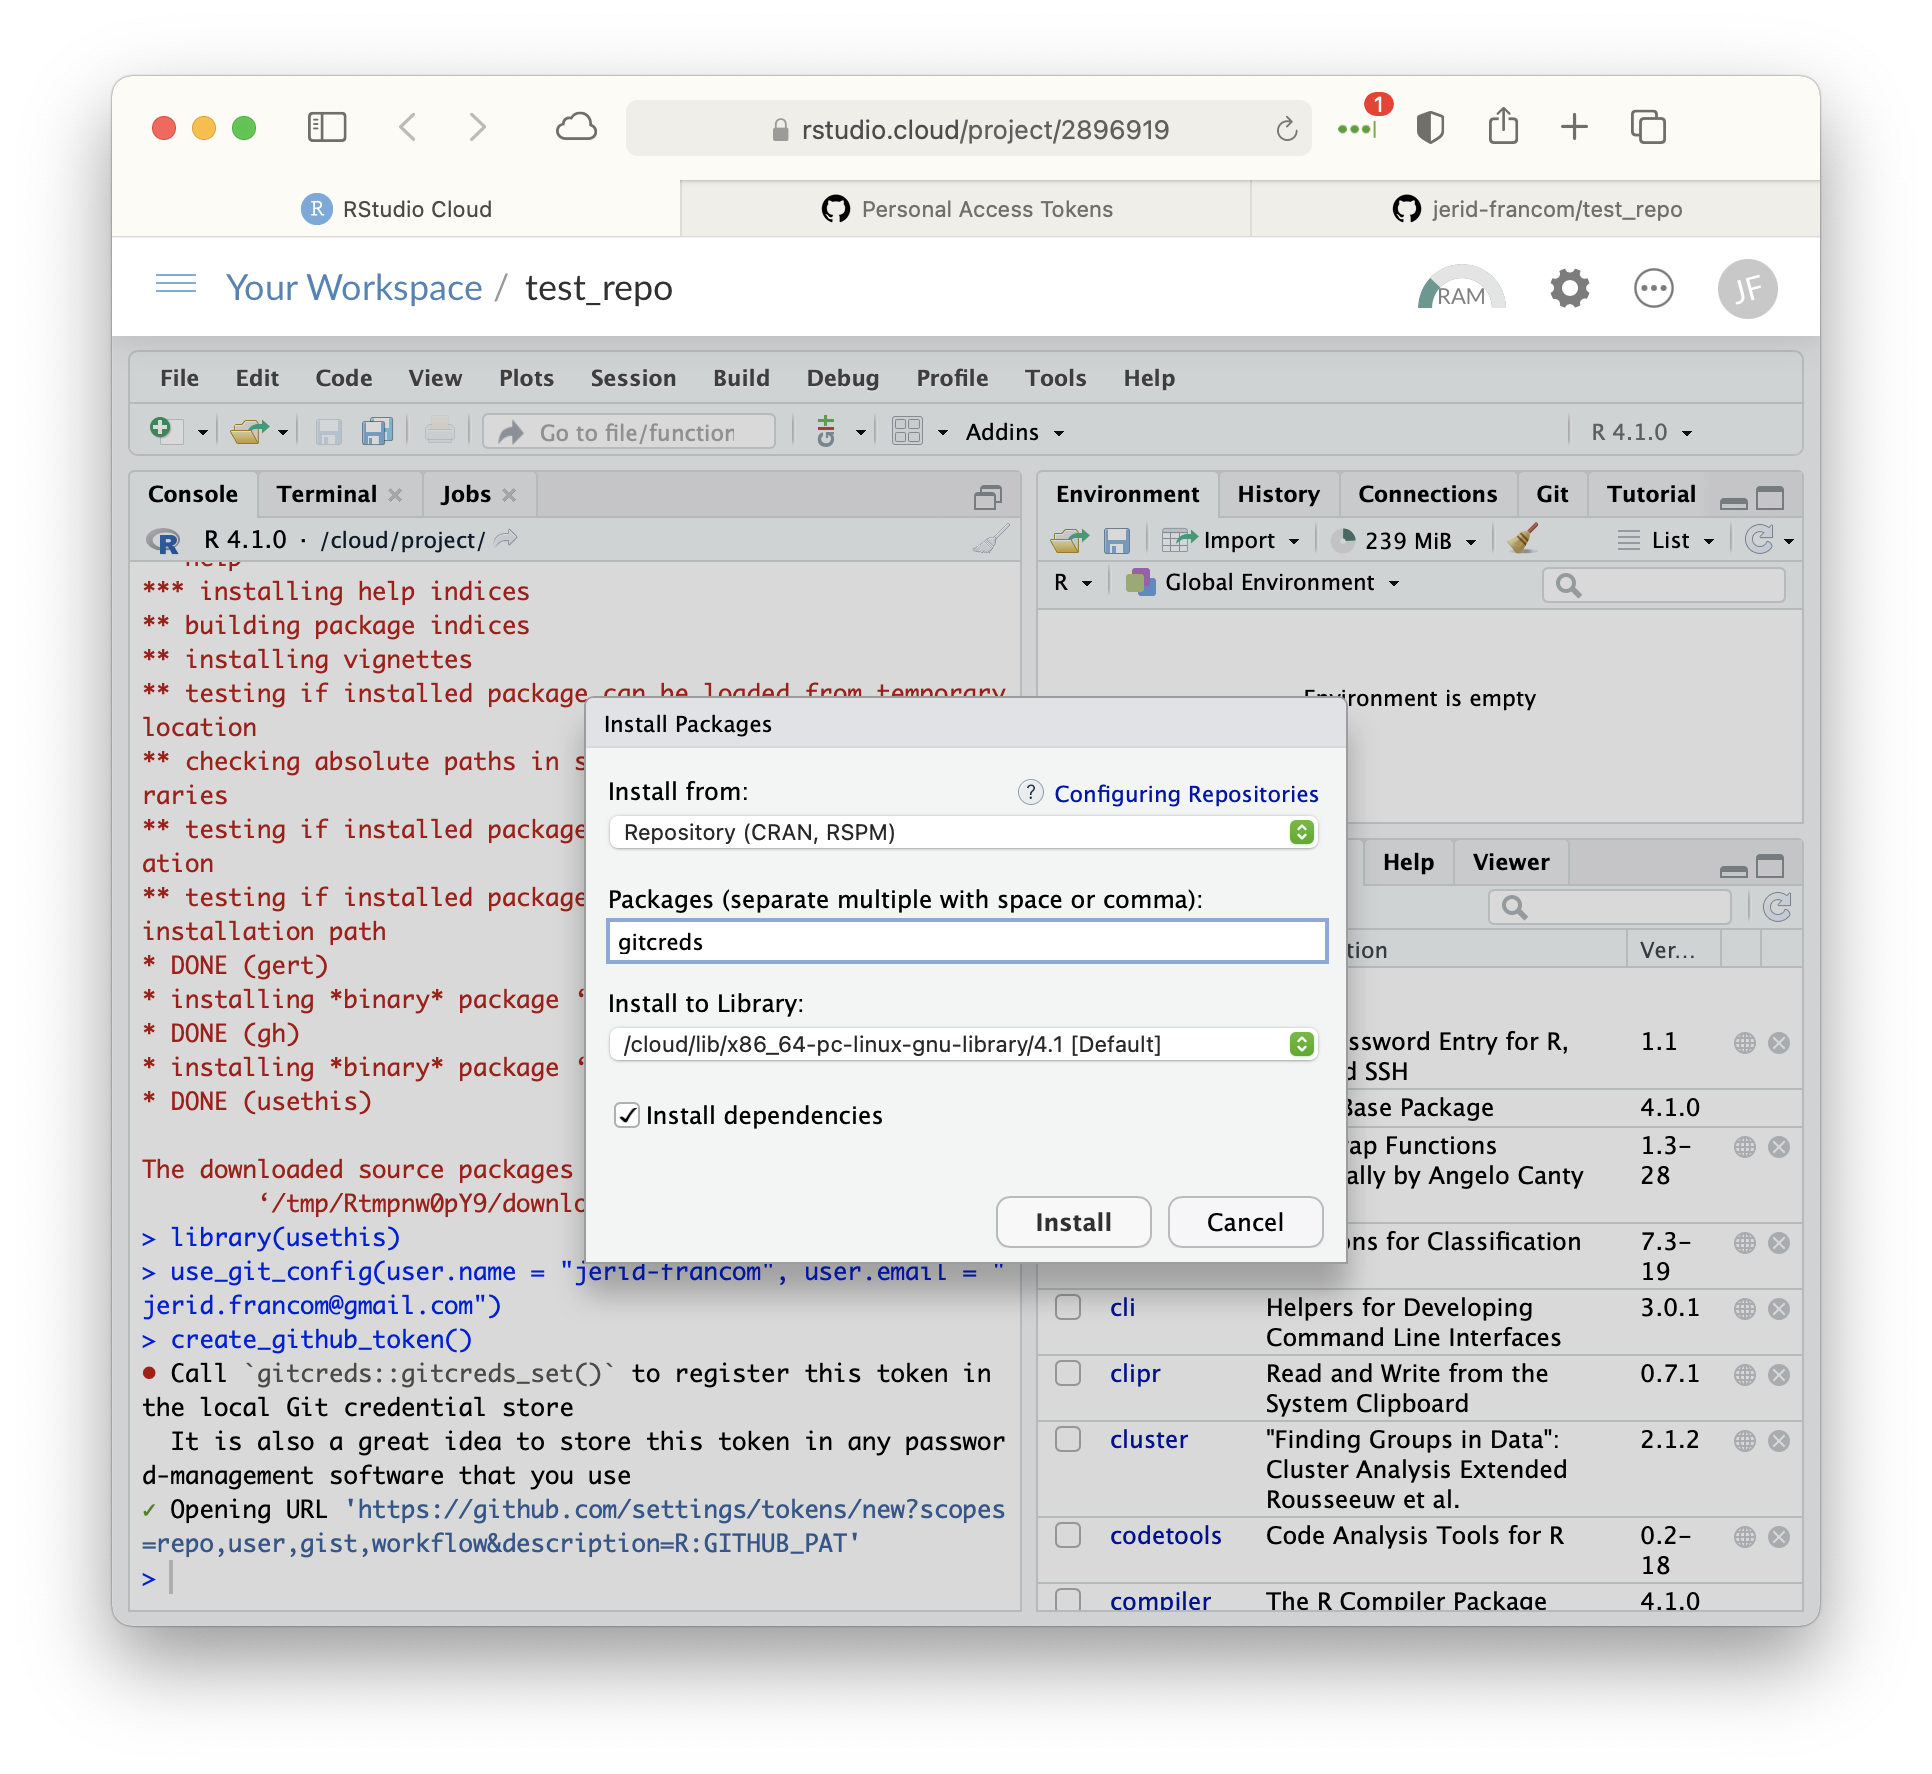
Now navigate back to RStudio Cloud and the test_repo project we’ve been working in. To add the PAT to our Git configuration we are going to install another R package that will make the process easy to do. As we did when installing usethis, navigate to the ‘Packages’ pane and click ‘Install’ enter gitcreds (Csárdi 2020) in the dialogue box and click ‘Install’ to install the package.
 Load the gitcreds package and run the
 gitcreds_set() function.
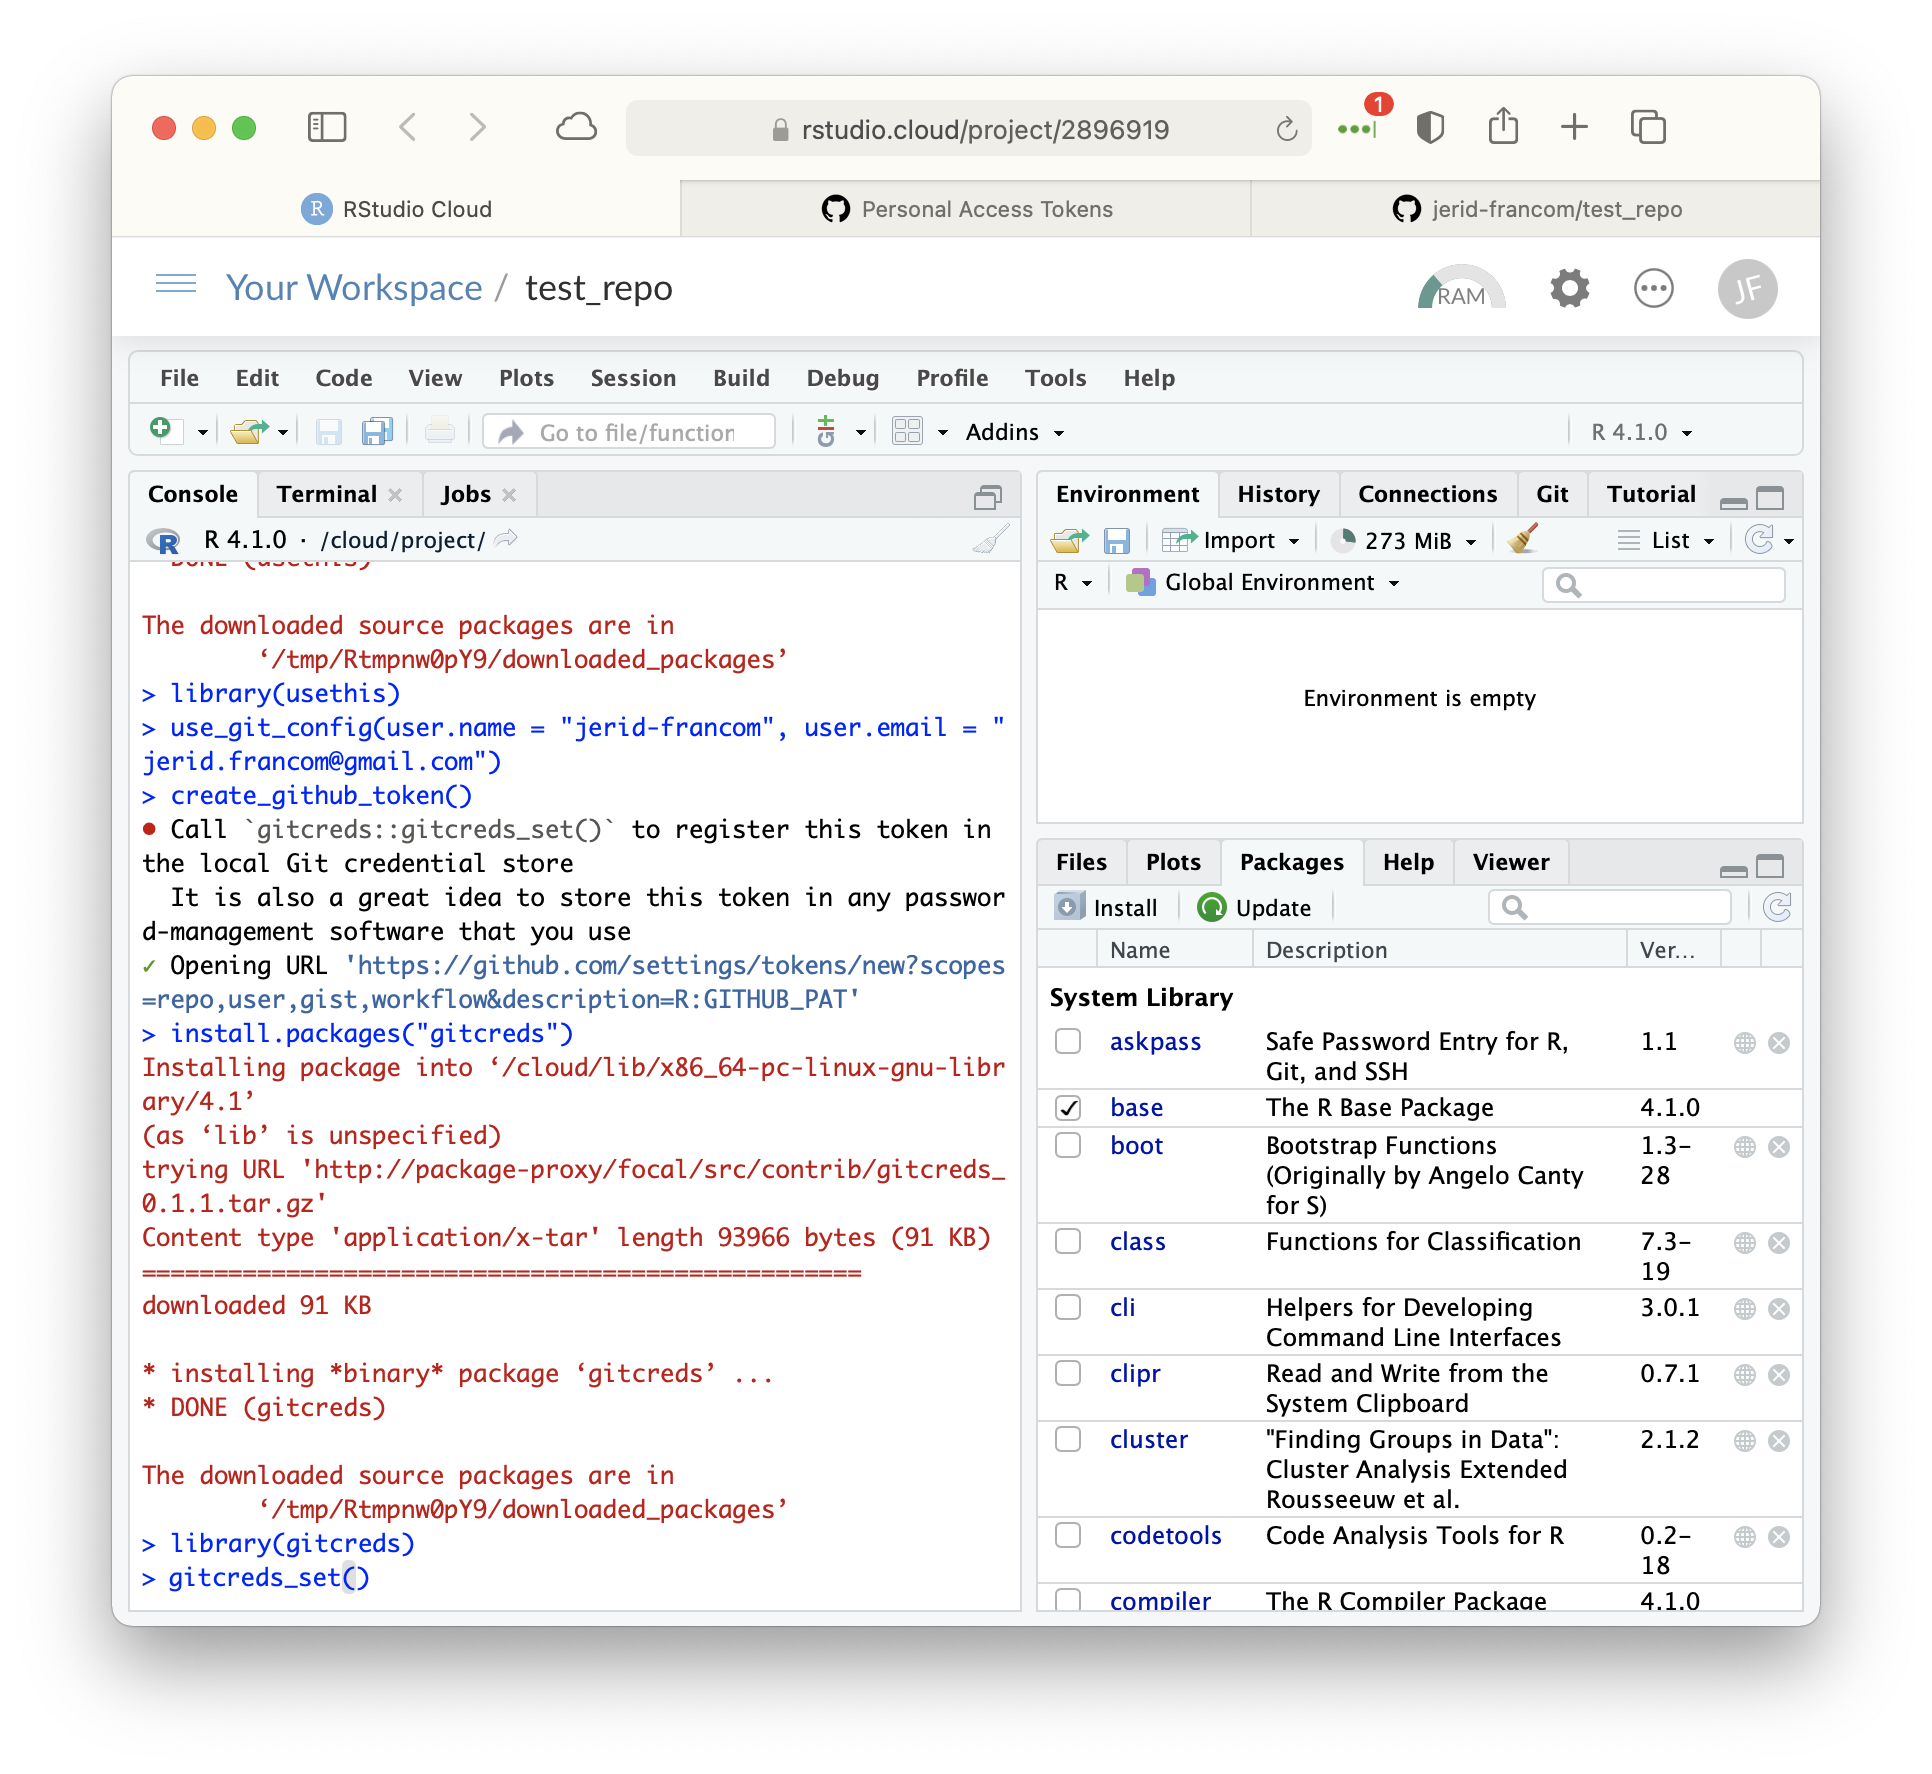 You will be prompted to enter your PAT. Return to the GitHub tab in your browser where the PAT is showing and copy that token. Return to RStudio Cloud and paste that PAT in at the ‘? Enter password or token’ prompt and hit ‘Return’ on your keyboard.
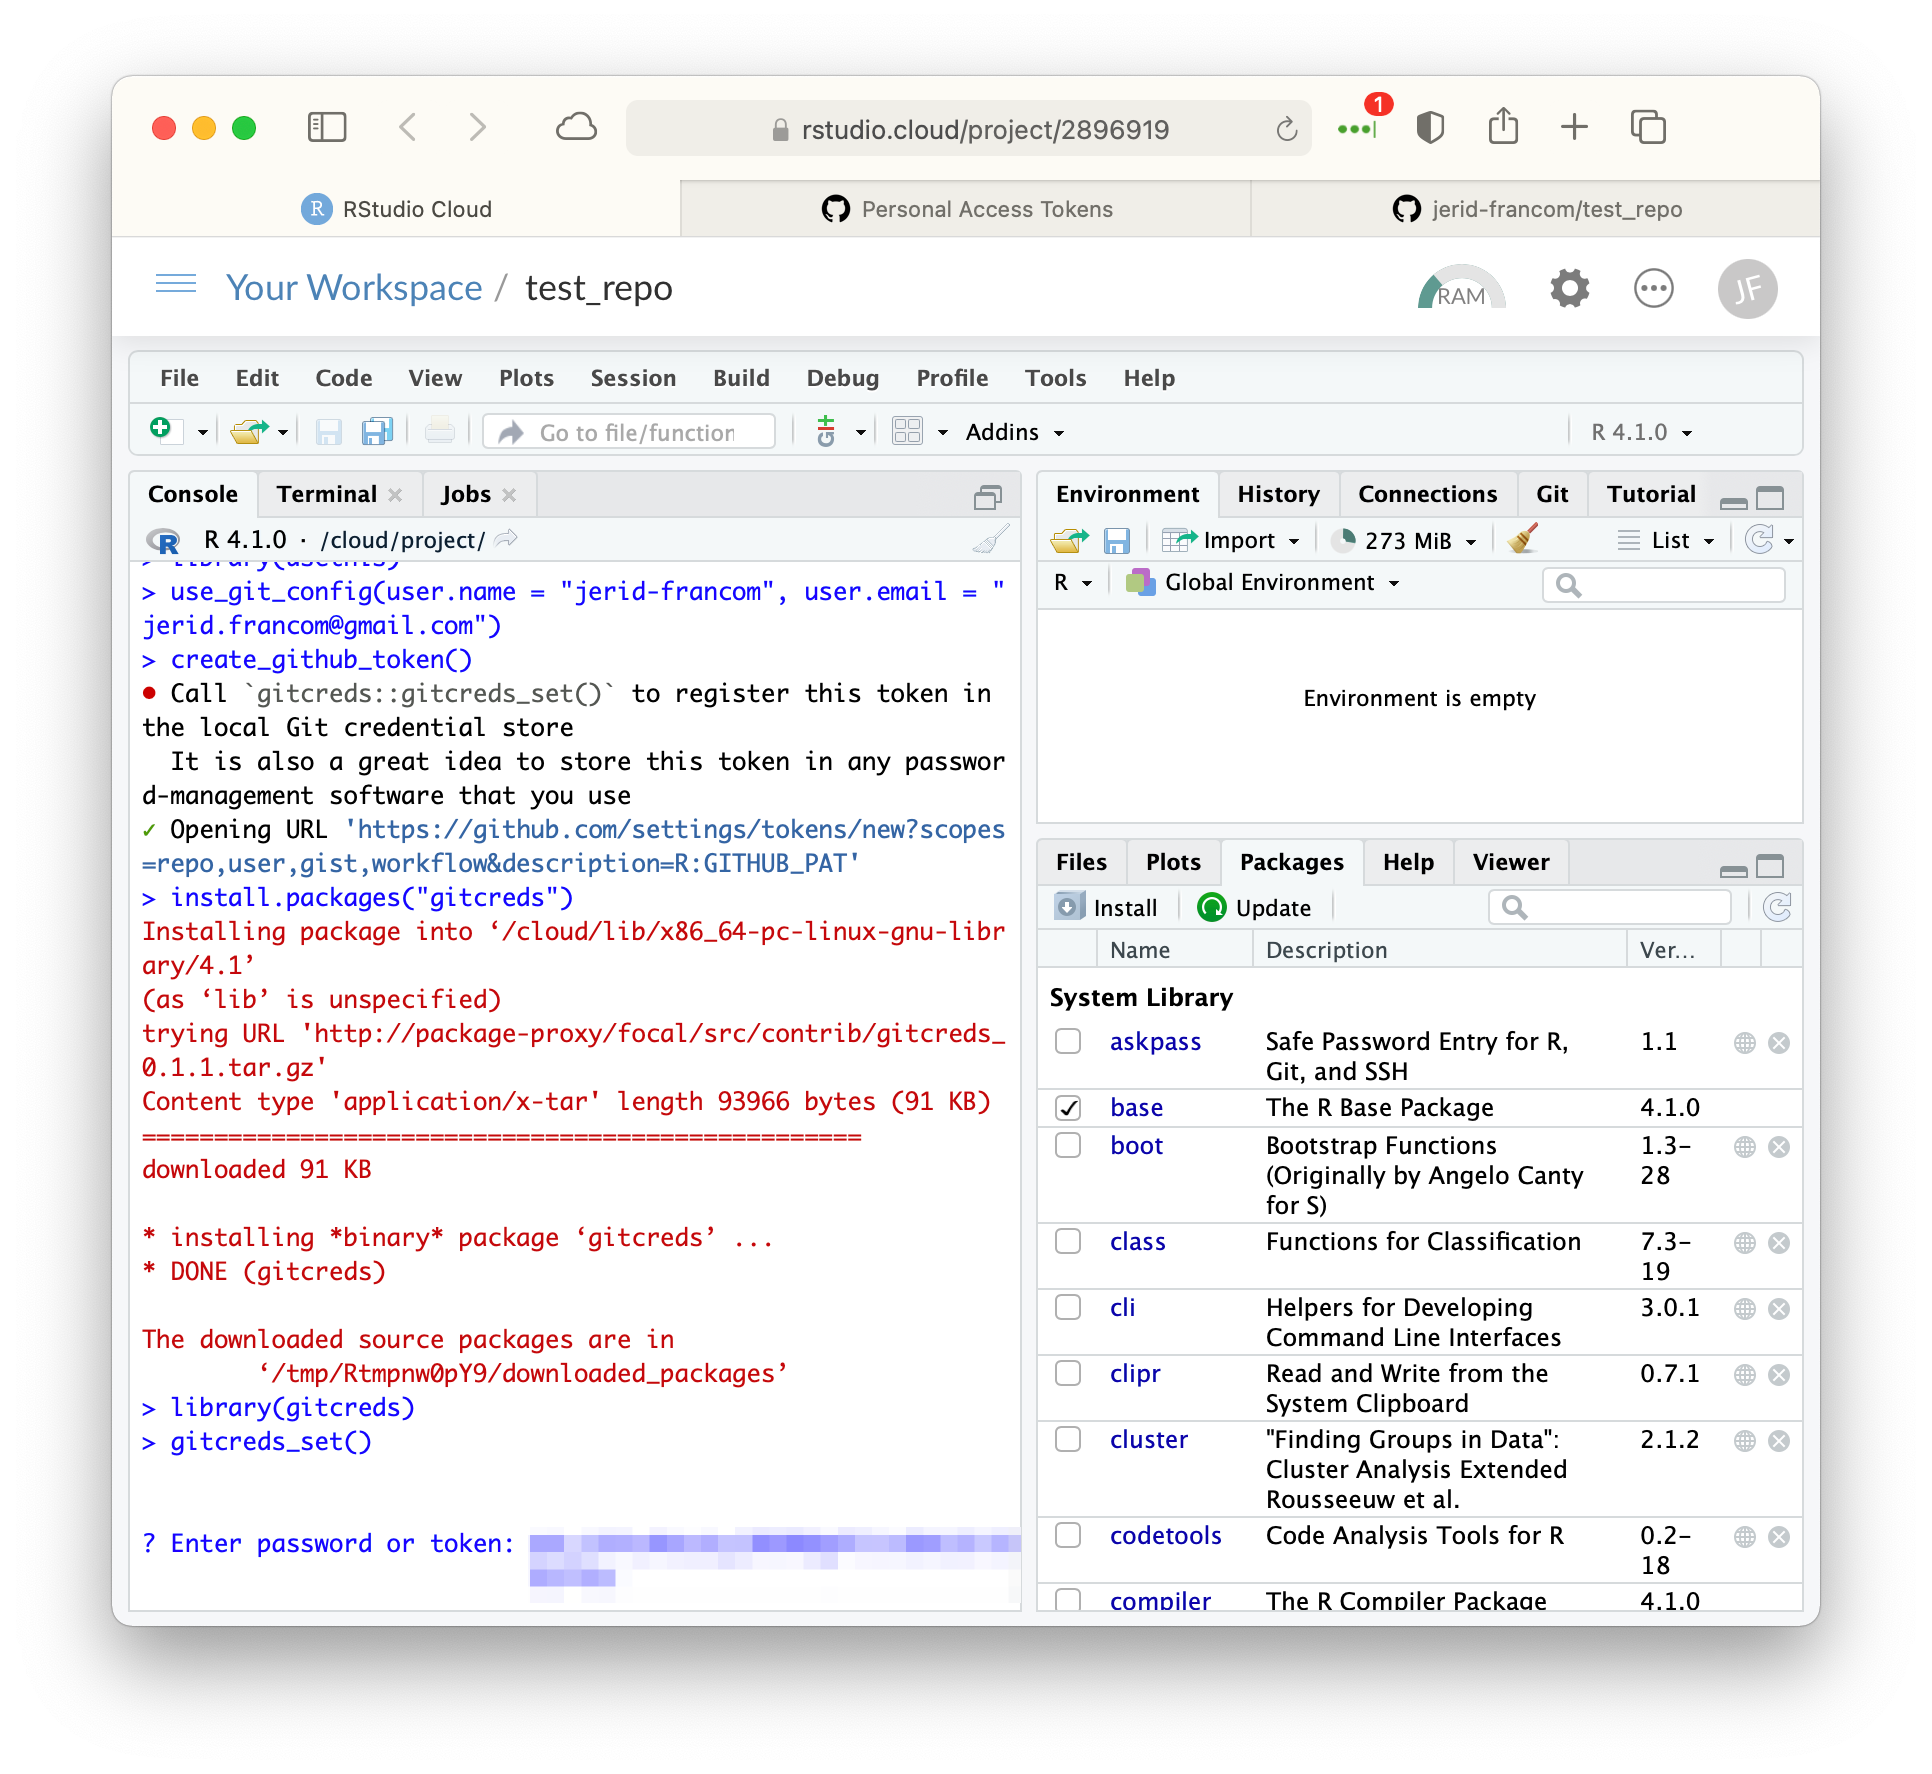 As your PAT is registered with Git on RStudio Cloud there will be some feedback given. To ensure that the PAT is registered, we can use the
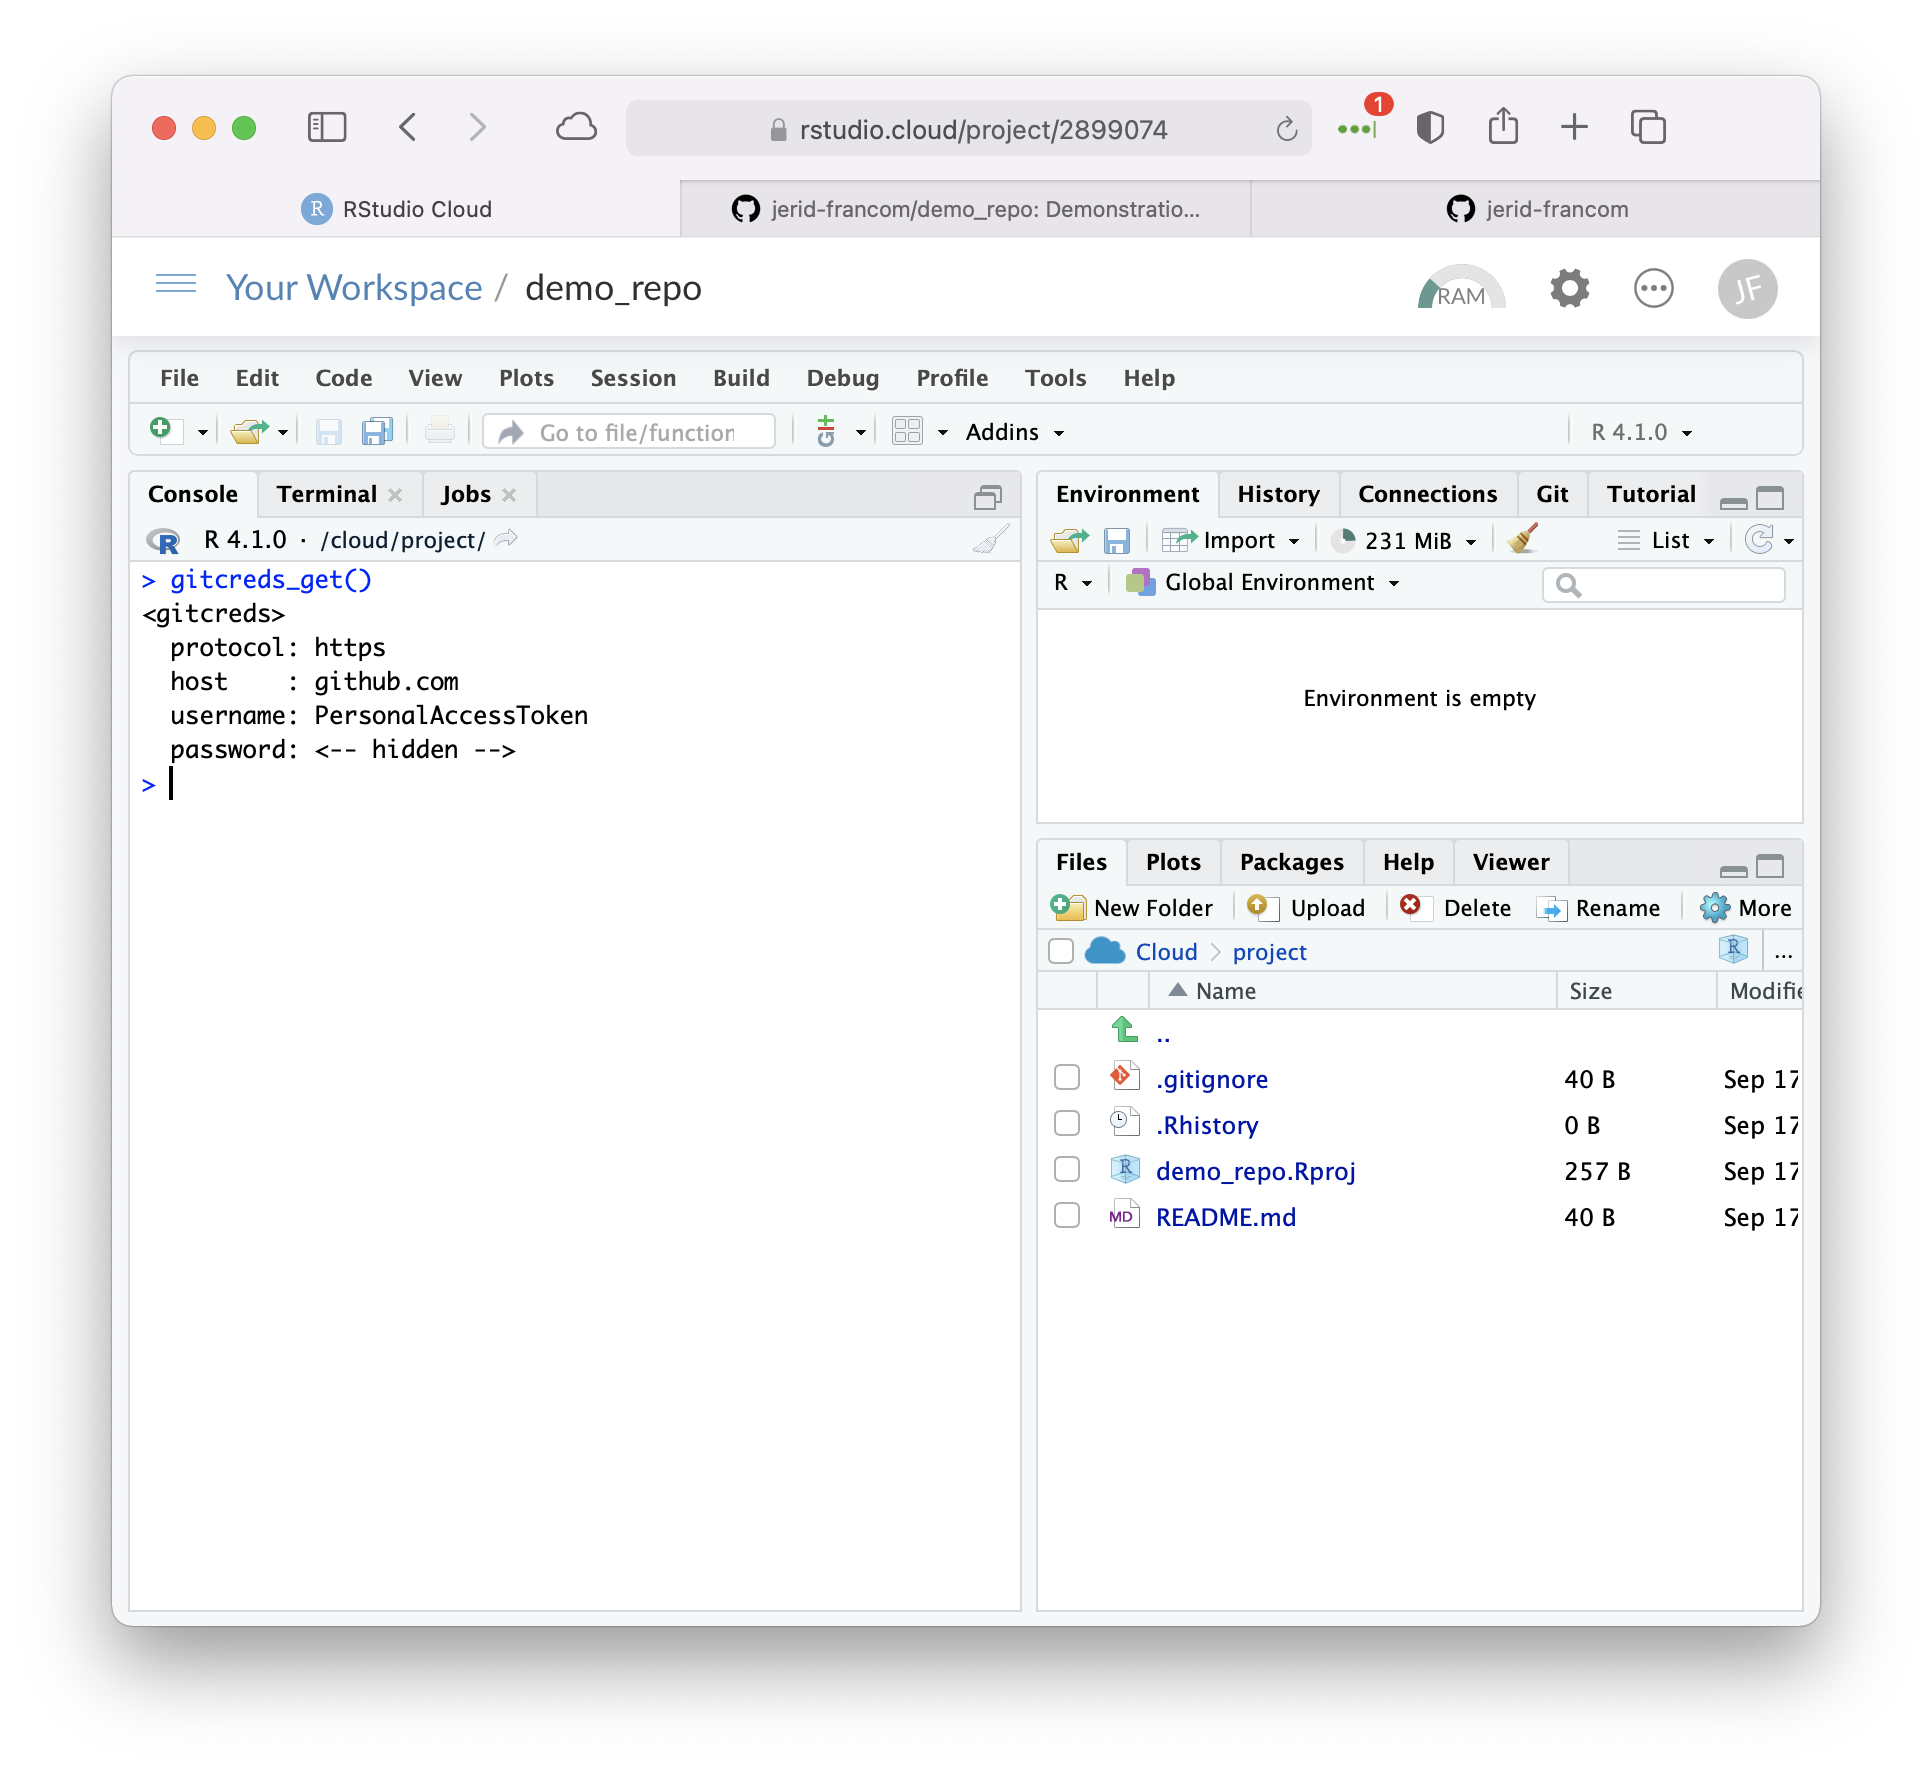
 gitcreds_get() function. If all is well you will see that the ‘username’ is ‘PersonalAccessToken’ and the ‘password’ is ‘<– hidden —>’.
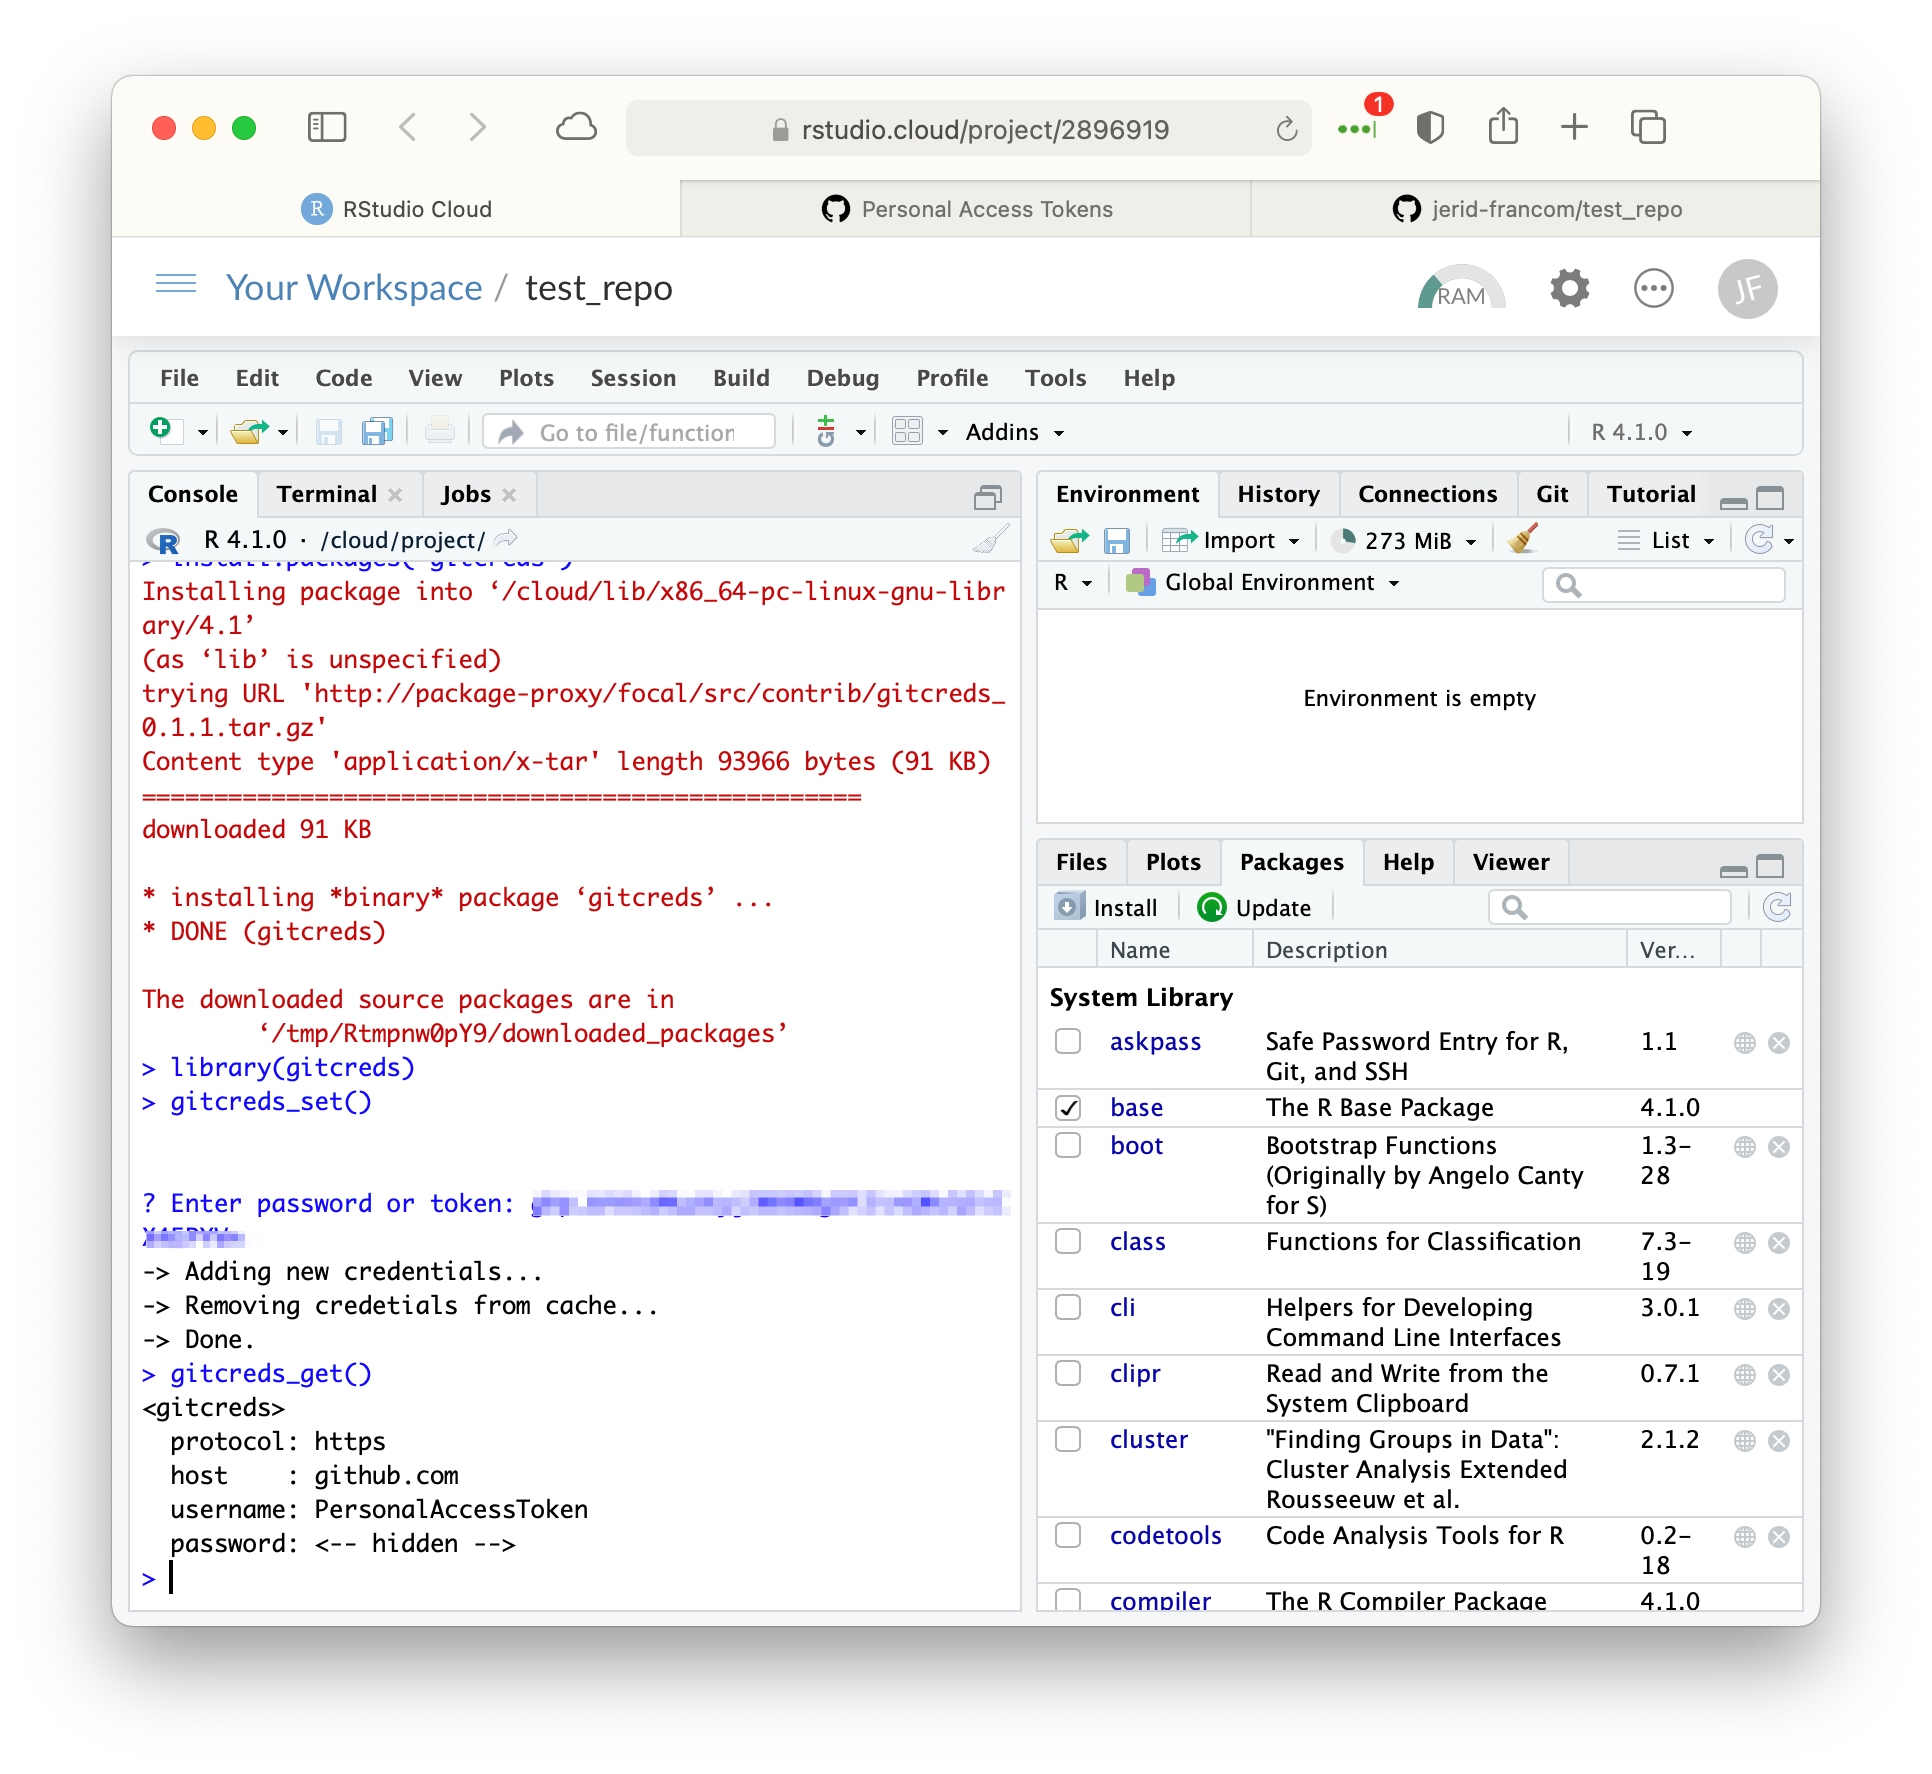 Now our Git configuration is setup to talk with Github!
Project workflow
Now that we’ve connected Git to a GitHub repository on RStudio Cloud we can now demonstrate how to use Git to log changes we make to our project and sync them back to GitHub.
Making changes
At this point Git is tracking any changes we make to this project. That includes changes to files, the addition of new files, and deletion of files.
For testing purposes, let’s open up the ‘README.md’ file in our project and make a simple change. In this case I just typed ‘Hello world!’.
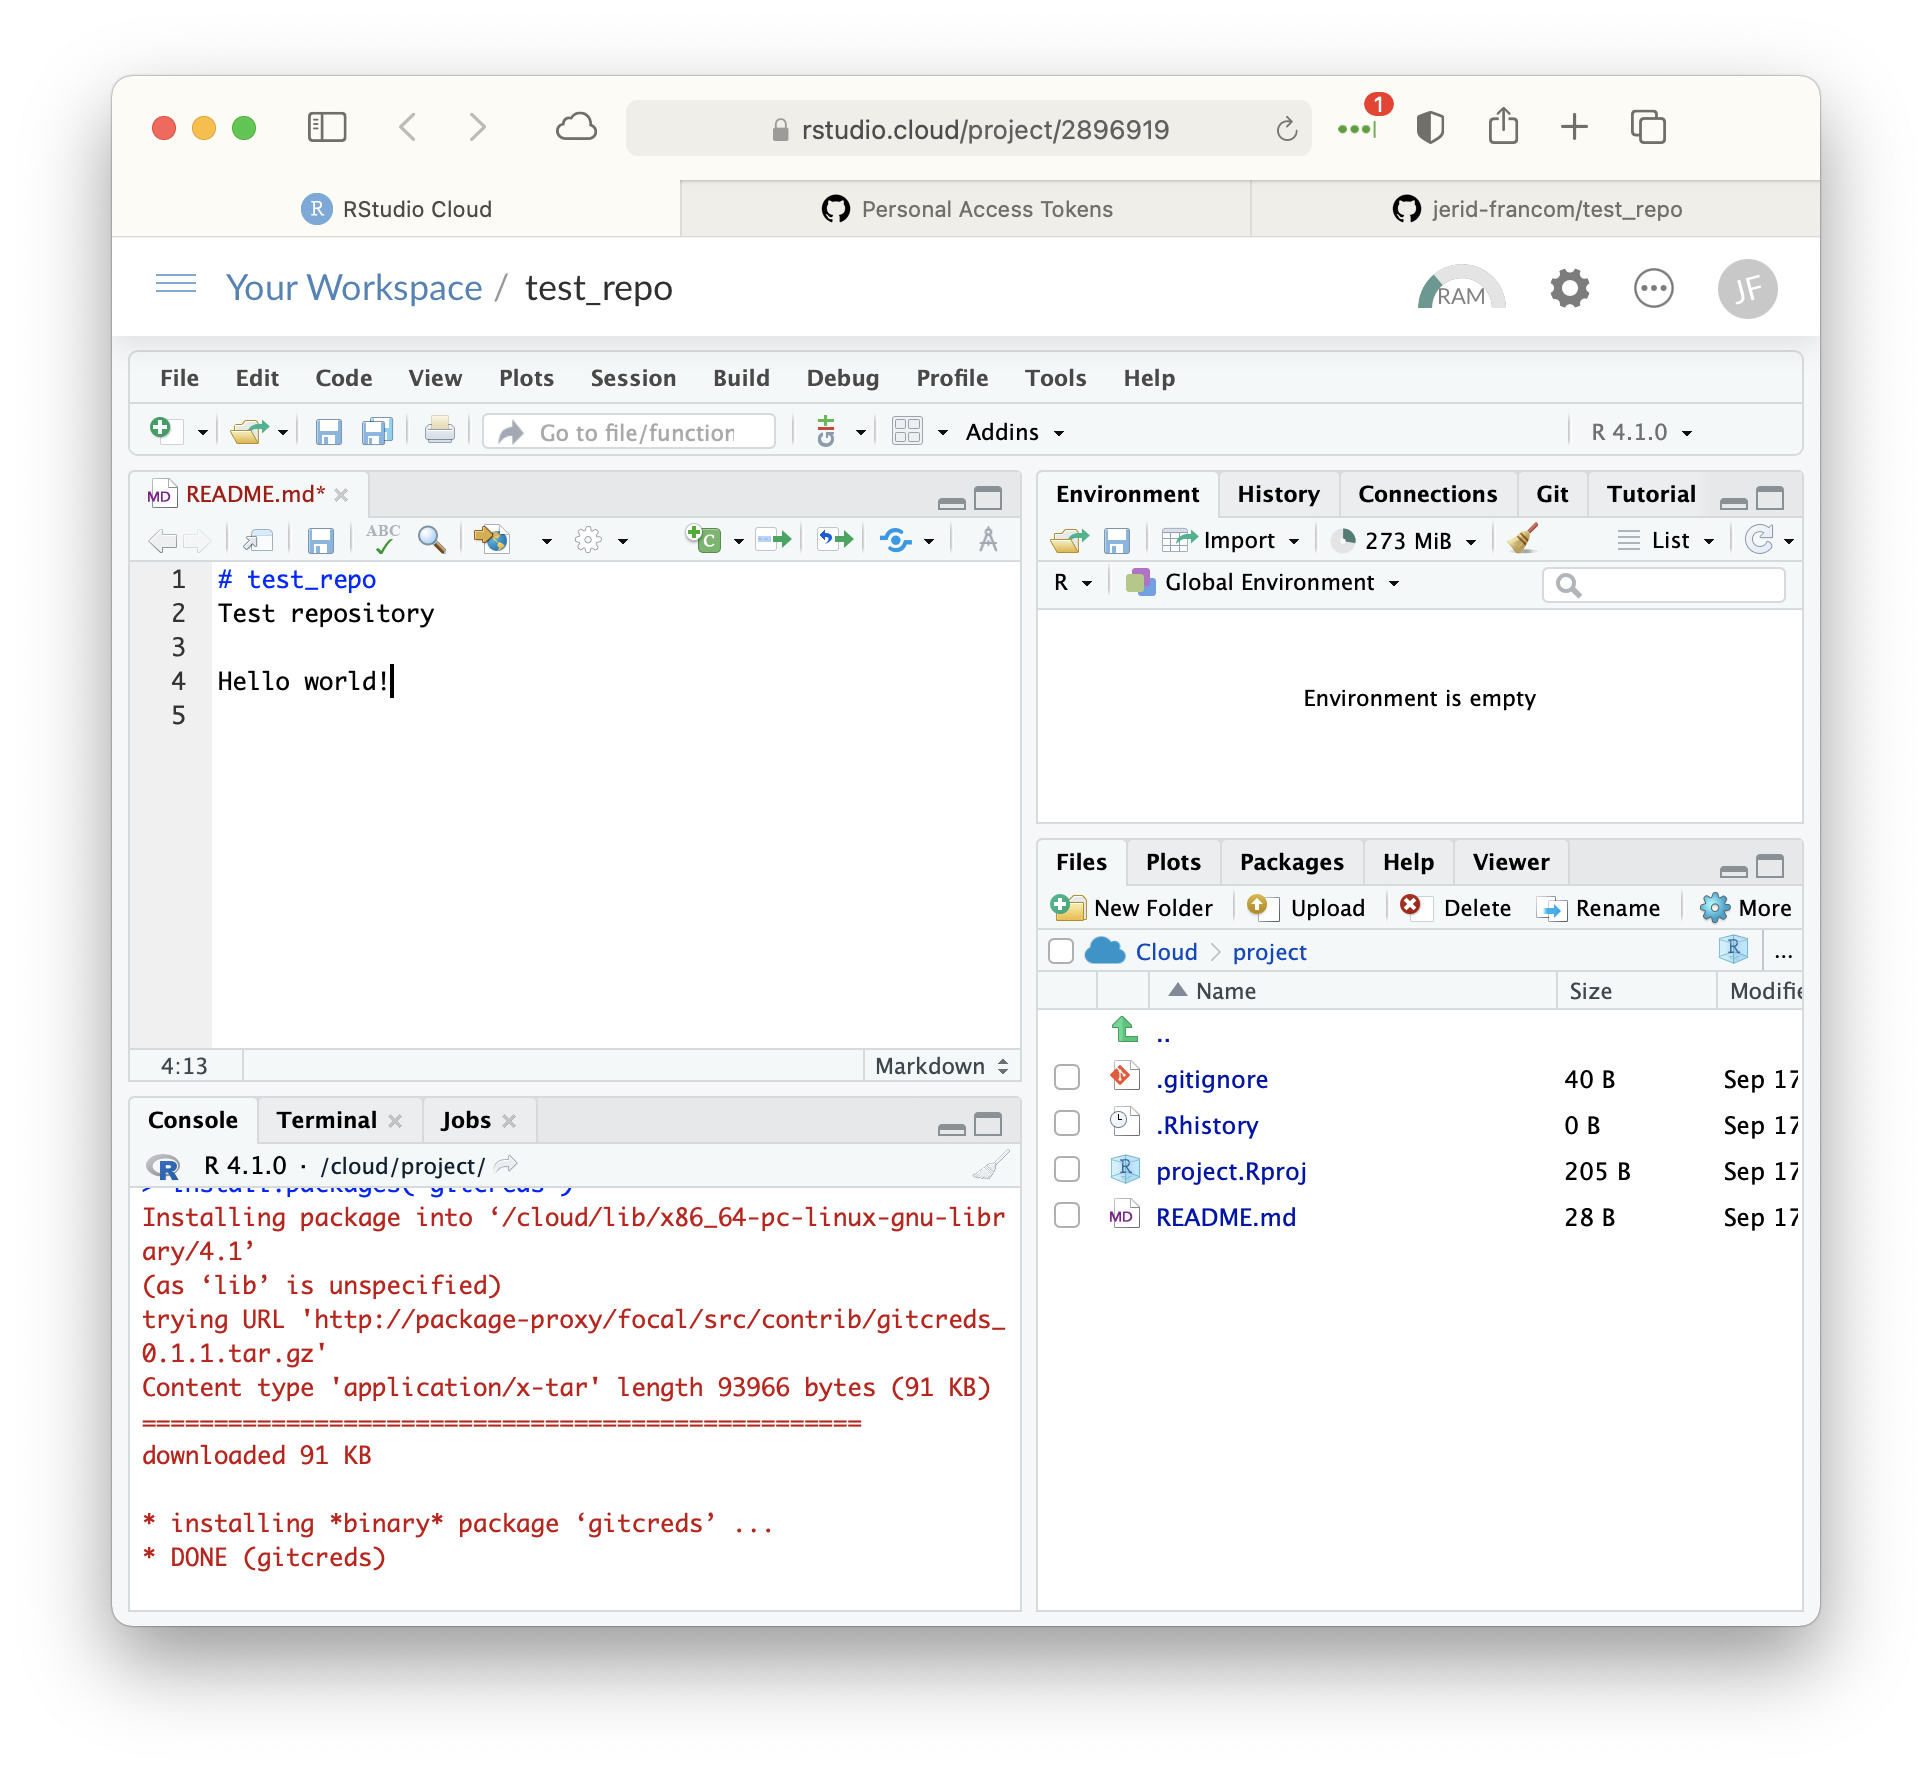 Now navigate to the ‘Terminal’ tab and enter the command
 git status.
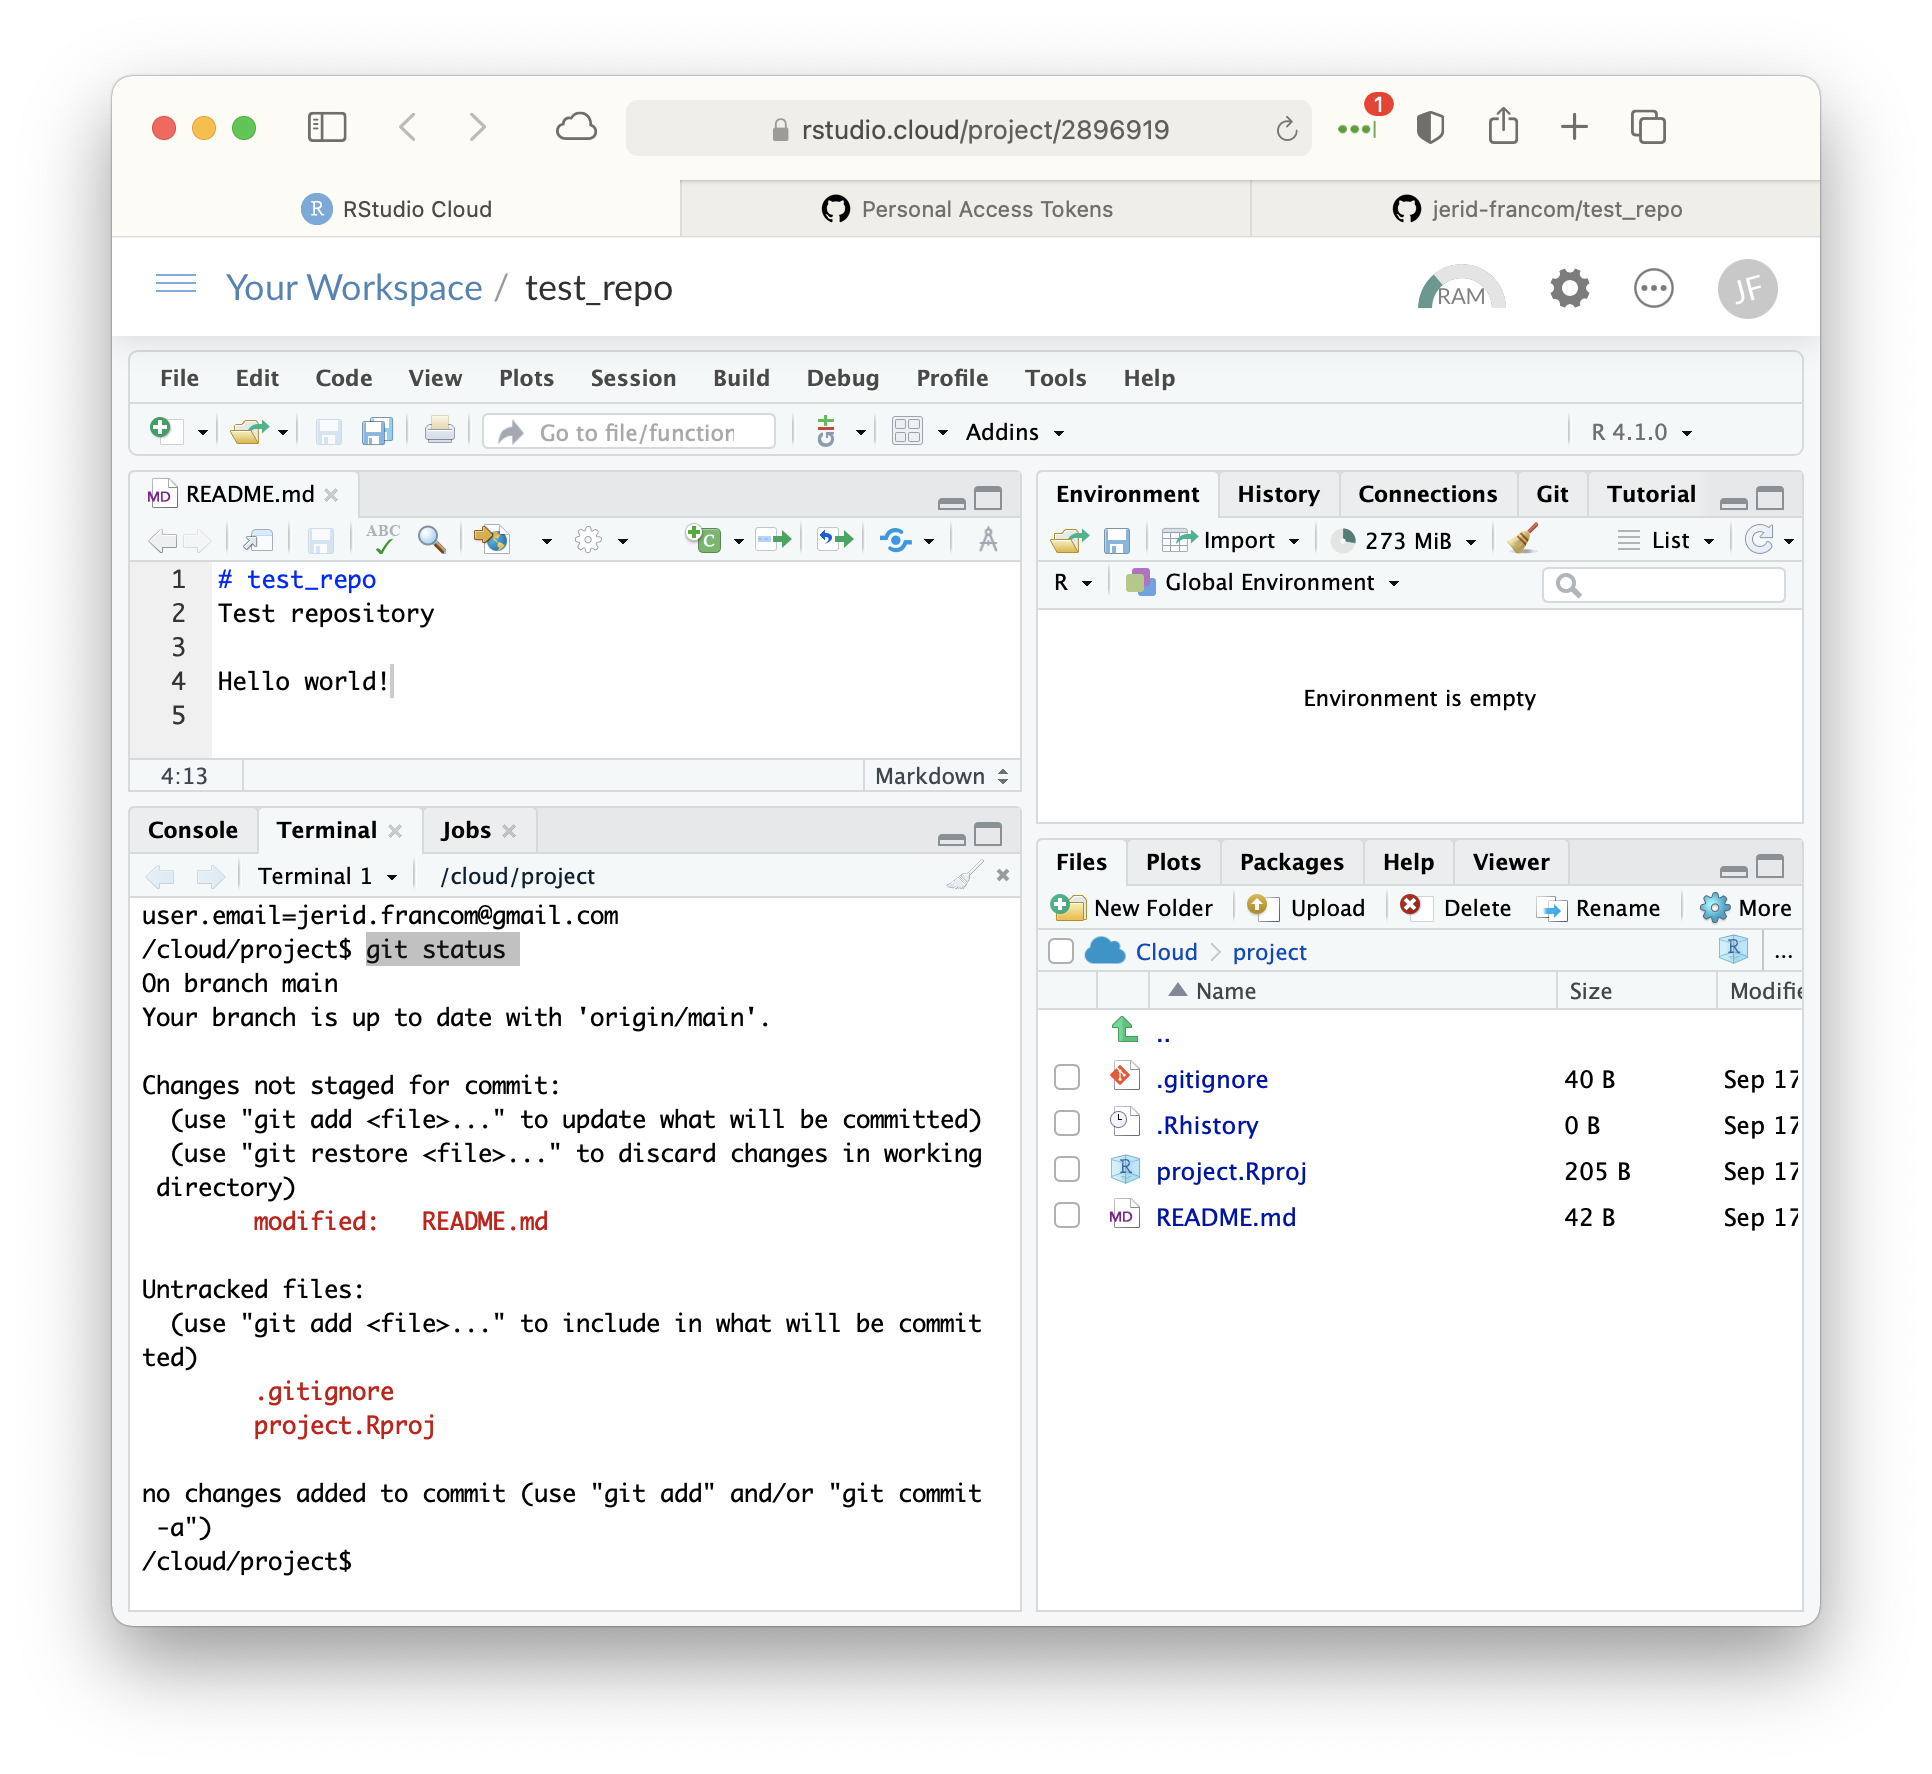 This will return the current status of the files that Git is tracking. Skipping over some of the details in the output, let’s focus on a couple things. First we see that the ‘README.md’ file is listed as ‘modified’ (in red). That makes sense, we’ve just added the ‘Hello world!’ text to this file. The ‘README.md’ file on GitHub no longer is up to date with the current status of the file in our RStudio Cloud project. Second Git is paying attention to new files as well. We see that the files ‘.gitignore’ and ‘project.Rproj’ are not being tracked (they also appear in red).
Adding and committing changes
To add the untracked files to the tracked status we run the git add -A command in the ‘Terminal’ pane. This “stages” these files as part of the Git registry. The next step is to “commit” these changed and new files to the Git log by running git commit -m "<some informative message.>". The message I gave here is basic, just a note to state that this is the first commit of the project.
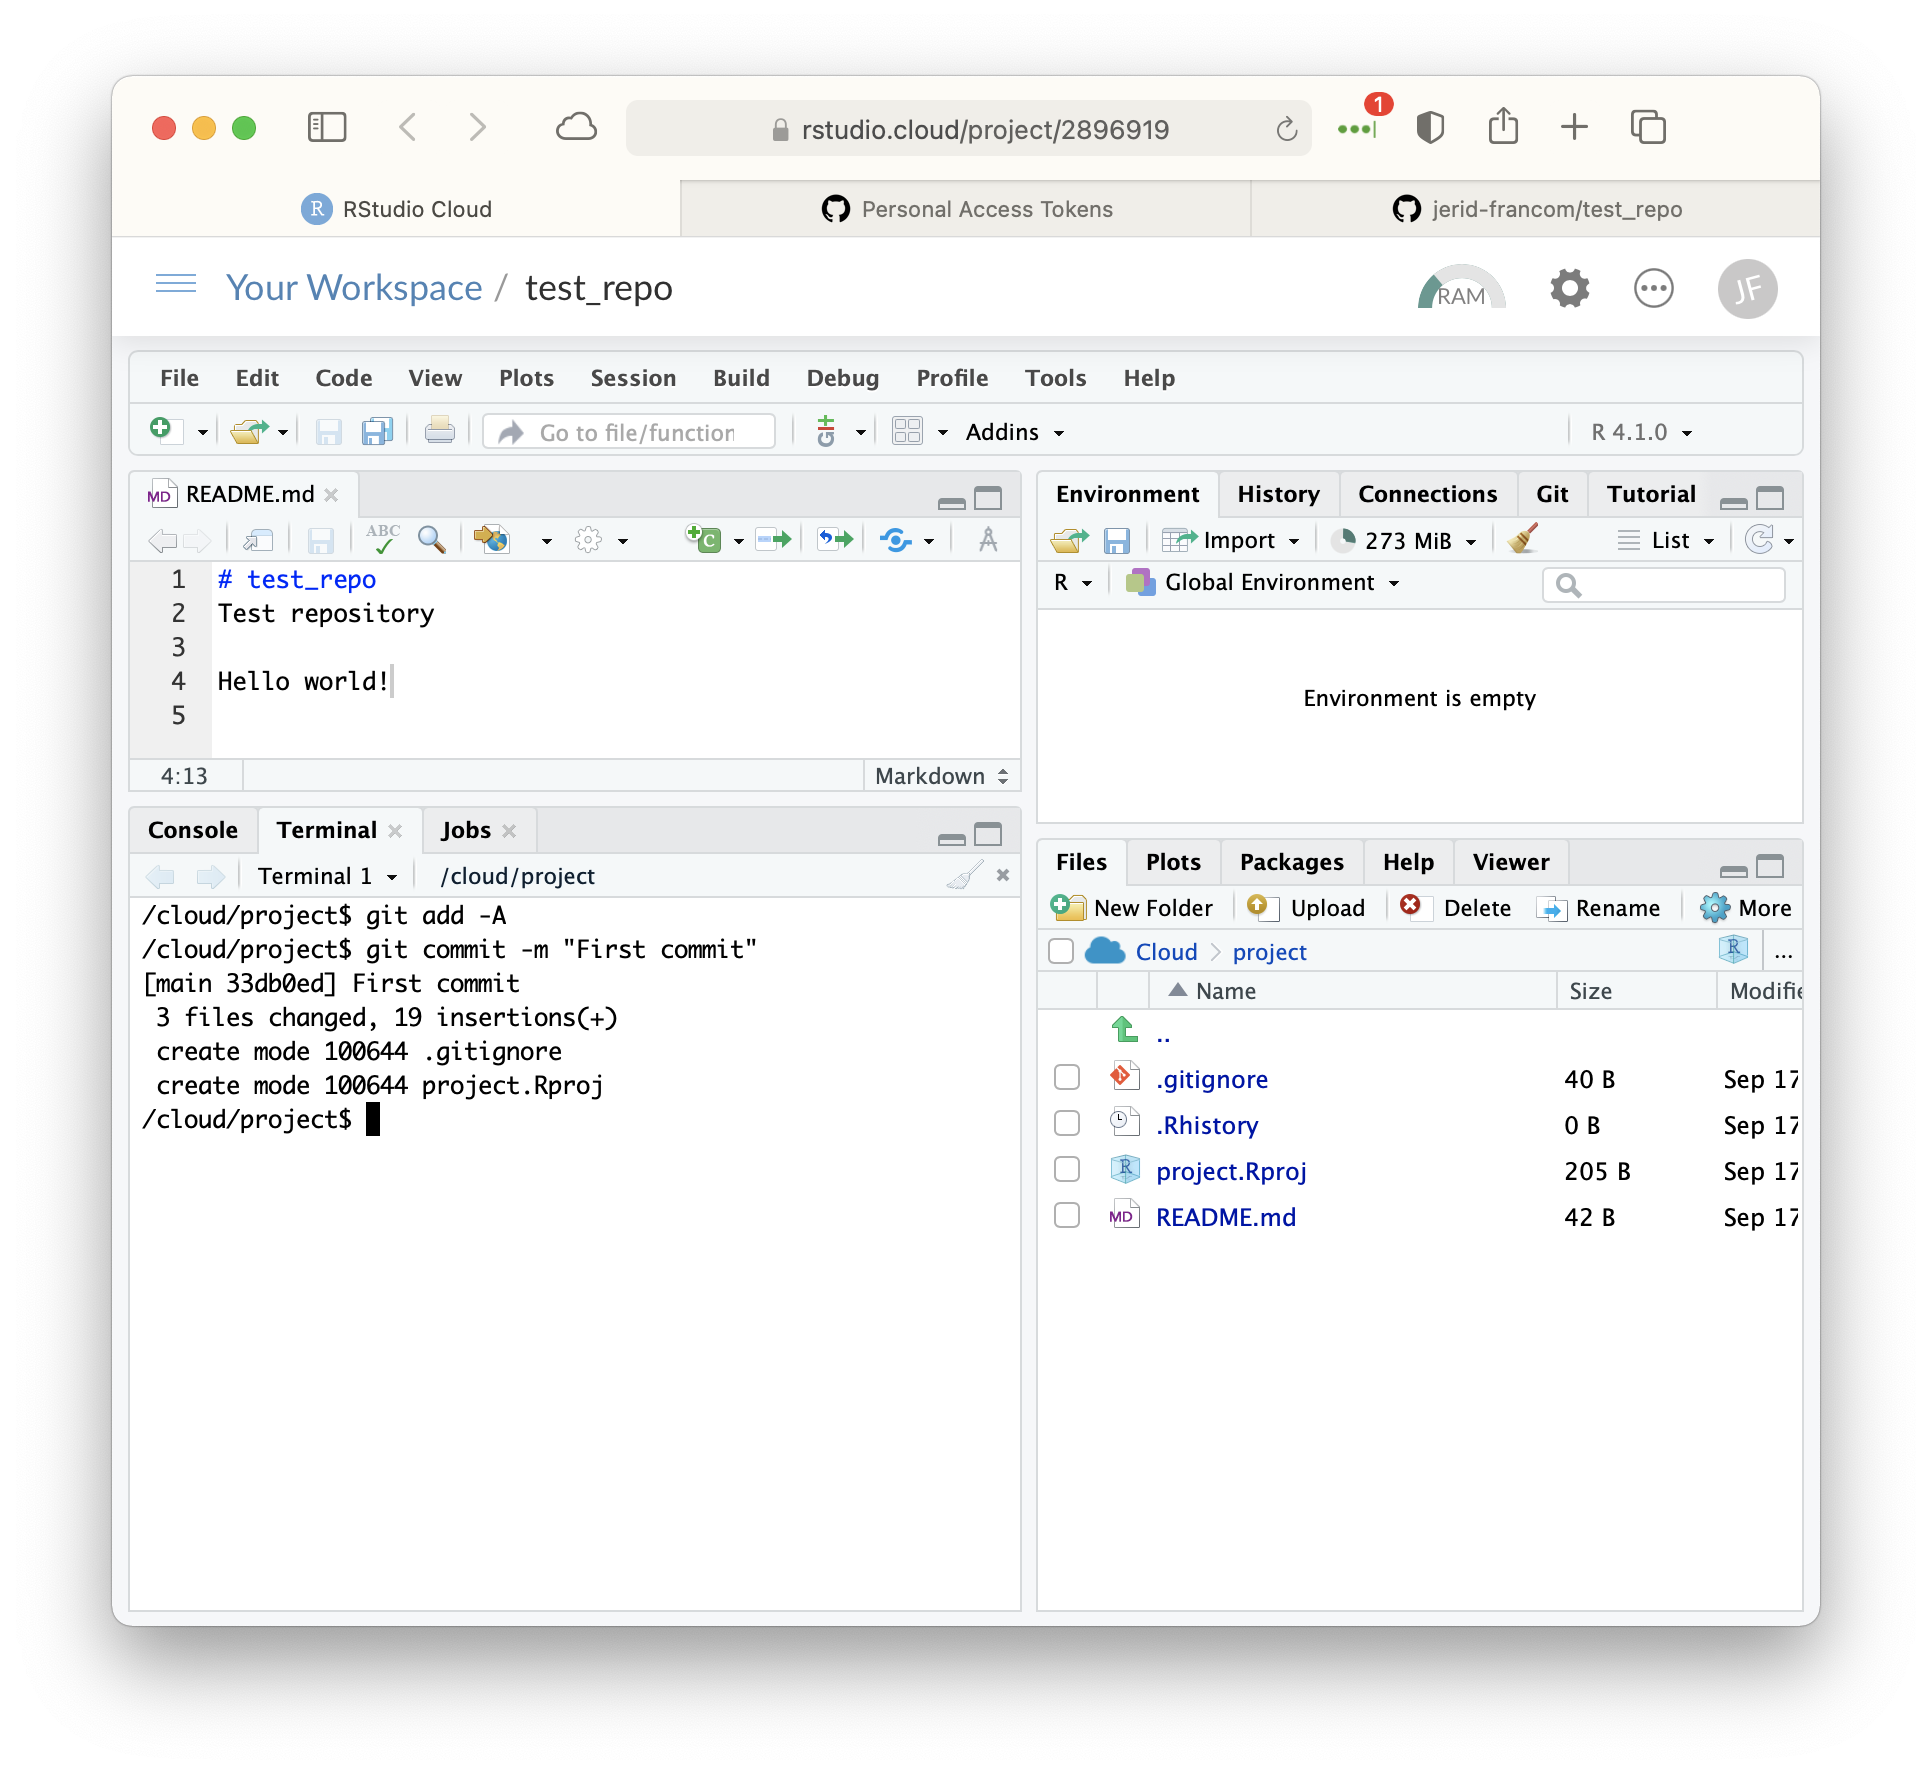
The log is basically a list of snapshots of the project that segment saved points, or “lines in the sand”. Each commit snapshot requires a brief message to describe what has been done. These commit snapshots can be helpful if we would like to revert the project back to the status of the project any one of these points. For now, however, it is key to note that we cannot send GitHub our changes unless we have committed them in Git.
Pushing changes to GitHub
So how do we send the committed changes to GitHub? Well, we ‘push’ them to GitHub with the git push command.
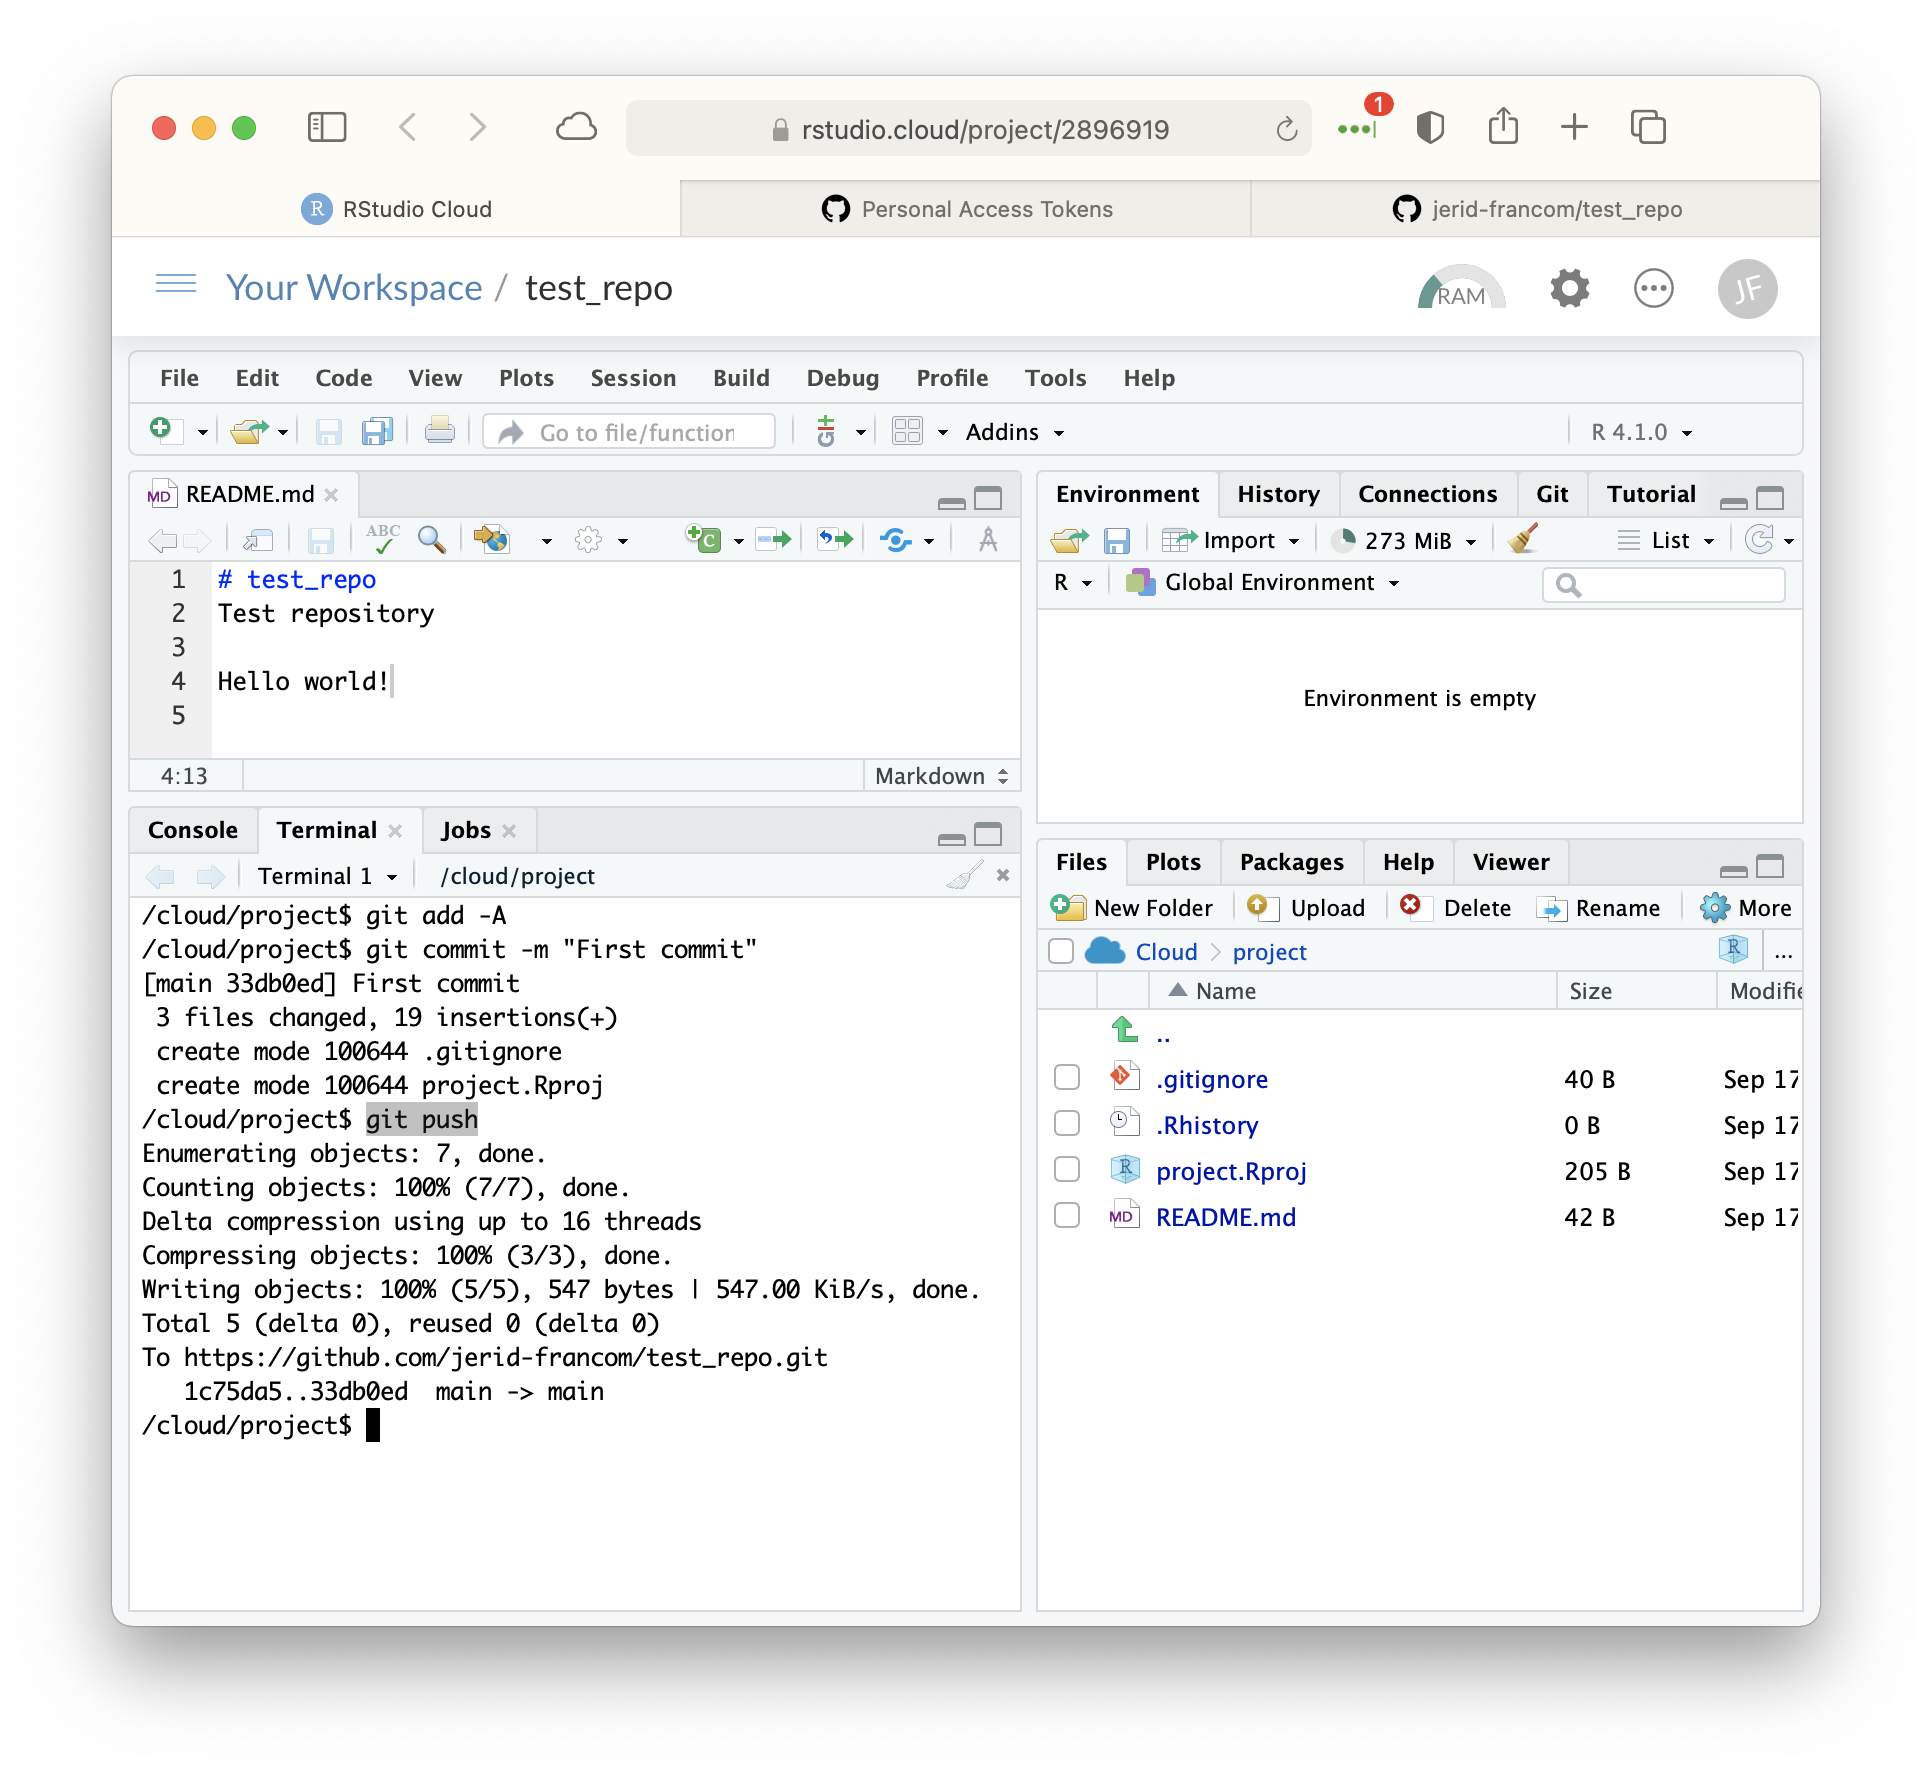 At this point the changes we made, the files we added, and the registry of commits we have created is synced with the GitHub repository. Navigate back to the
 test_repo repository page on GitHub and refresh the browser page. You will now see the updates to the project reflected on GitHub.
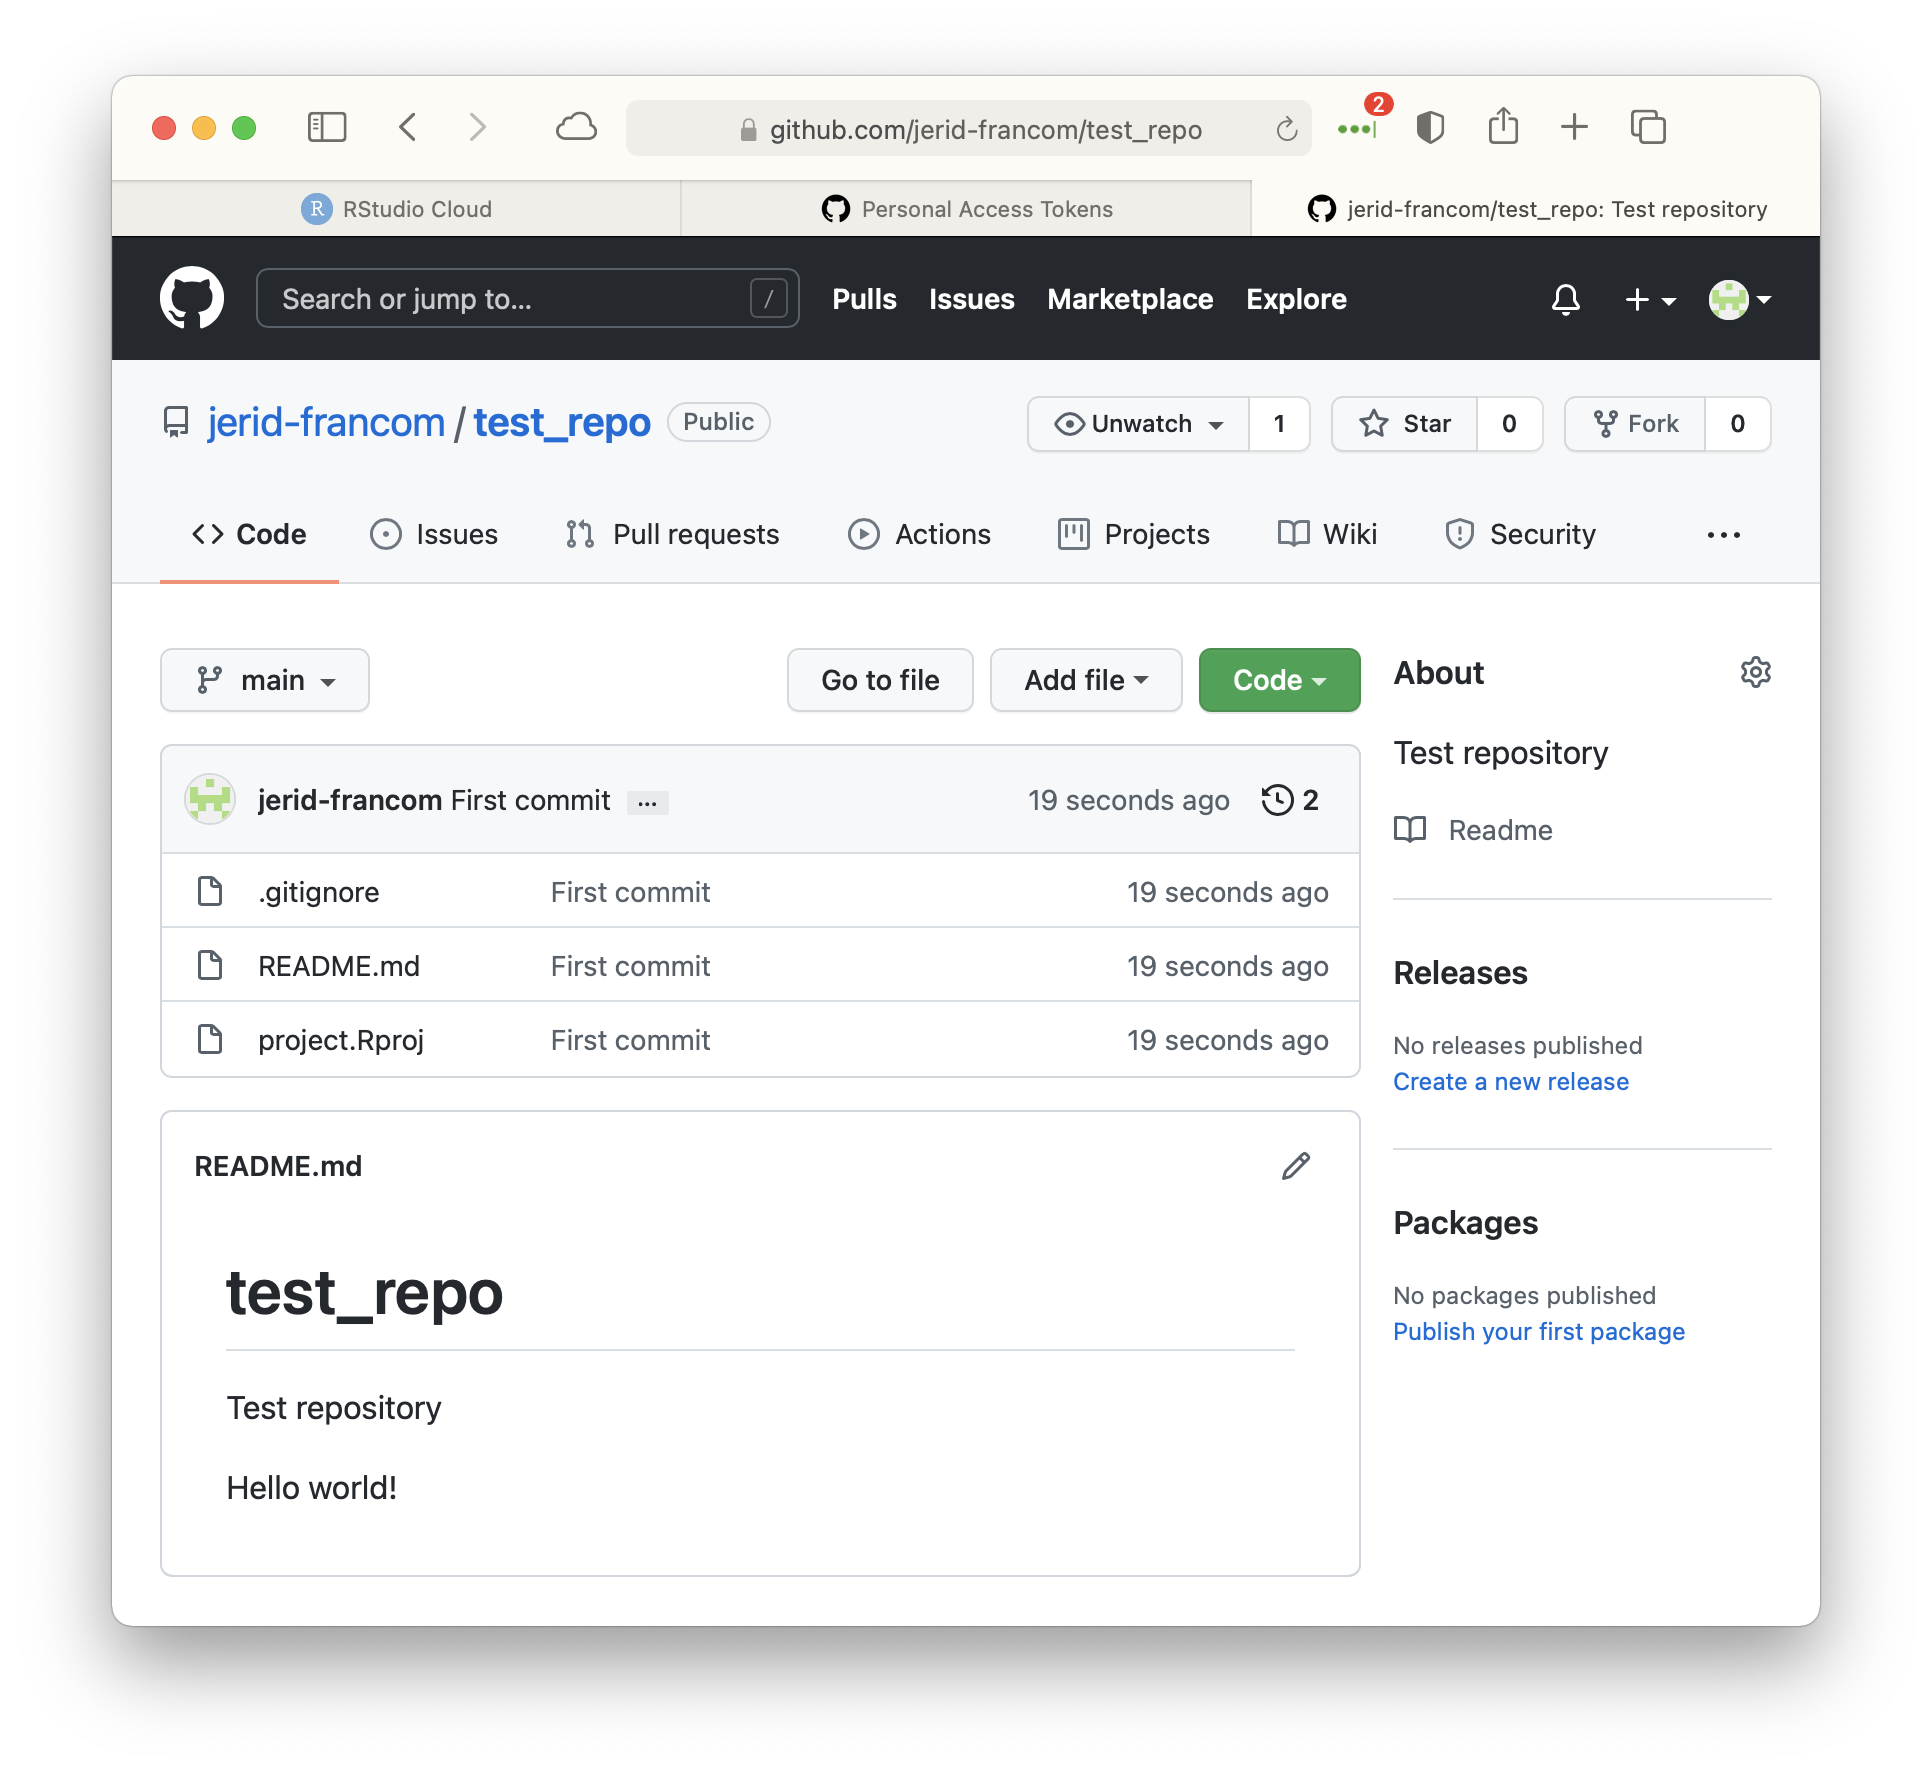
We can now see the updates, the message(s) associated with our commits, and the time since the commit was pushed to GitHub.
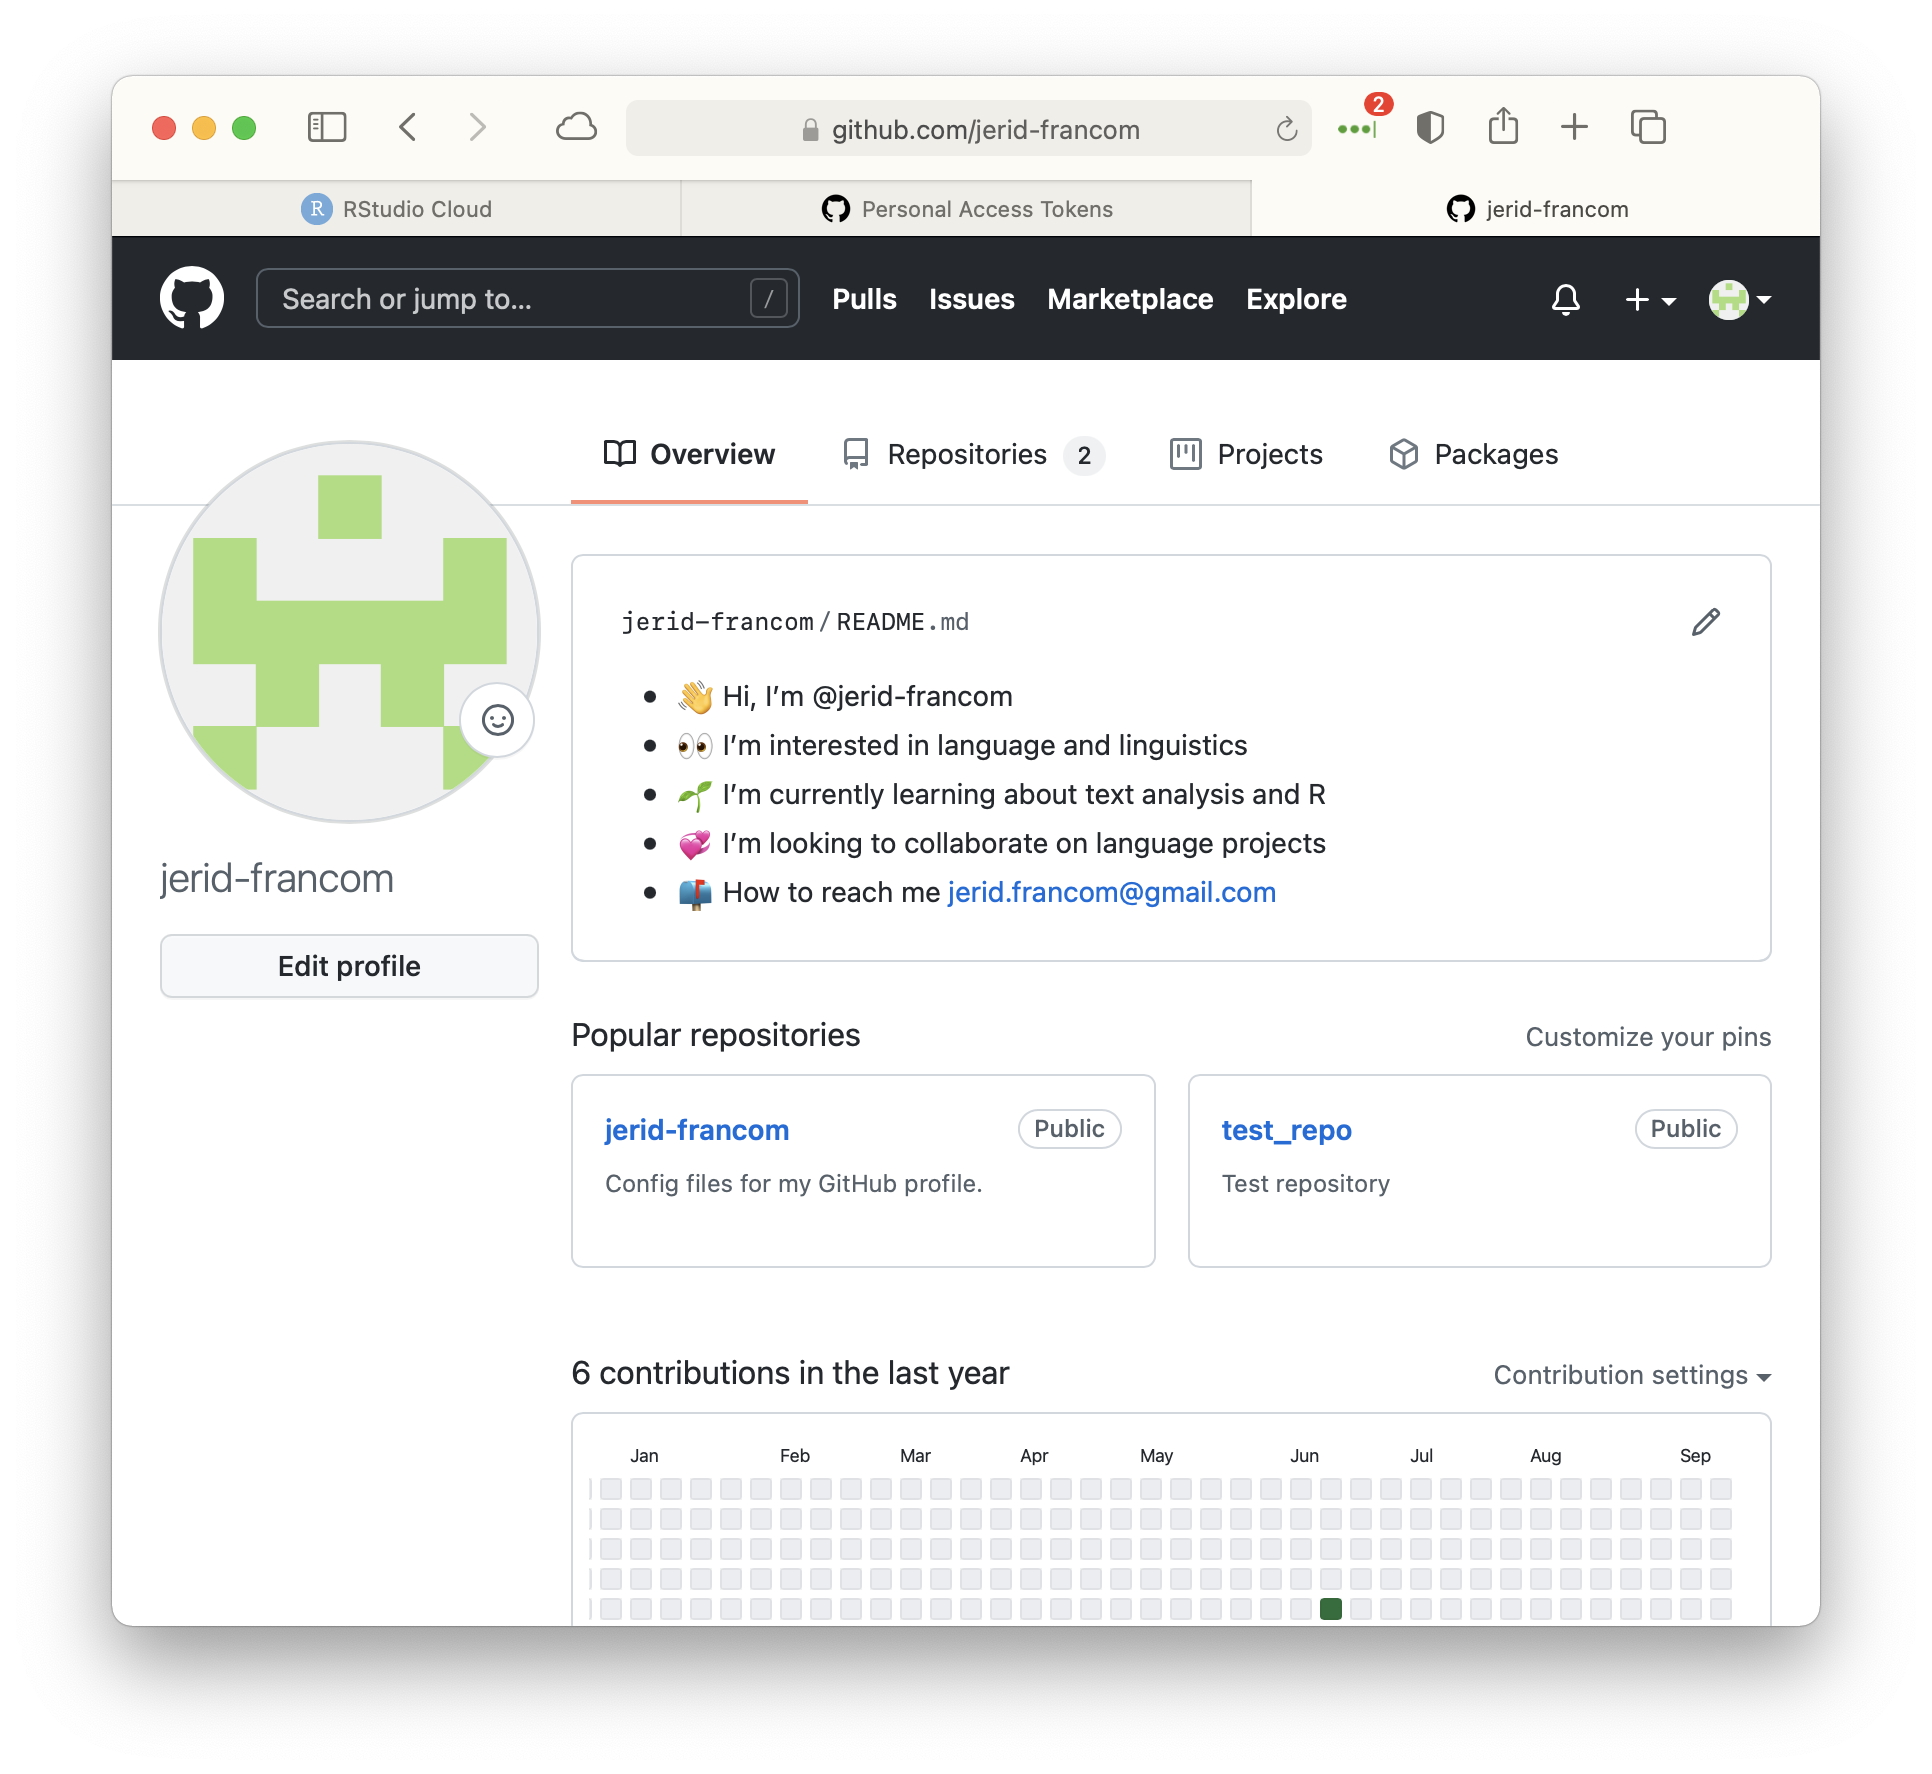
If we now navigate to the main page of our GitHub profile, we will see that our repository is among this list of repositories associated with our GitHub account.
Fork a repository
You can find a project and create a copy of this project on your own GitHub account. This process is known as ‘forking’. Here you can find a demonstration repository (demo_repo) I’ve created, seen below.
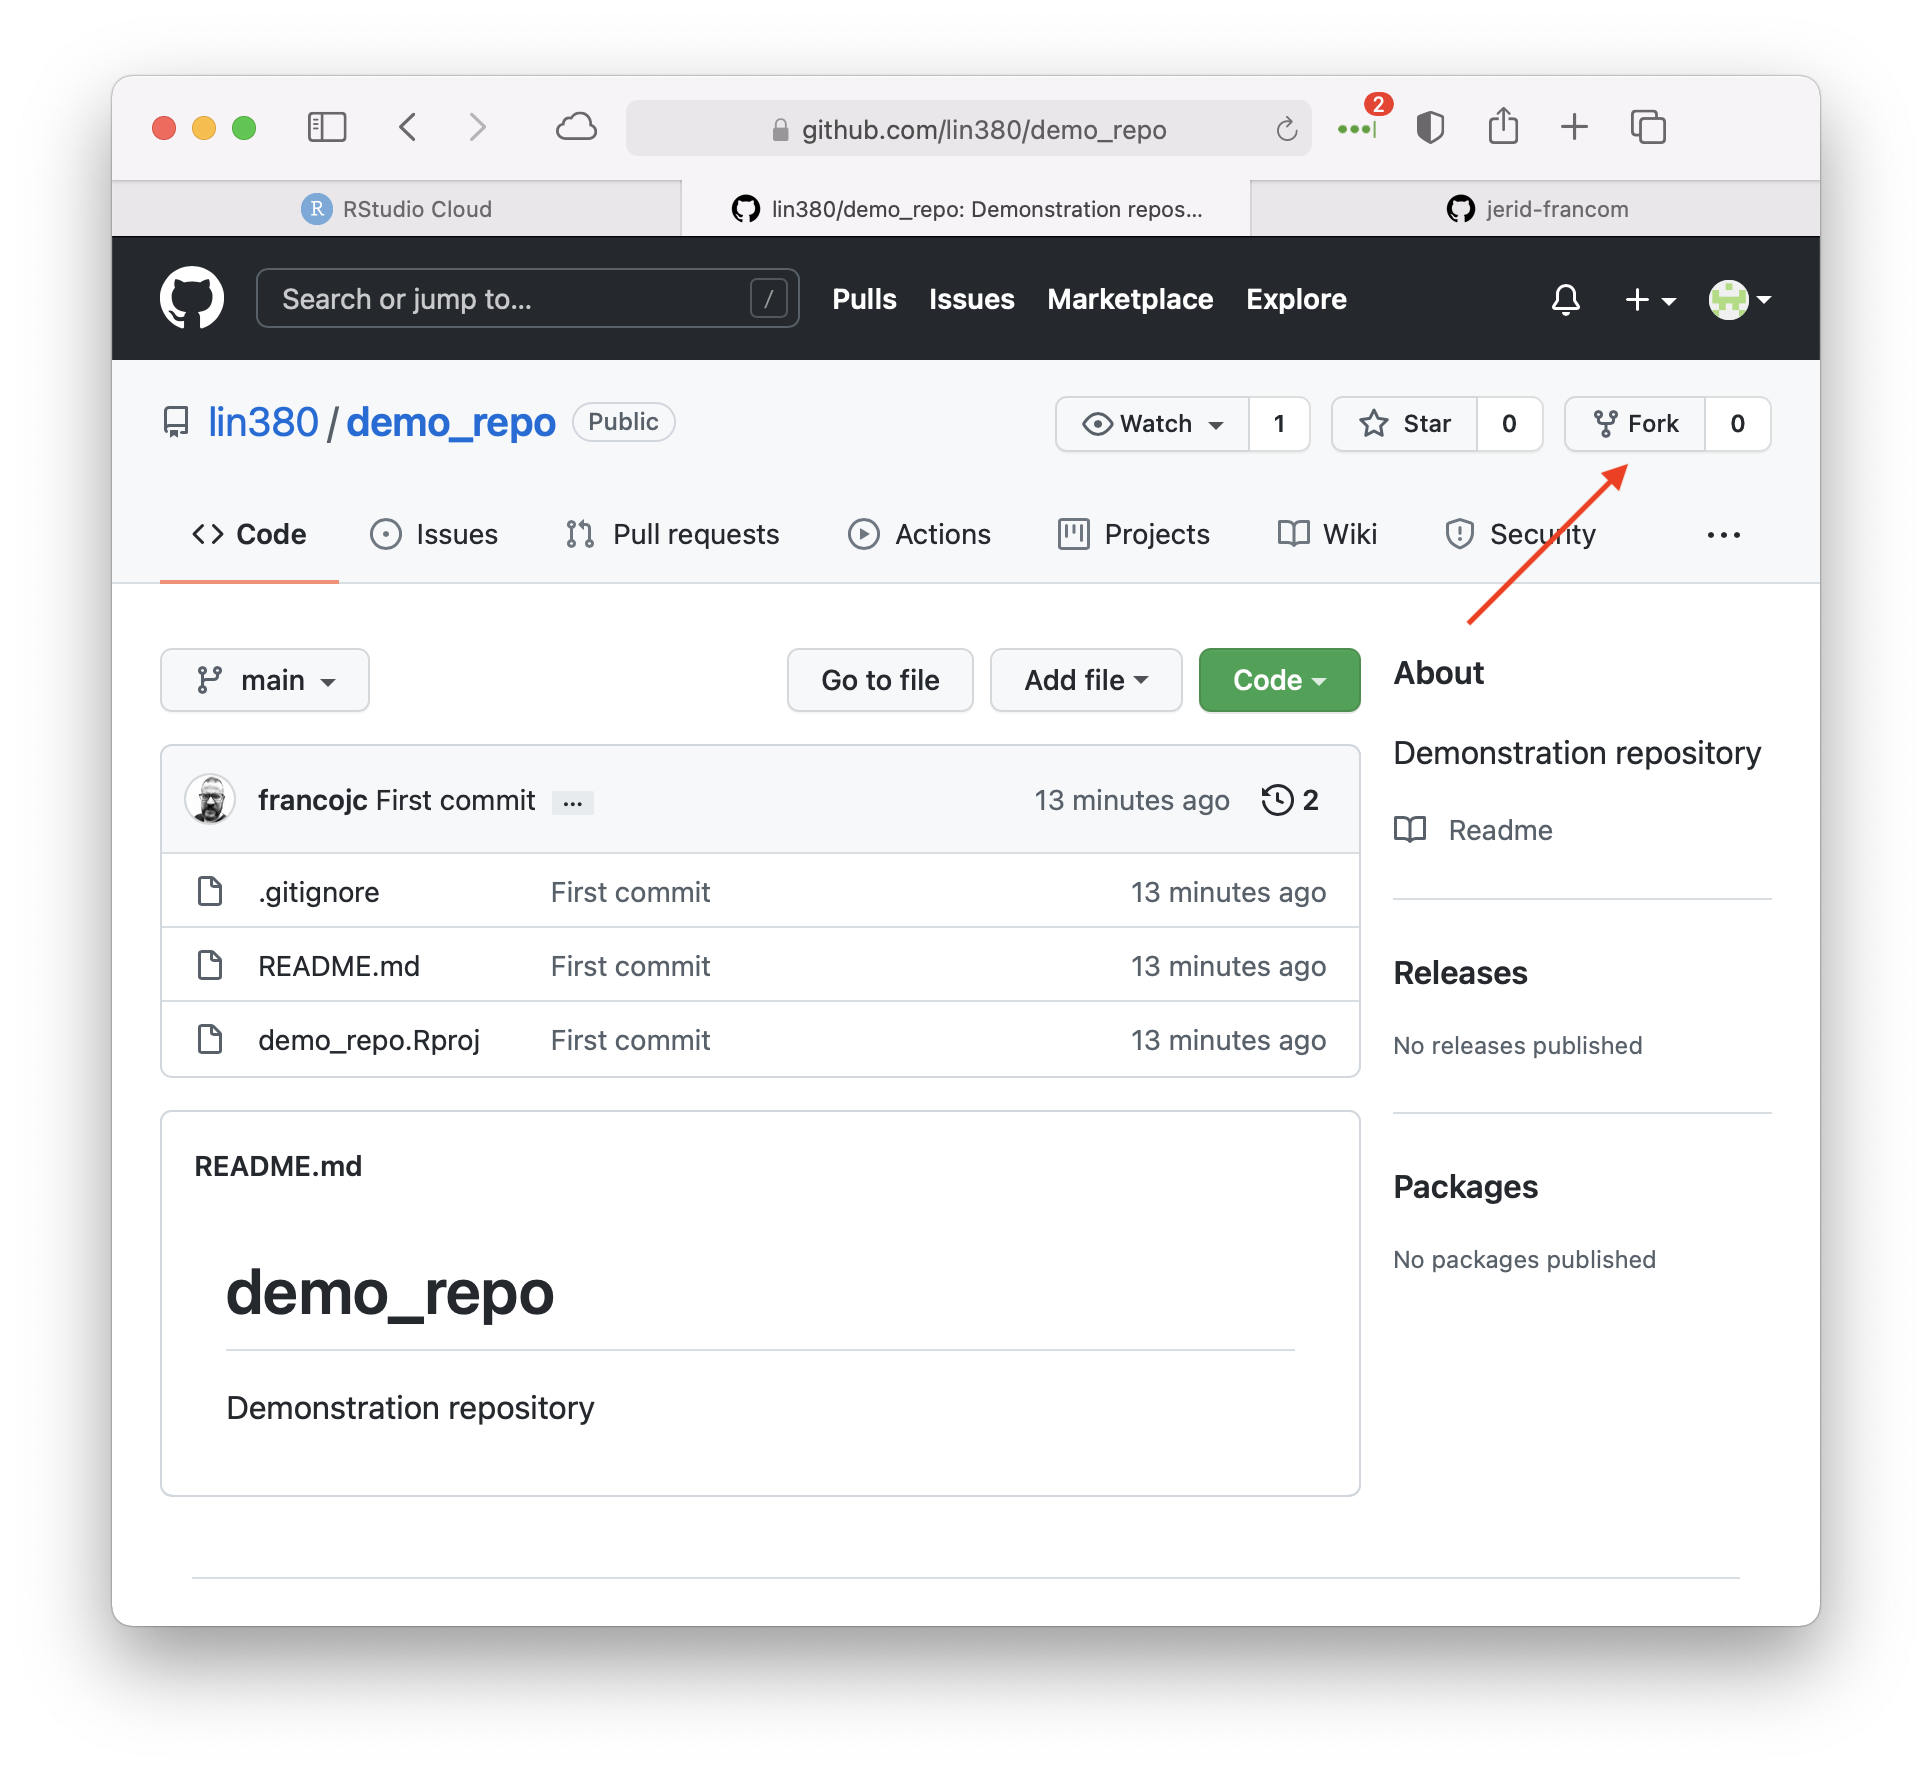
Click ‘Fork’ at the top left of the GitHub repository’s page. You will then be taken to your copy of this repo.
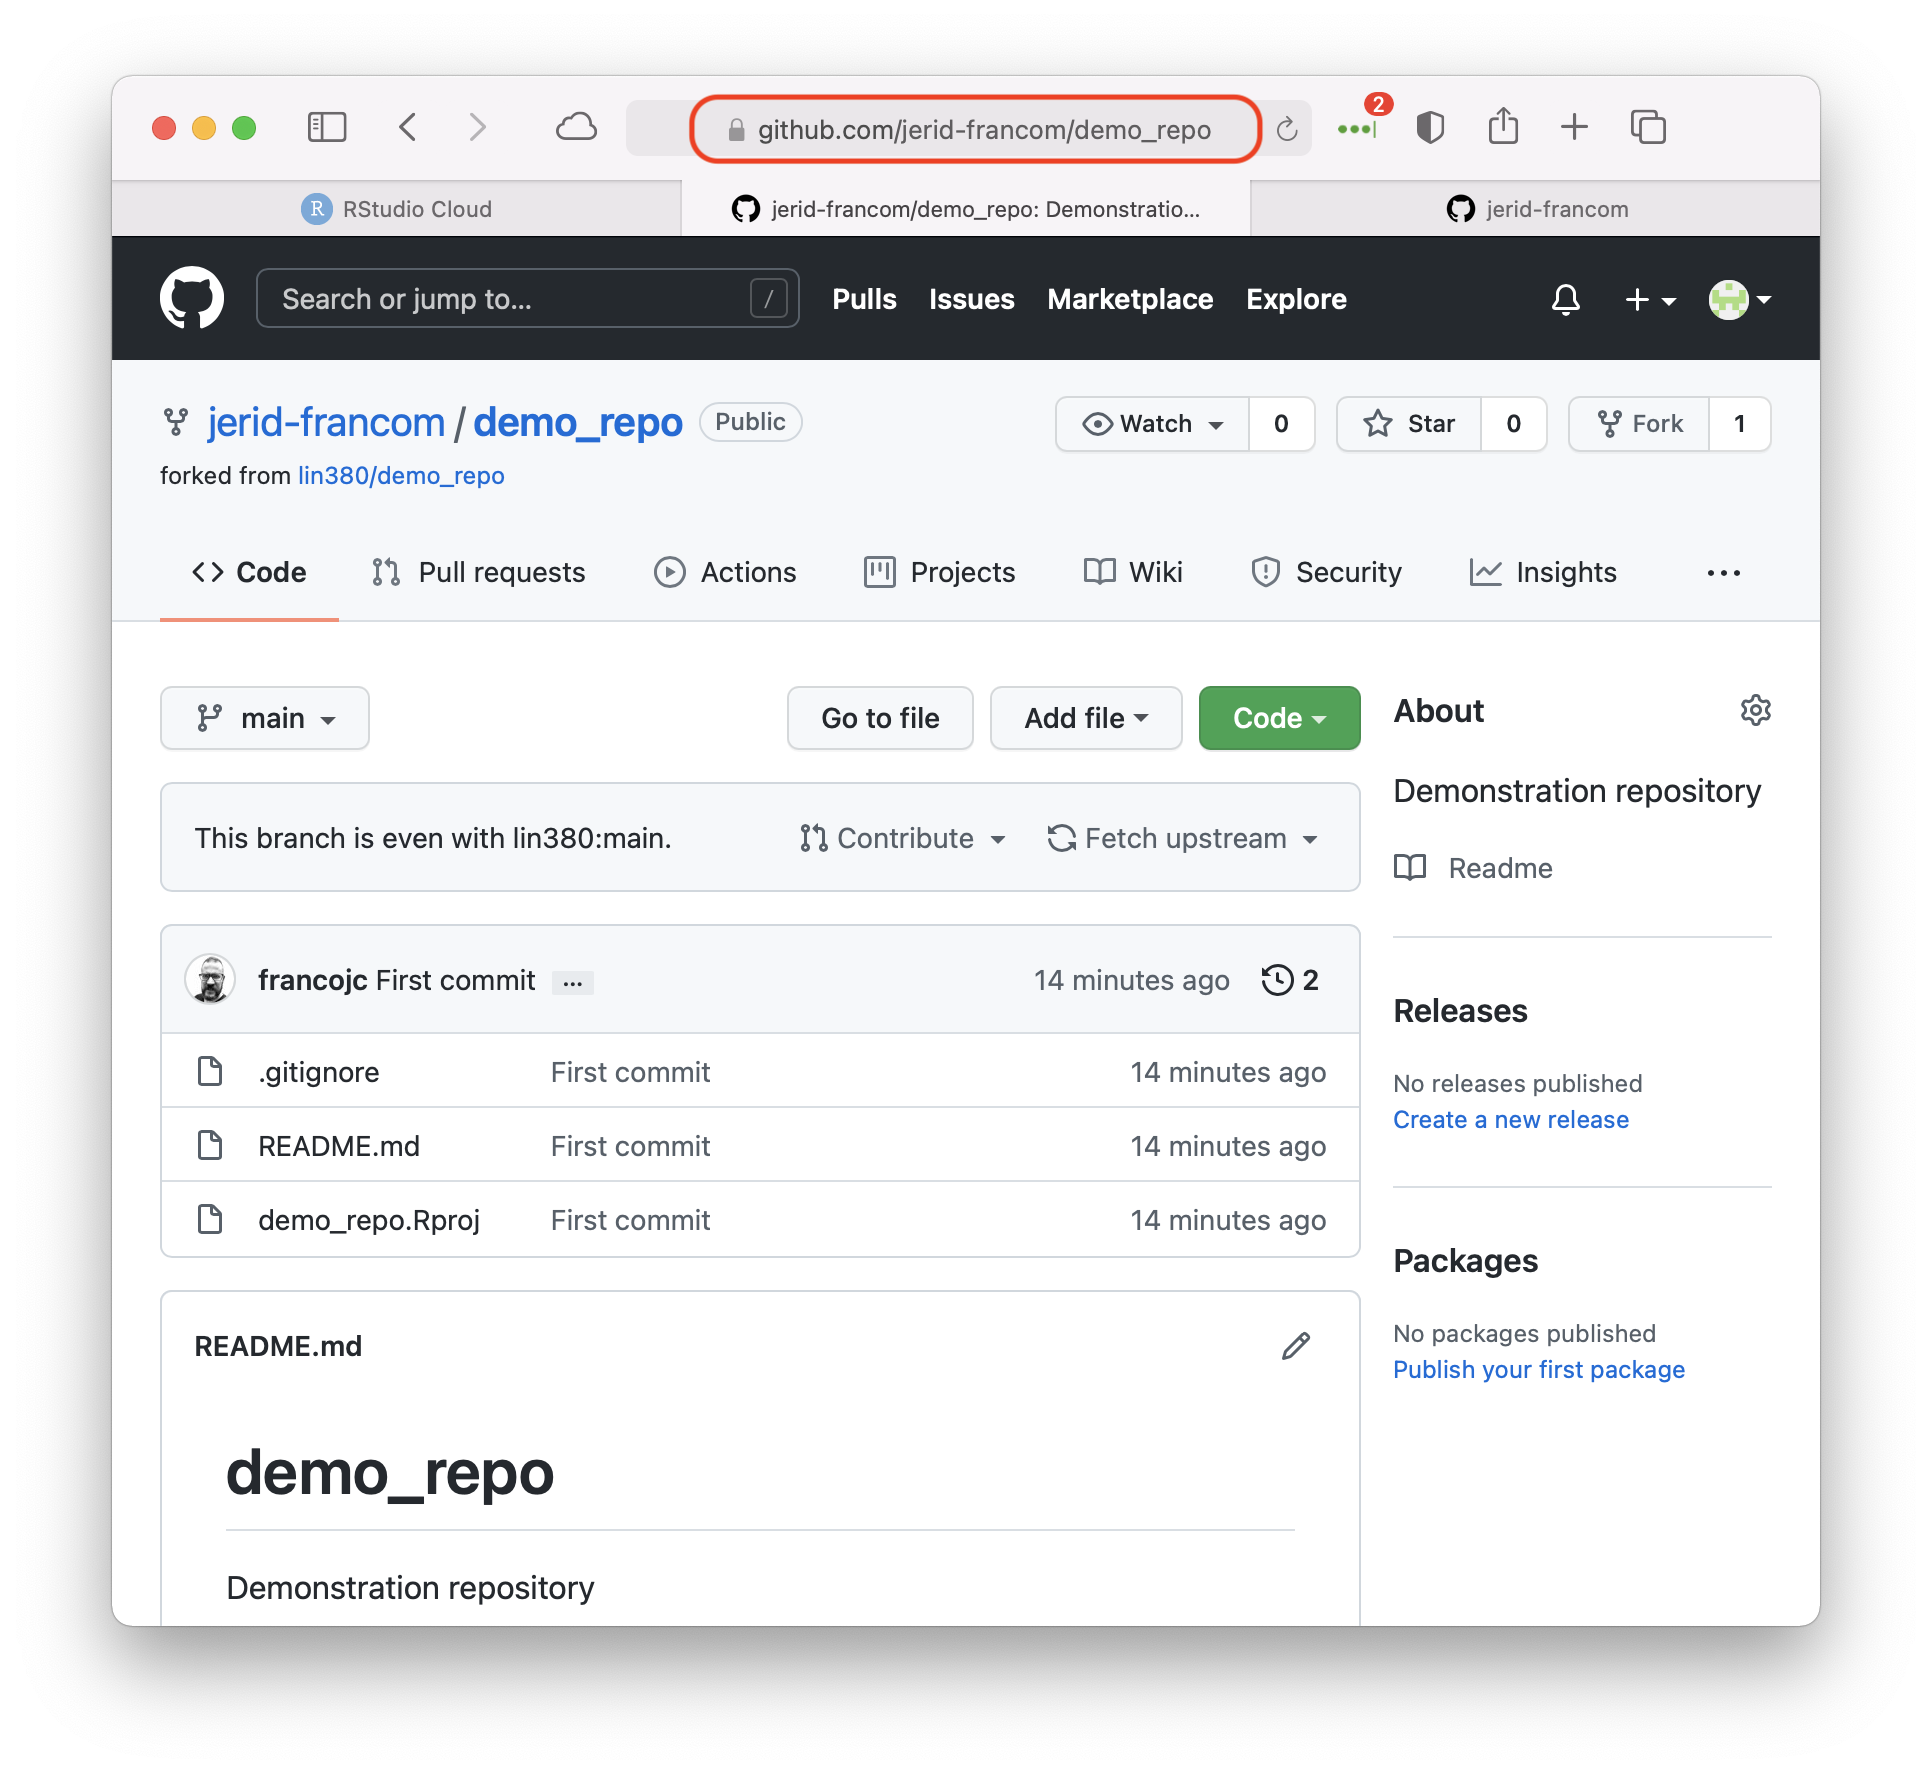
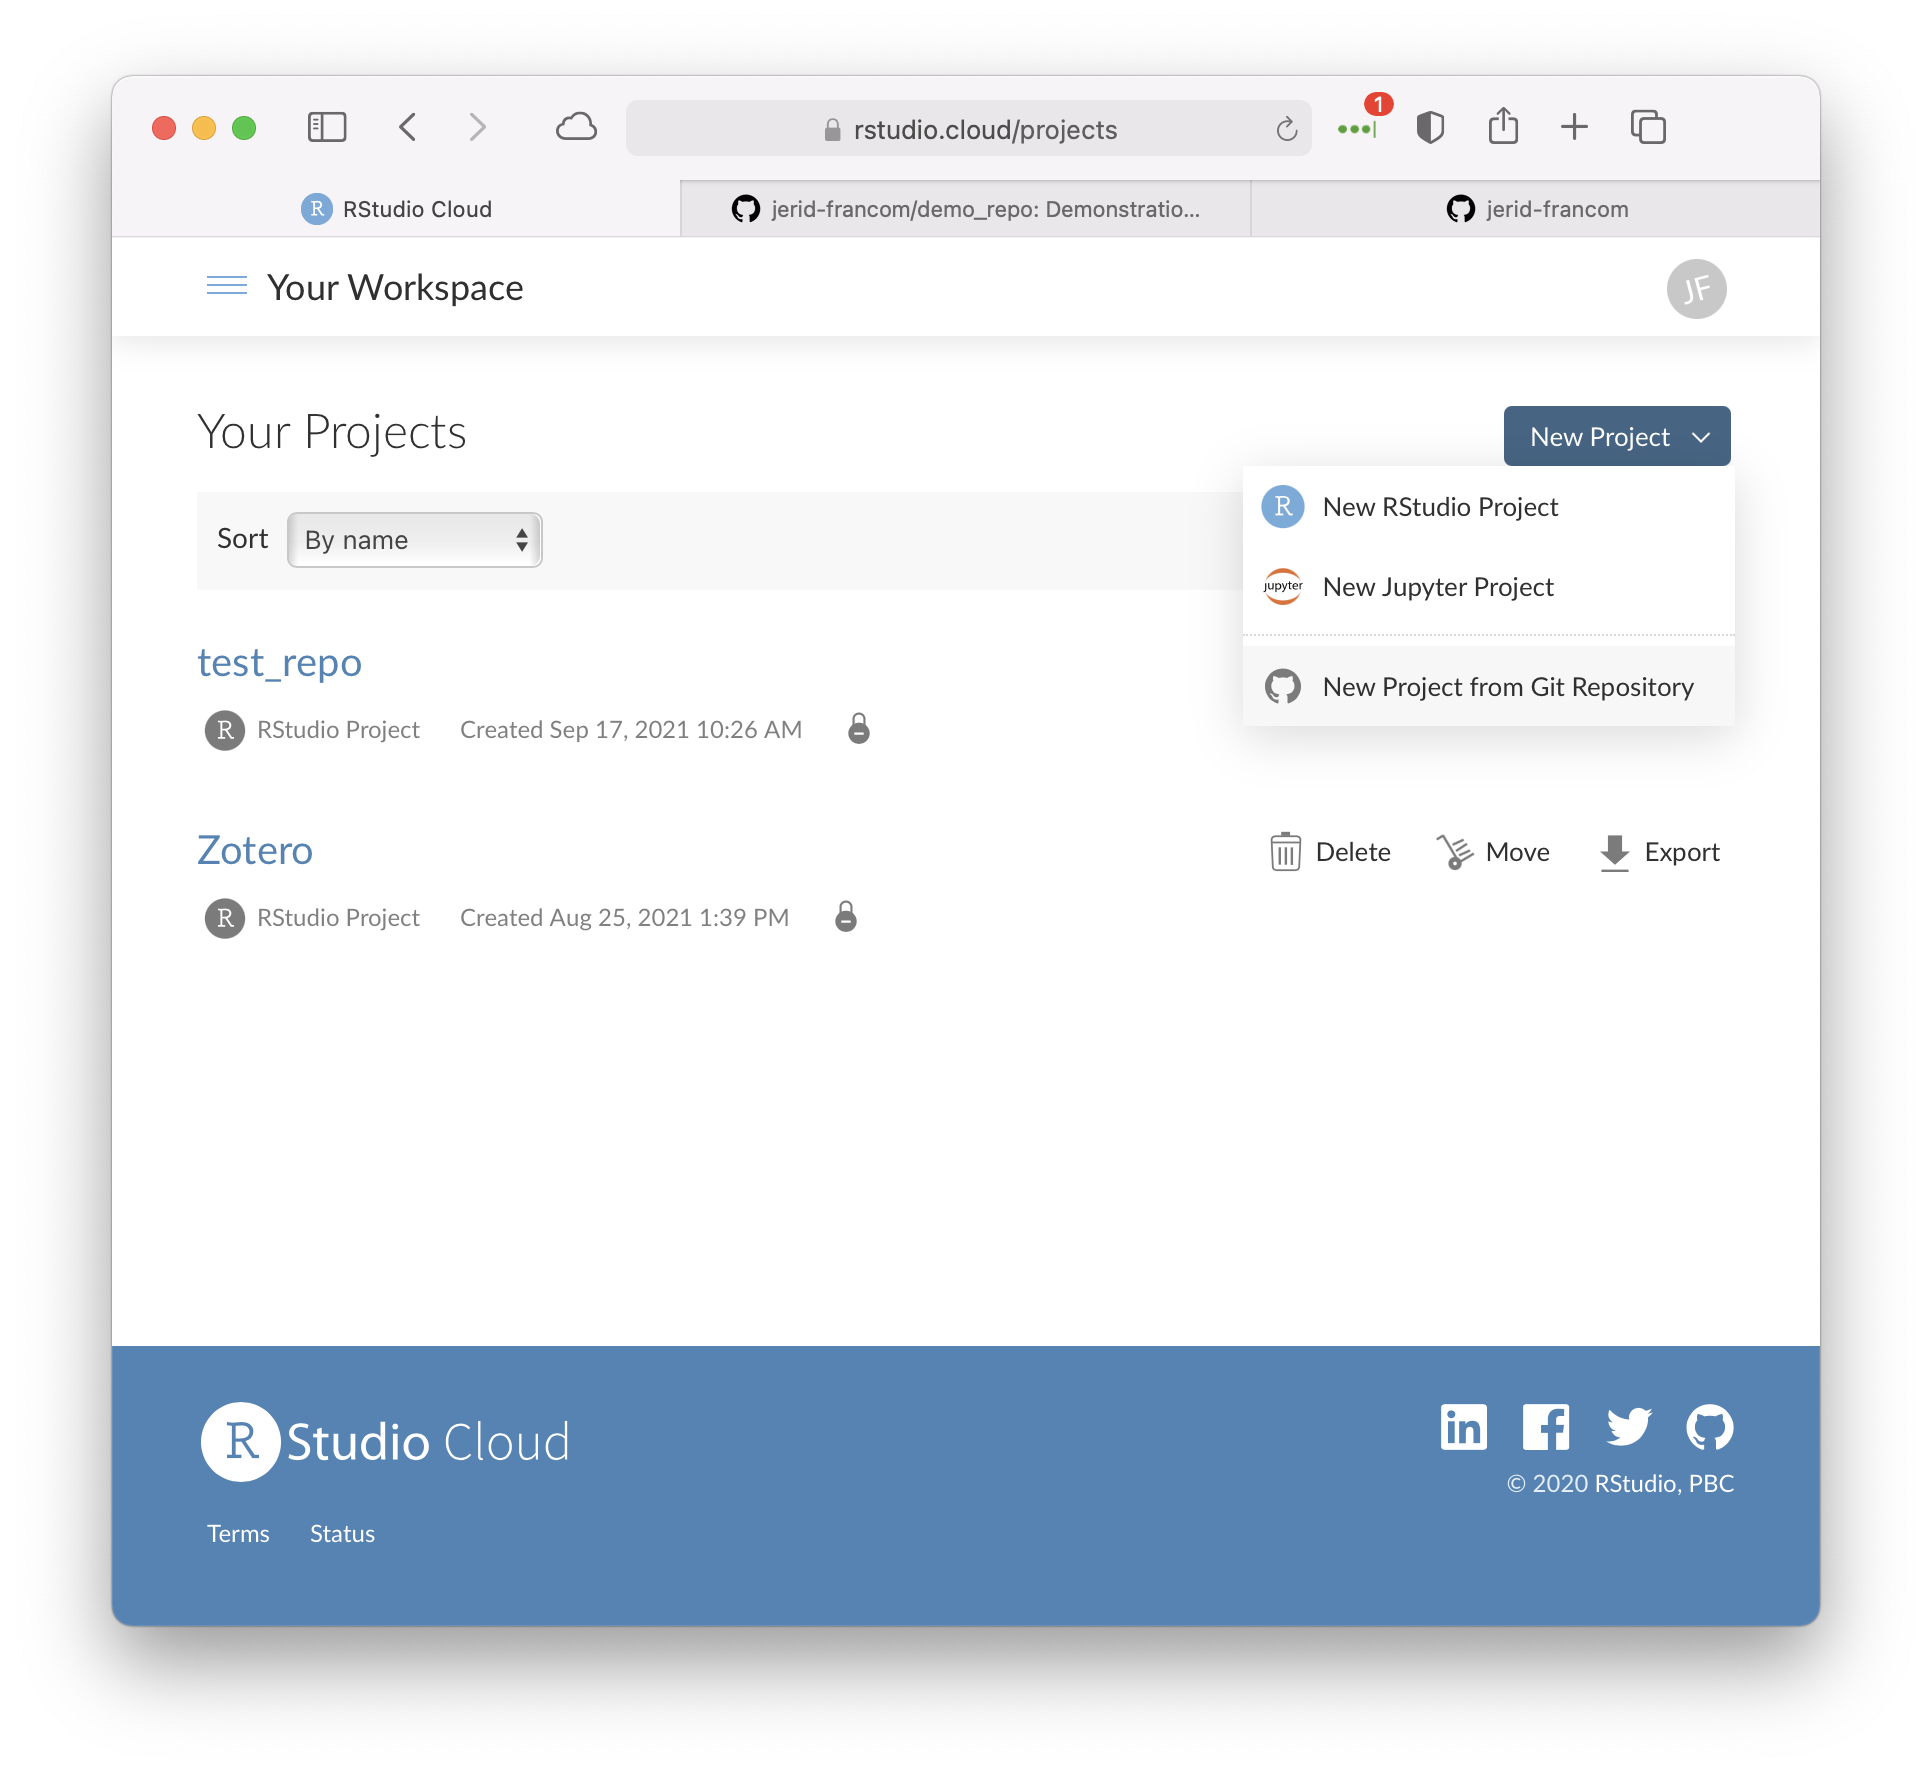
Once you have forked a repository to your own account, you can then create a new RStudio Cloud project using the URL to your forked copy of the repository.
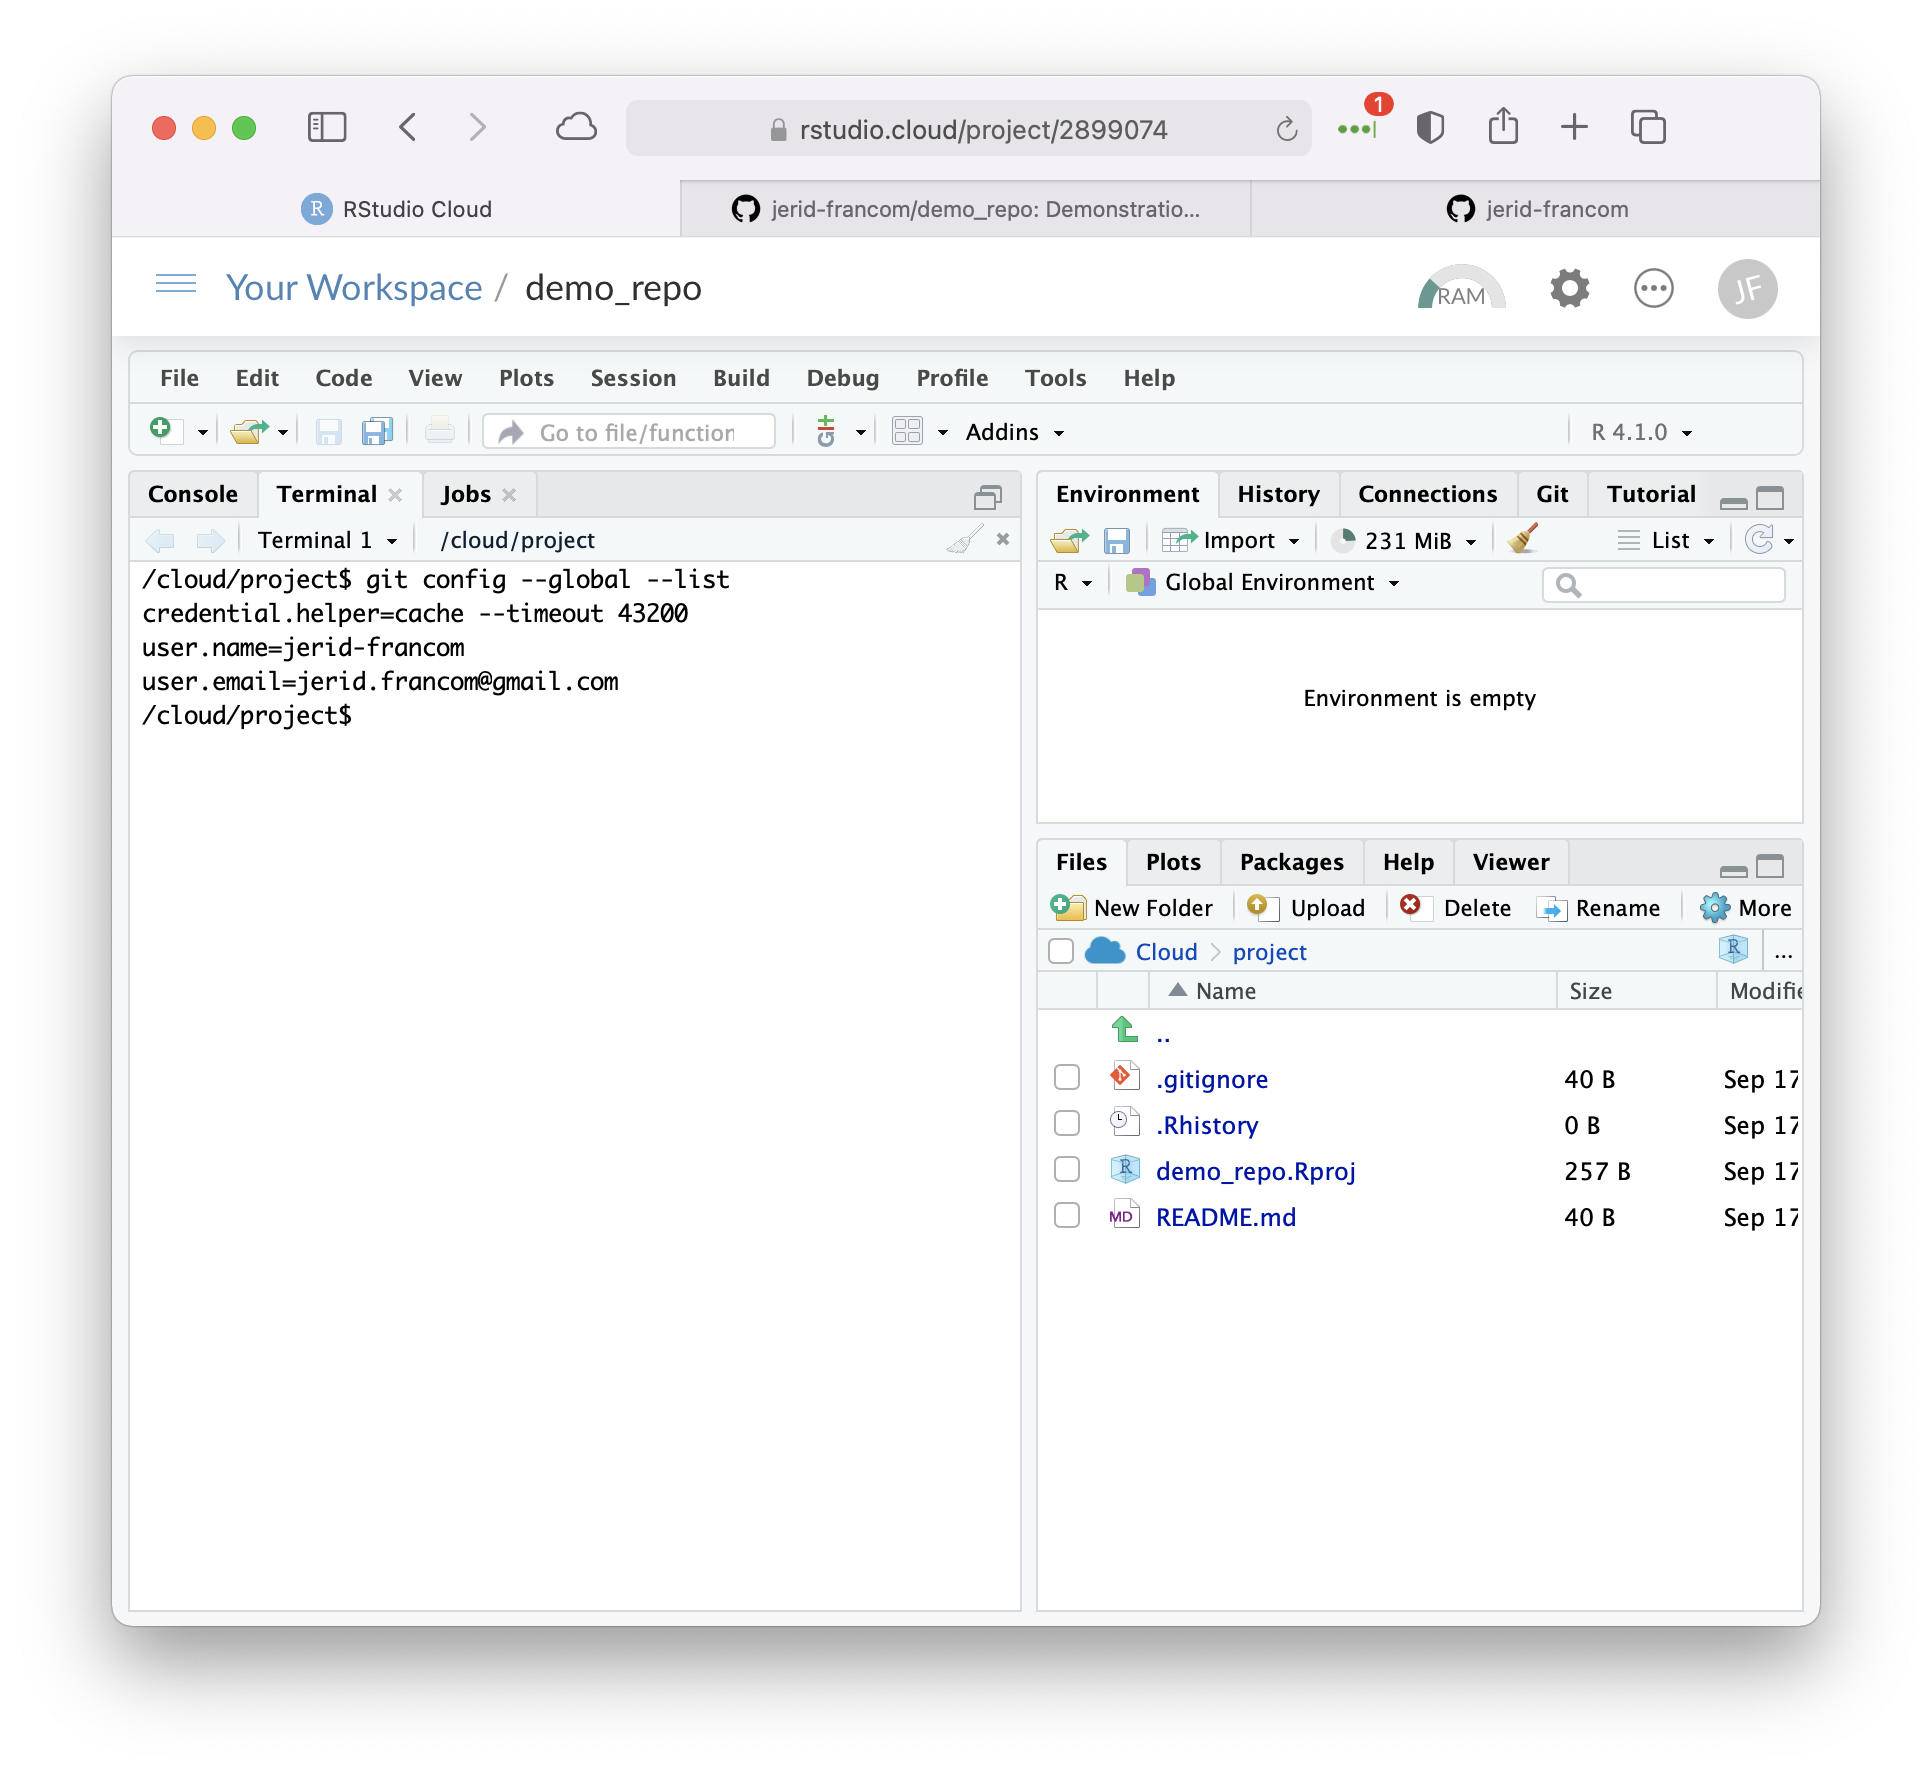
Since each RStudio Cloud project starts ‘fresh’, the packages that we installed in the previous RStudio Cloud project need to be installed into this new project and the steps to set up the Git configuration to talk with GitHub need to be followed. Here’s the summary:
R Packages
- Install the R packages ‘usethis’ and ‘gitcreds’.
- Load both the ‘usethis’ and ‘gitcreds’ packages.
Git credentials
- Set up your GitHub username and user email with
use_git_config(user.name = "<your-username>", user.email = "<your-email>"). - Set your GitHub personal access token (PAT) with
gitcreds_set(). Copy and paste your PAT at the prompt and hit ‘Return’.
You can check your user name and email configuration settings by running git config --global --list in the Terminal pane.
And check your PAT in the R Console running gitcreds_get().
You are now ready to edit, add, and/ or delete files in this project! The workflow for adding, committing, and pushing changes to GitHub are the same as above, but here is a summary of the steps.
git add -A
git commit -m "<a short message describing what you've done.>"
git push
You can periodically run git status to find out what the status is of Git in relation to changes in the project. I usually run this at the beginning of my workflow and then again after git add -A to see what is ready to commit.
Summary
In this Recipe you have been introduced to Git, GitHub, and how to set these technologies up to work with RStudio Cloud to manage, store, and publish research projects. We have also seen how to fork other programmers’ GitHub repositories and set them up so we can work with them. In this way research that is published on GitHub contributes to reproducible research as any researcher can access and reproduce and/ or extend another researcher’s work!
References
There are some great tips and guides on Happy Git and GitHub for the useR↩︎